User Guide (All Roles)

RaceMaps User Guide

The core idea of RaceMaps is "organizer prepares the event -> participants share location -> followers see a live overview." It can be used for many types of activities, not only sports, such as group trips, caravans, training groups, large-area events, route surveys, or field team operations.

What RaceMaps does

Admin
  • Create events and race categories (event name, class name)
  • Record race routes on maps and link them to categories
  • Control Event: Start/Finish + monitor racer status
Racer
  • Register for an event/category
  • Enable tracking
  • Send live location to the map
Viewer
  • Scan QR or choose an event
  • Pick a category + choose racers to follow
  • View map + list panel + focus a racer
Core idea: Admin prepares -> Racer sends location -> Viewer sees the live overview

This guide shows screenshots by topic (Admin / Racer / Viewer) and includes the full gallery at the end.

1) Getting started

1.1 Choose your role

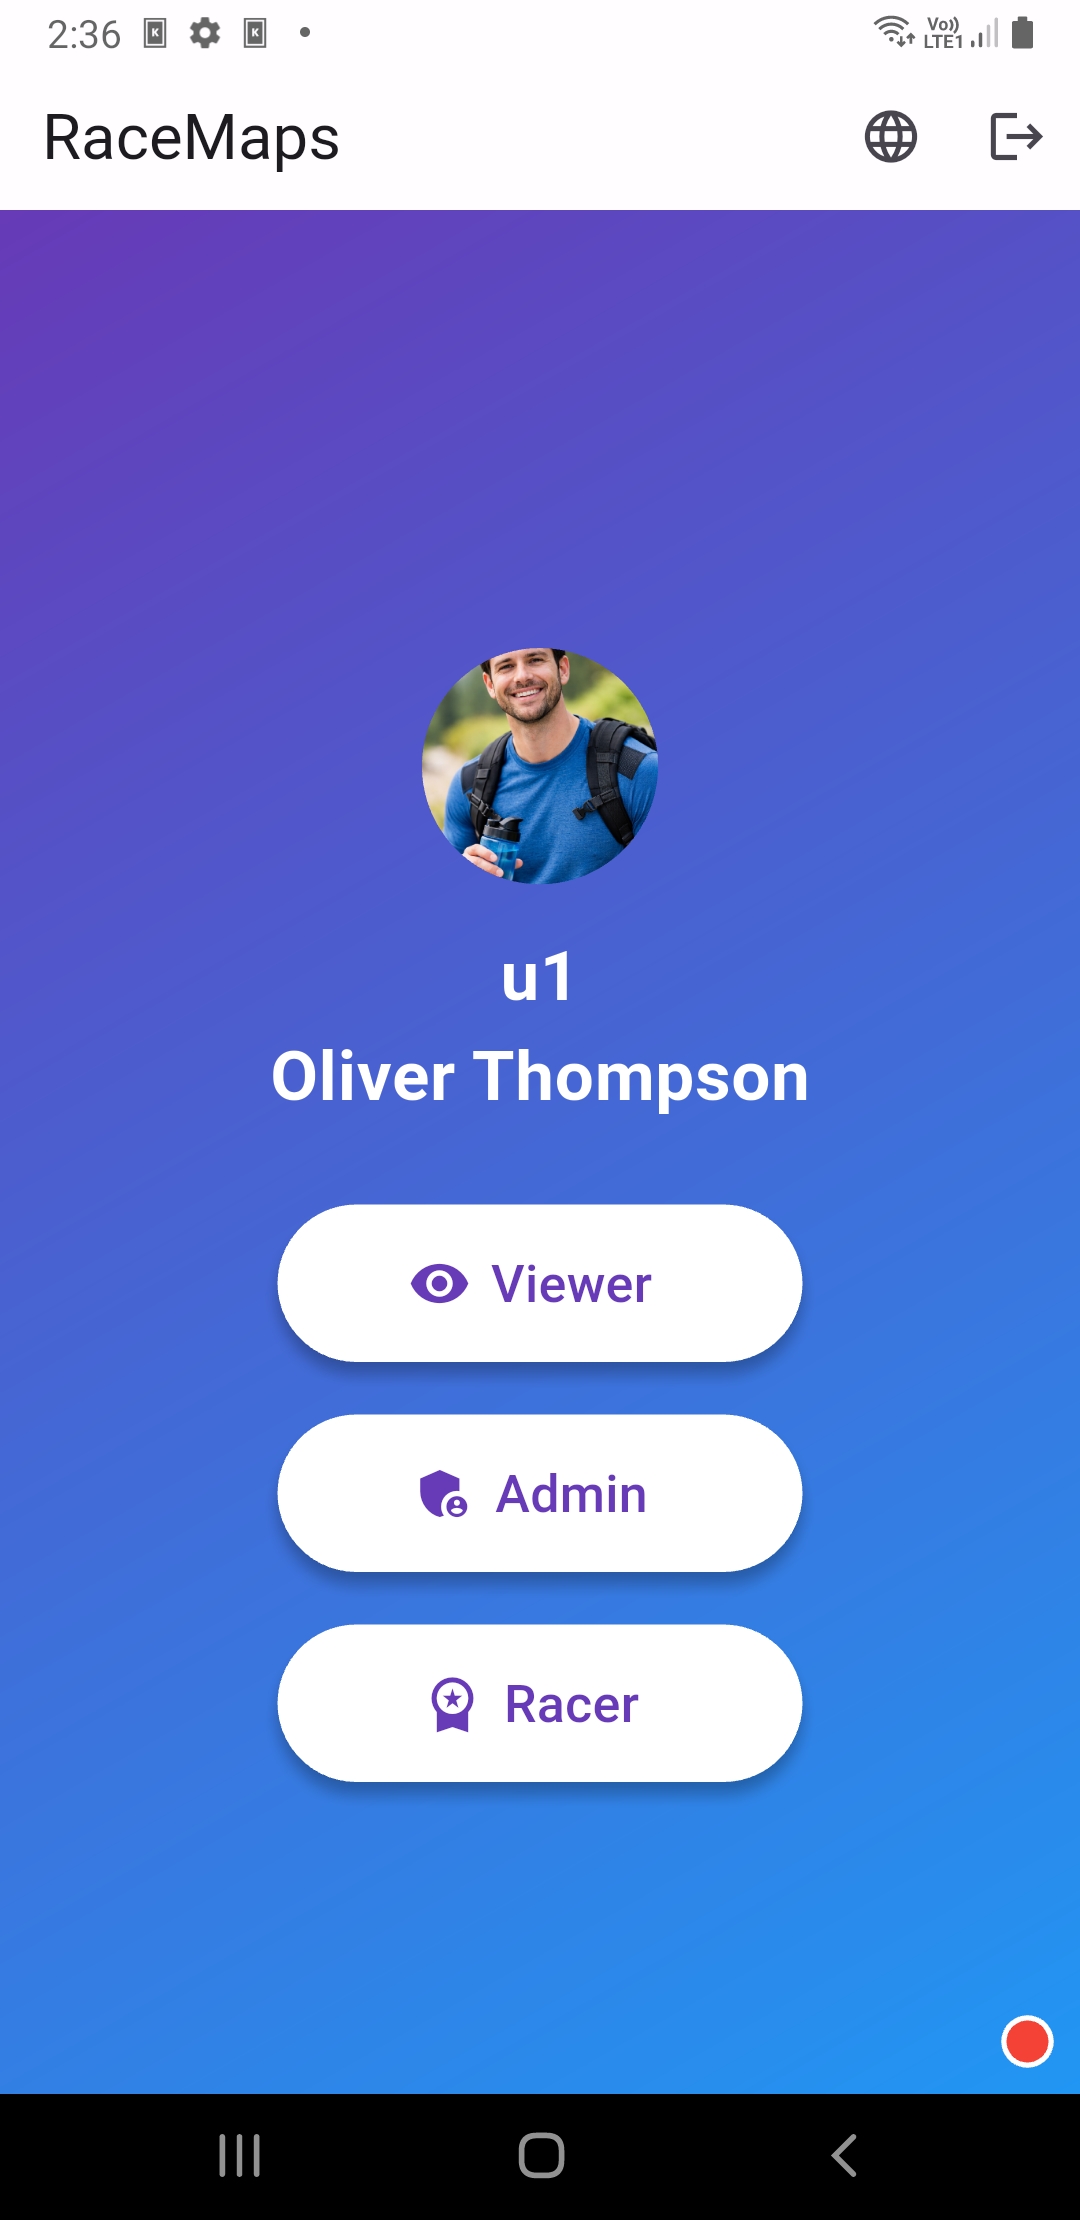
  1. Open the app -> choose Viewer, Racer, or Admin
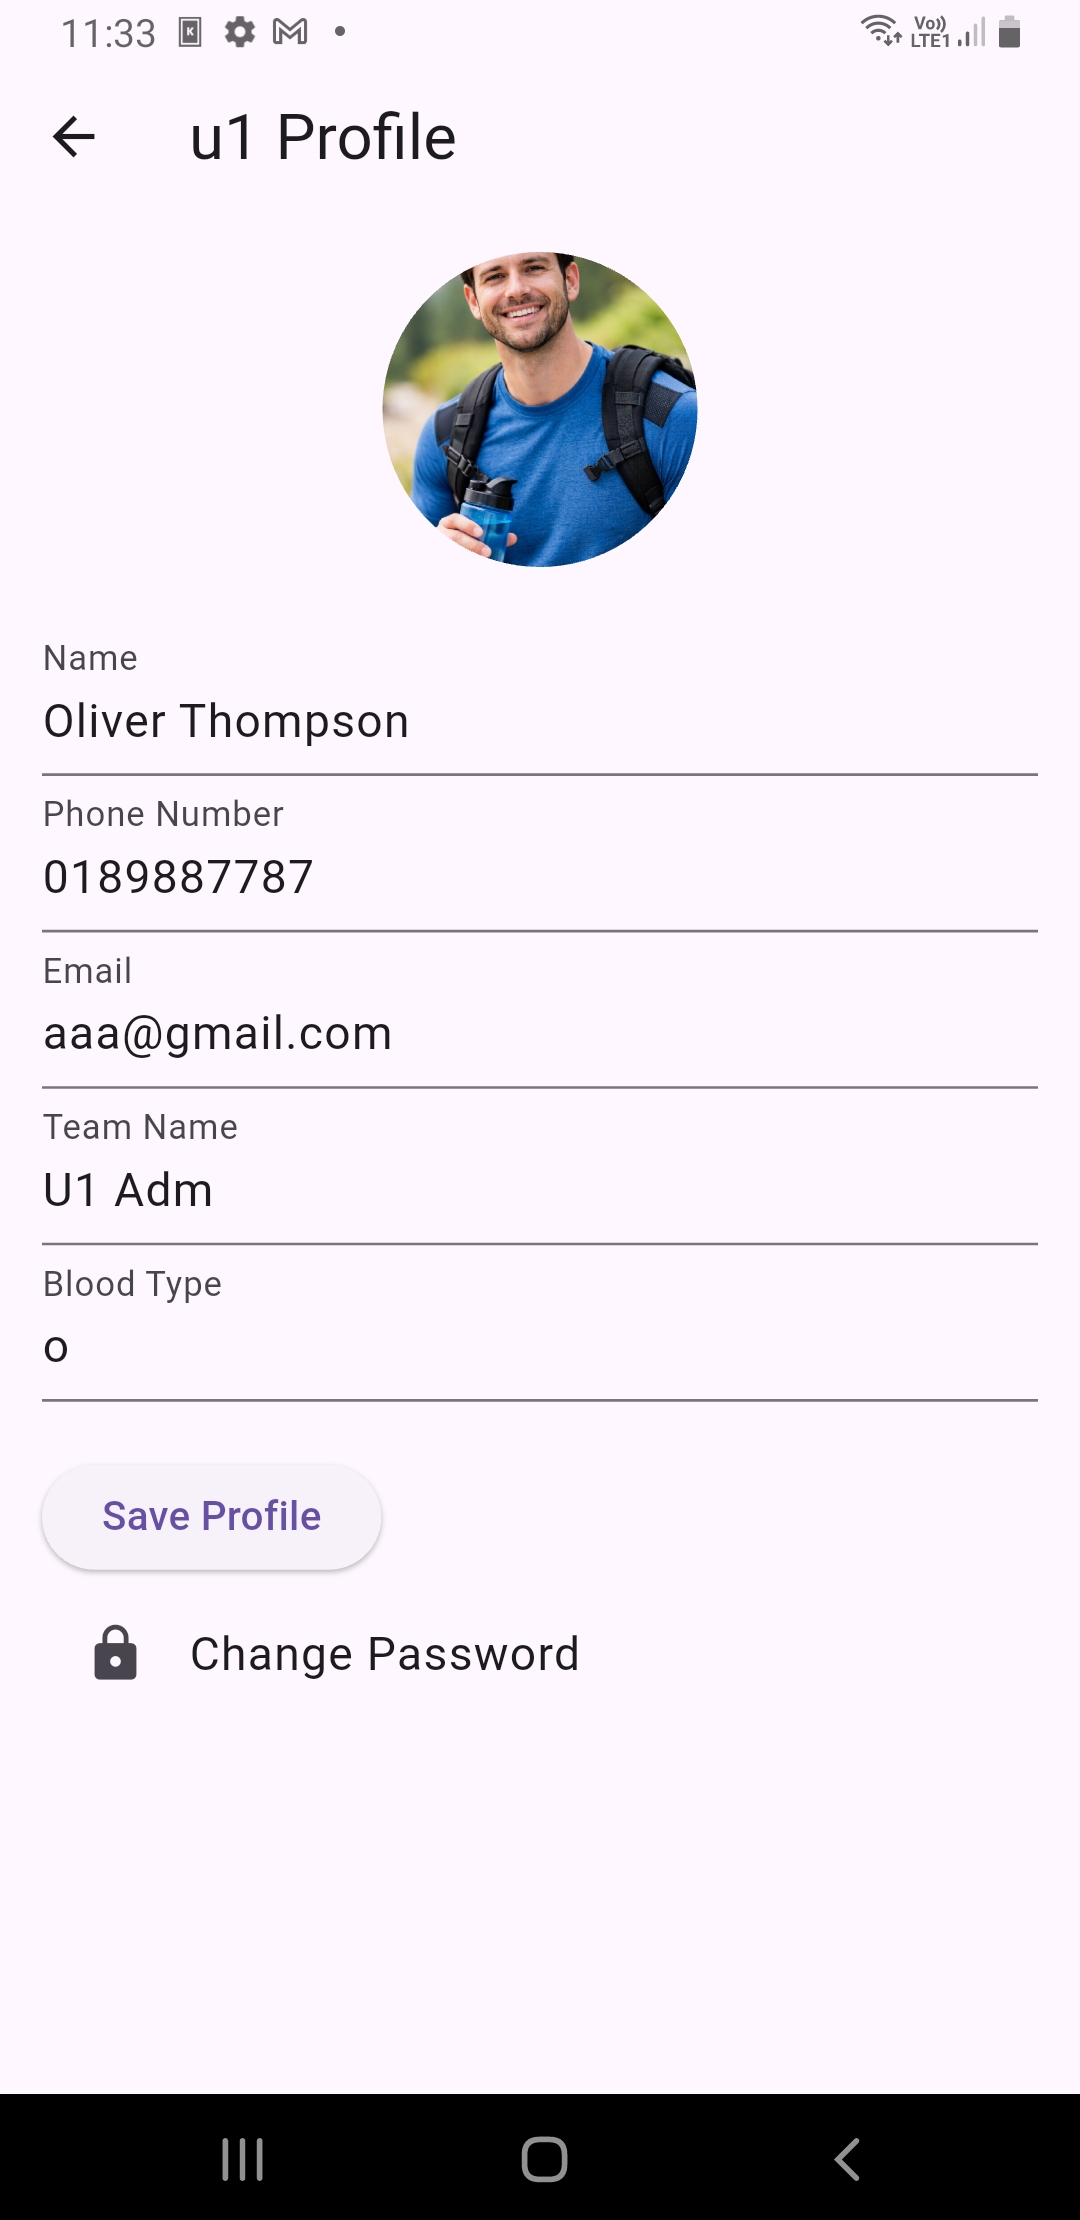
  2. Check your profile (name/photo) so it shows correctly in the racer list
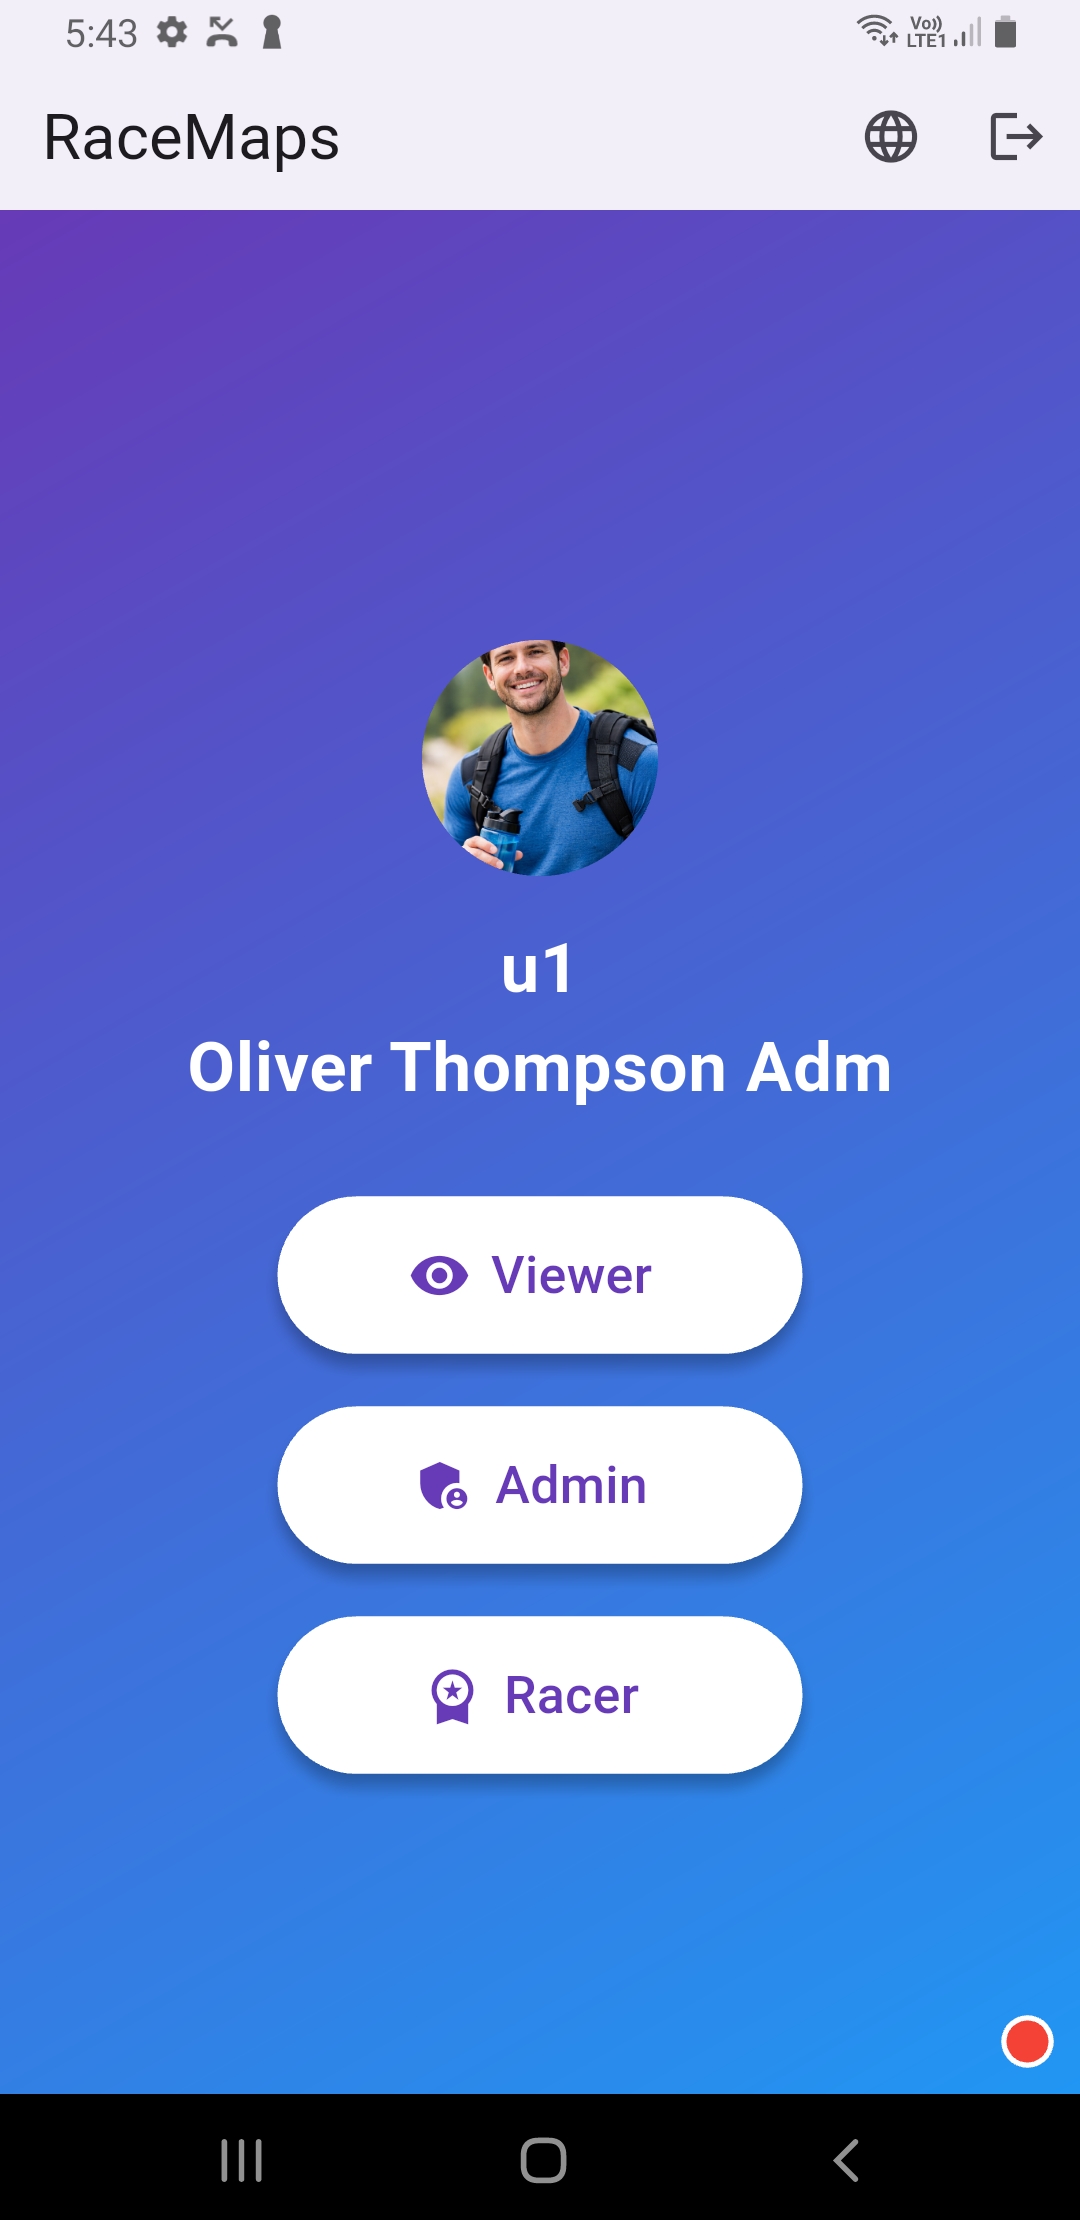
Choose a role (Viewer / Racer / Admin) from the home screen
Choose a role (Viewer / Racer / Admin) from the home screen(Screenshot_20260108-174338.jpg)
Choose Viewer role from the home screen
Choose Viewer role from the home screen(Screenshot_20260110-144555.jpg)
Choose Admin role from the home screen
Choose Admin role from the home screen(ssss15.jpg)
Choose Racer role from the home screen
Choose Racer role from the home screen(ssss7.jpg)
User profile screen (Profile)
User profile screen (Profile)(Screenshot_20260109-113400.jpg)
Tip: Racer/Admin modes should test Location + internet before the event day

2) Admin guide

2.1 Manage events (Event)

  1. Go to Event Categories
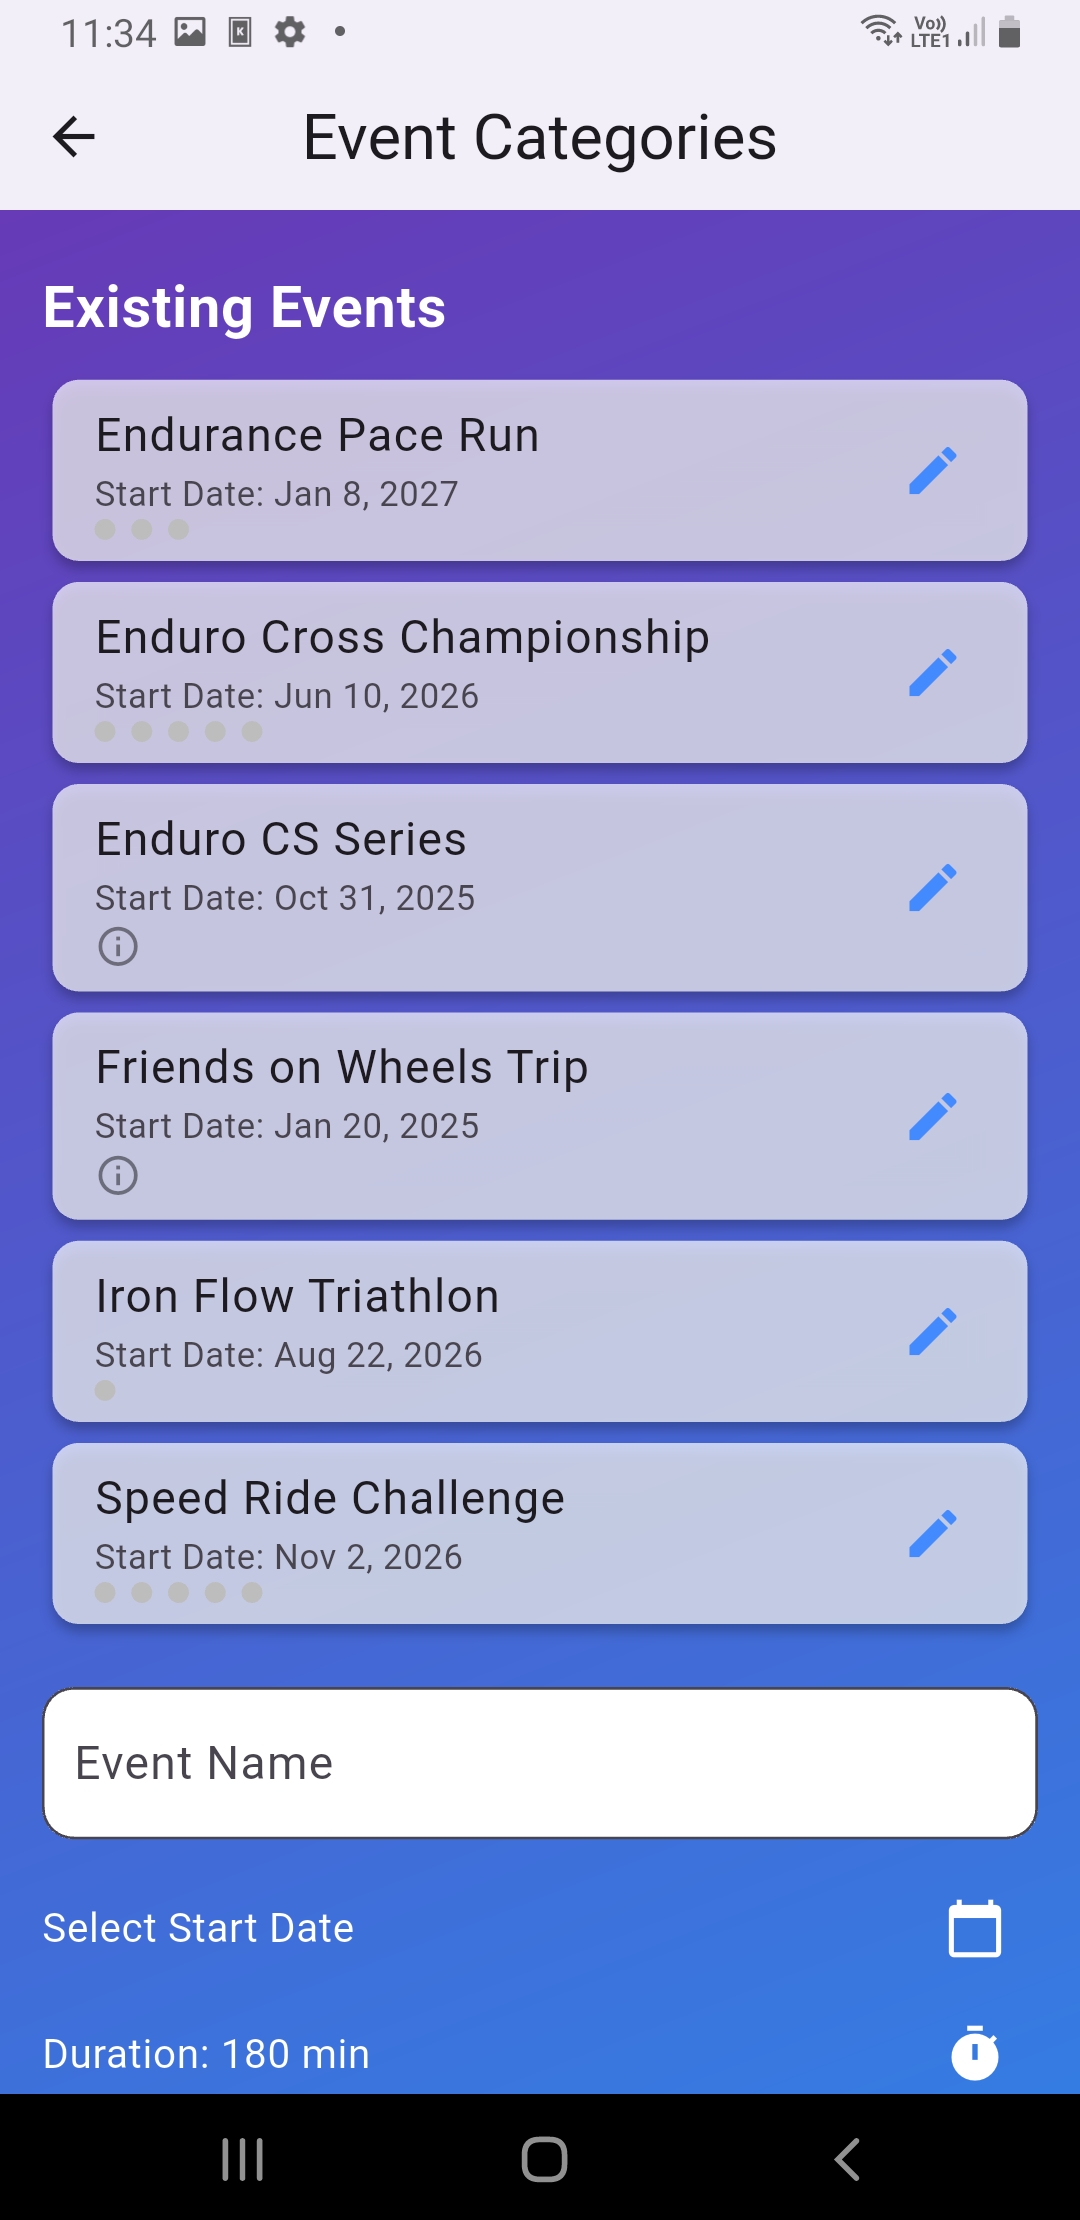
  2. Create a new event (name/date) or select an existing event
  3. Check setup status: are Category/Route ready?
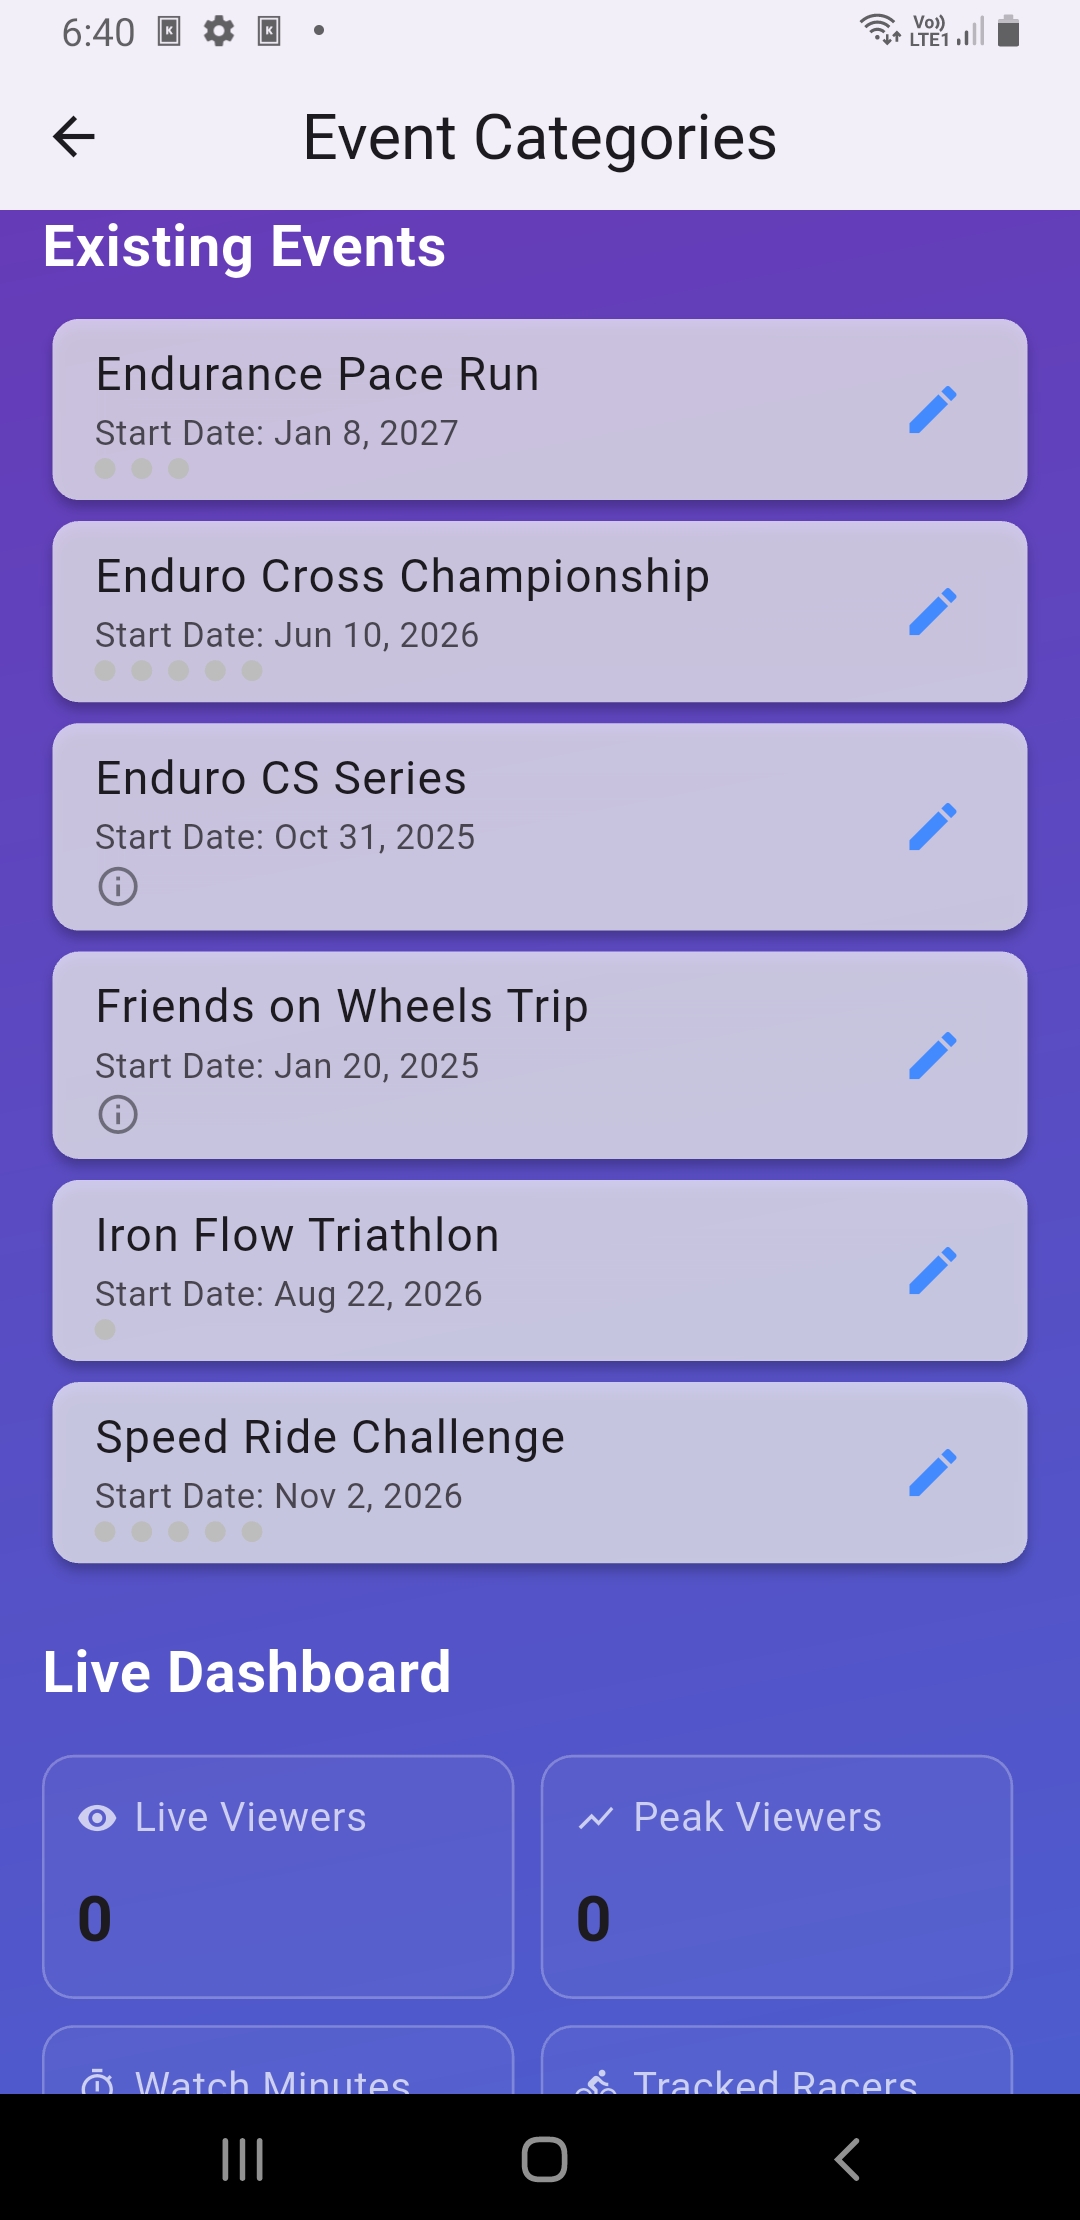
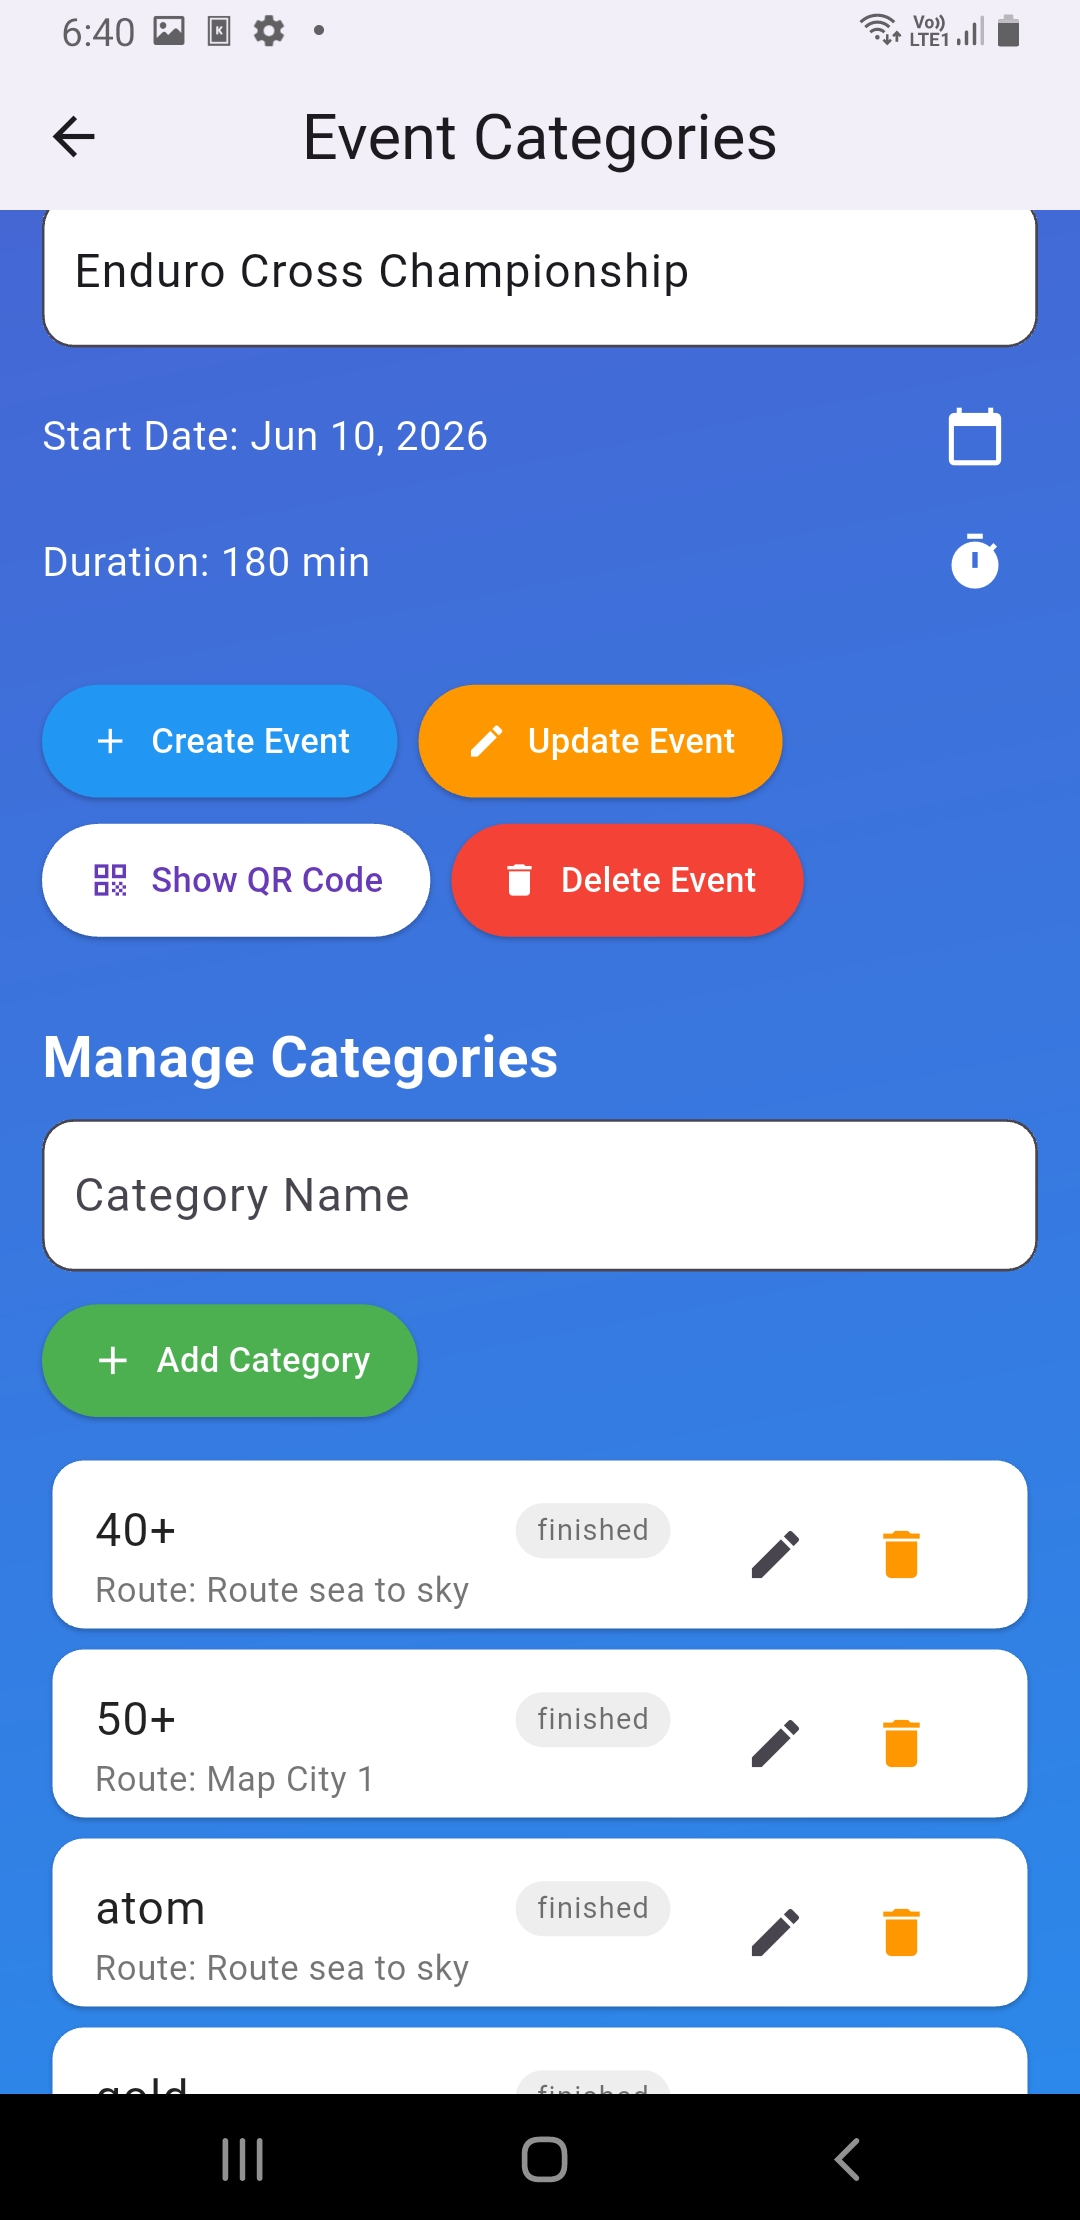
Event Categories screen: event list / create event
Event Categories screen: event list / create event(Screenshot_20260108-184008.jpg)
Event details + manage Category/QR/settings menu
Event details + manage Category/QR/settings menu(Screenshot_20260108-184040.jpg)
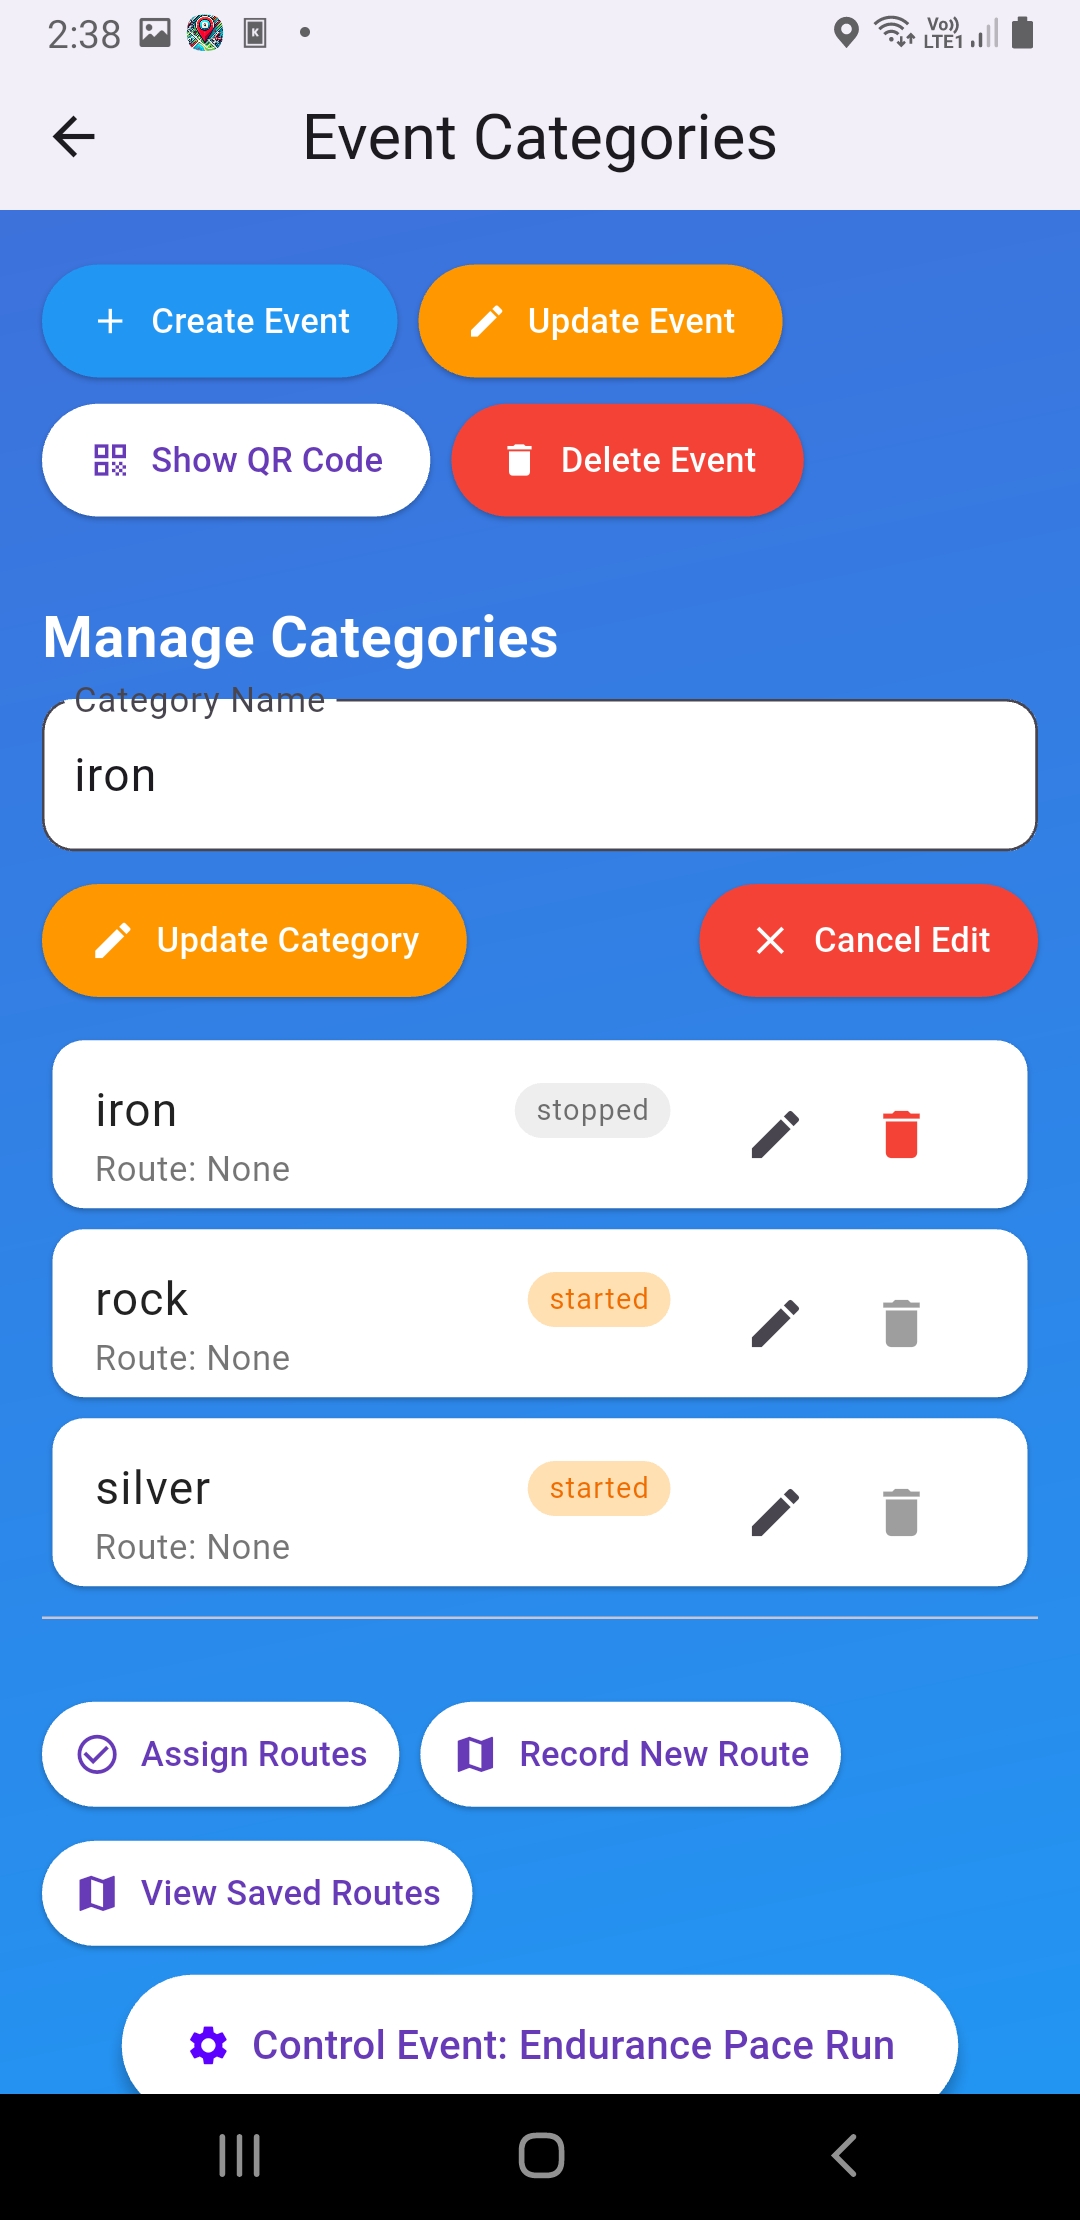
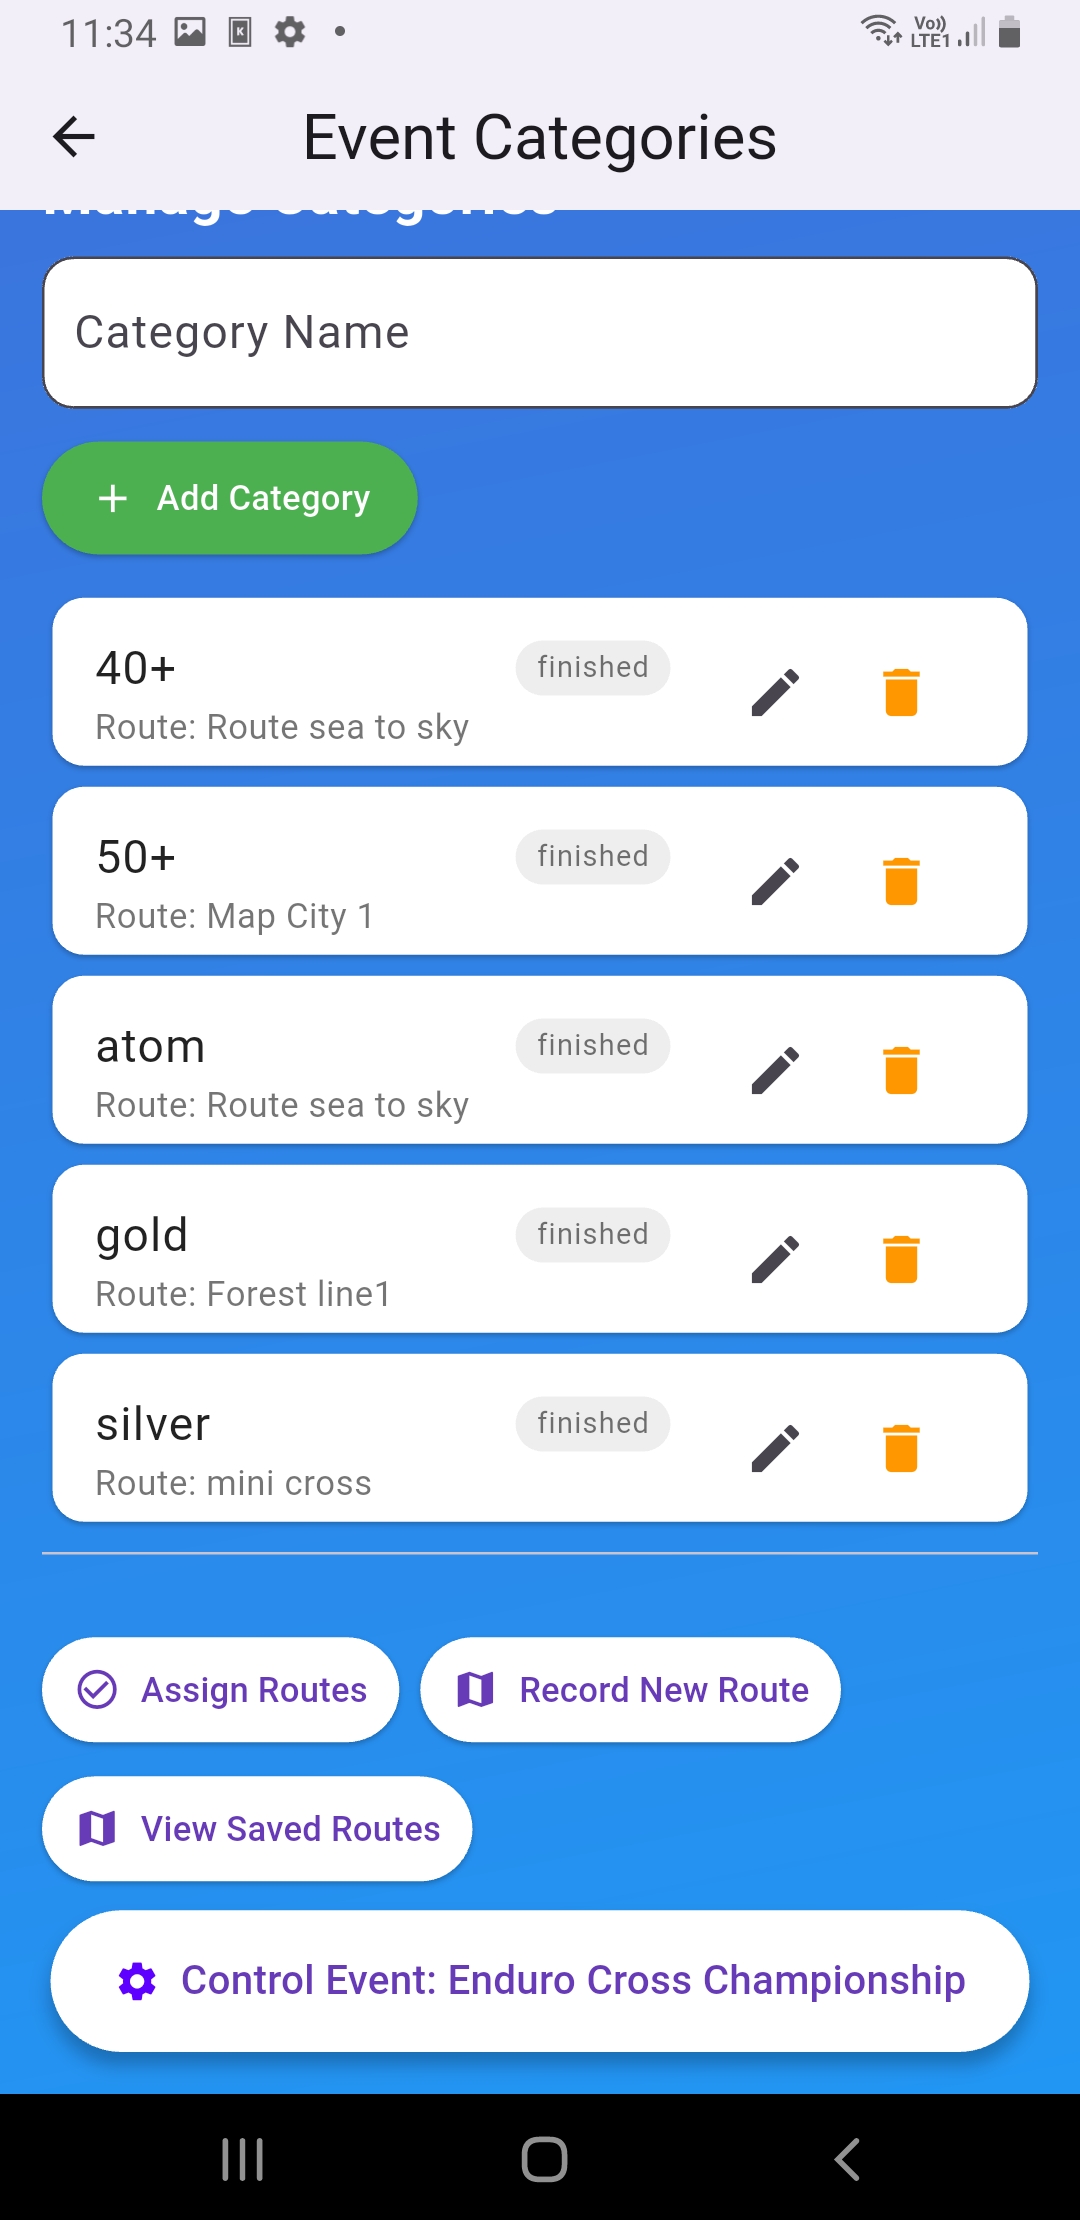
Buttons for assigning routes, recording new routes, editing routes, managing start/finish, and participants
Buttons for assigning routes, recording new routes, editing routes, managing start/finish, and participants(Screenshot_20260110-143819.jpg)
Best practice: Use formal event names so they are easy to search and recognize

2.2 Manage categories

Categories separate classes/fields/time slots inside an event, such as IRON SILVER

  1. From the event page -> go to Manage Categories
  2. Create/edit a category: name, description, start/end time
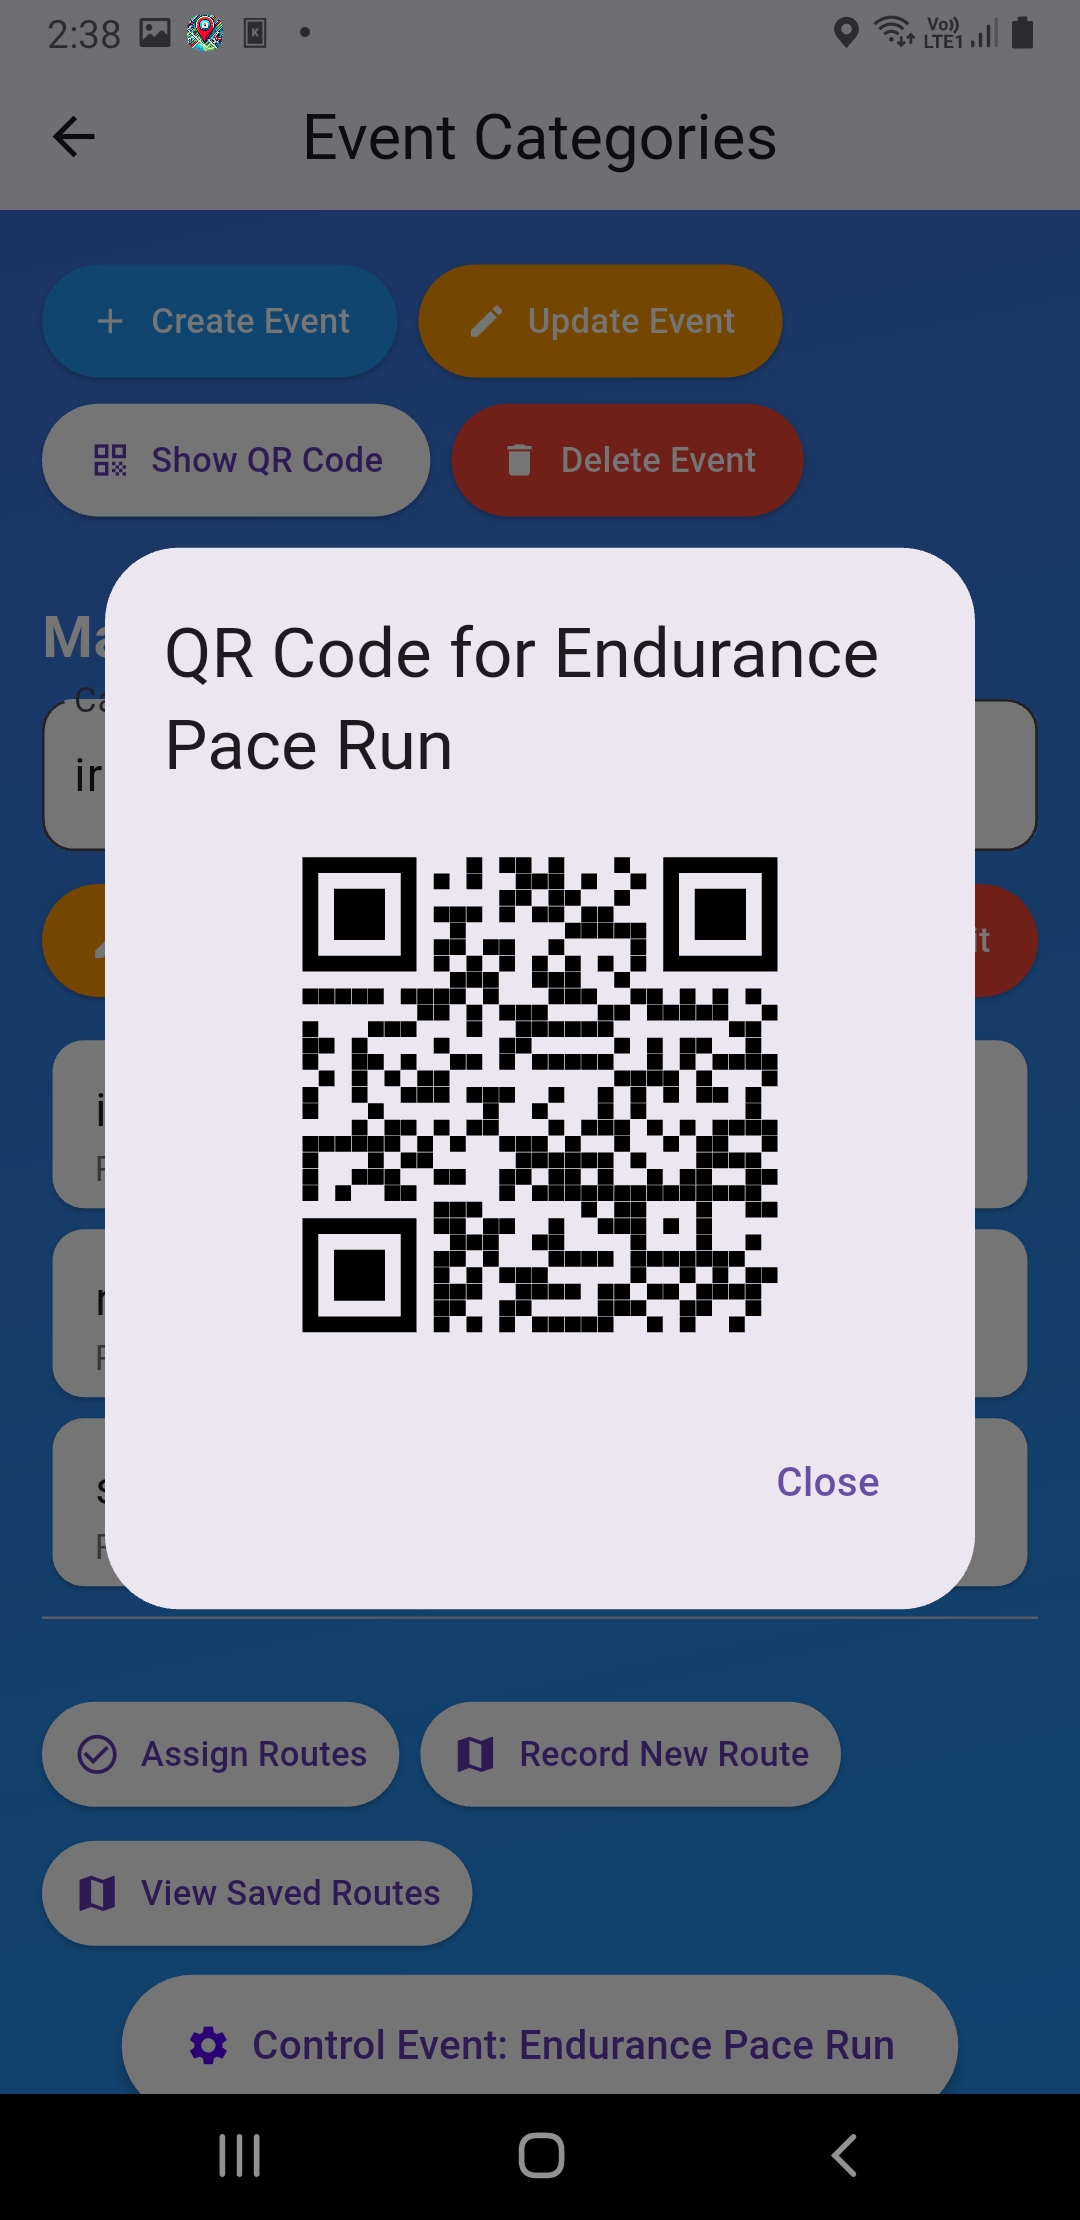
  3. Use Show QR (if available) to help viewers enter quickly
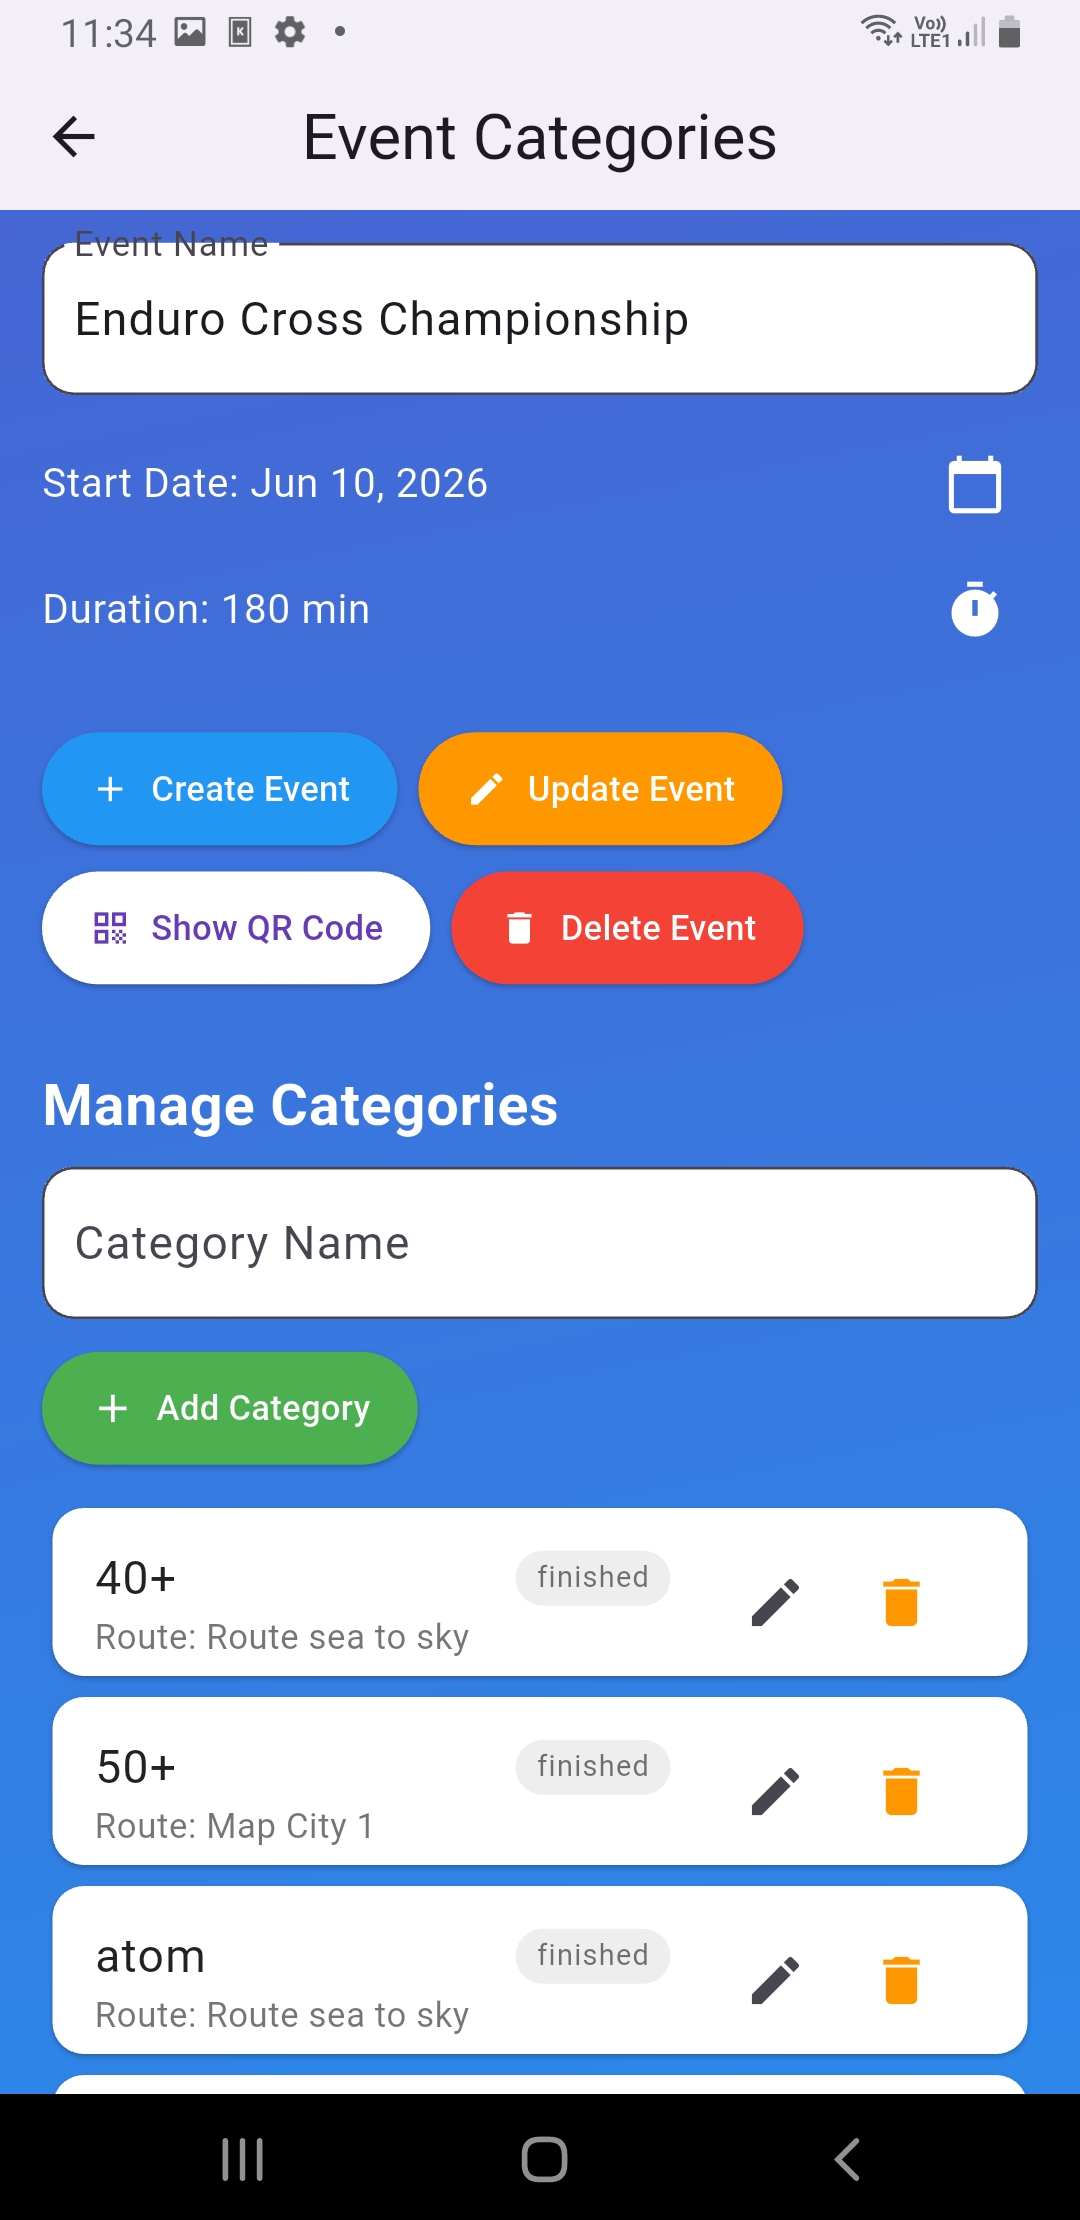
Manage Categories screen: category list
Manage Categories screen: category list(Screenshot_20260109-113443.jpg)
Manage Categories screen: category list
Manage Categories screen: category list(sss5.jpg)
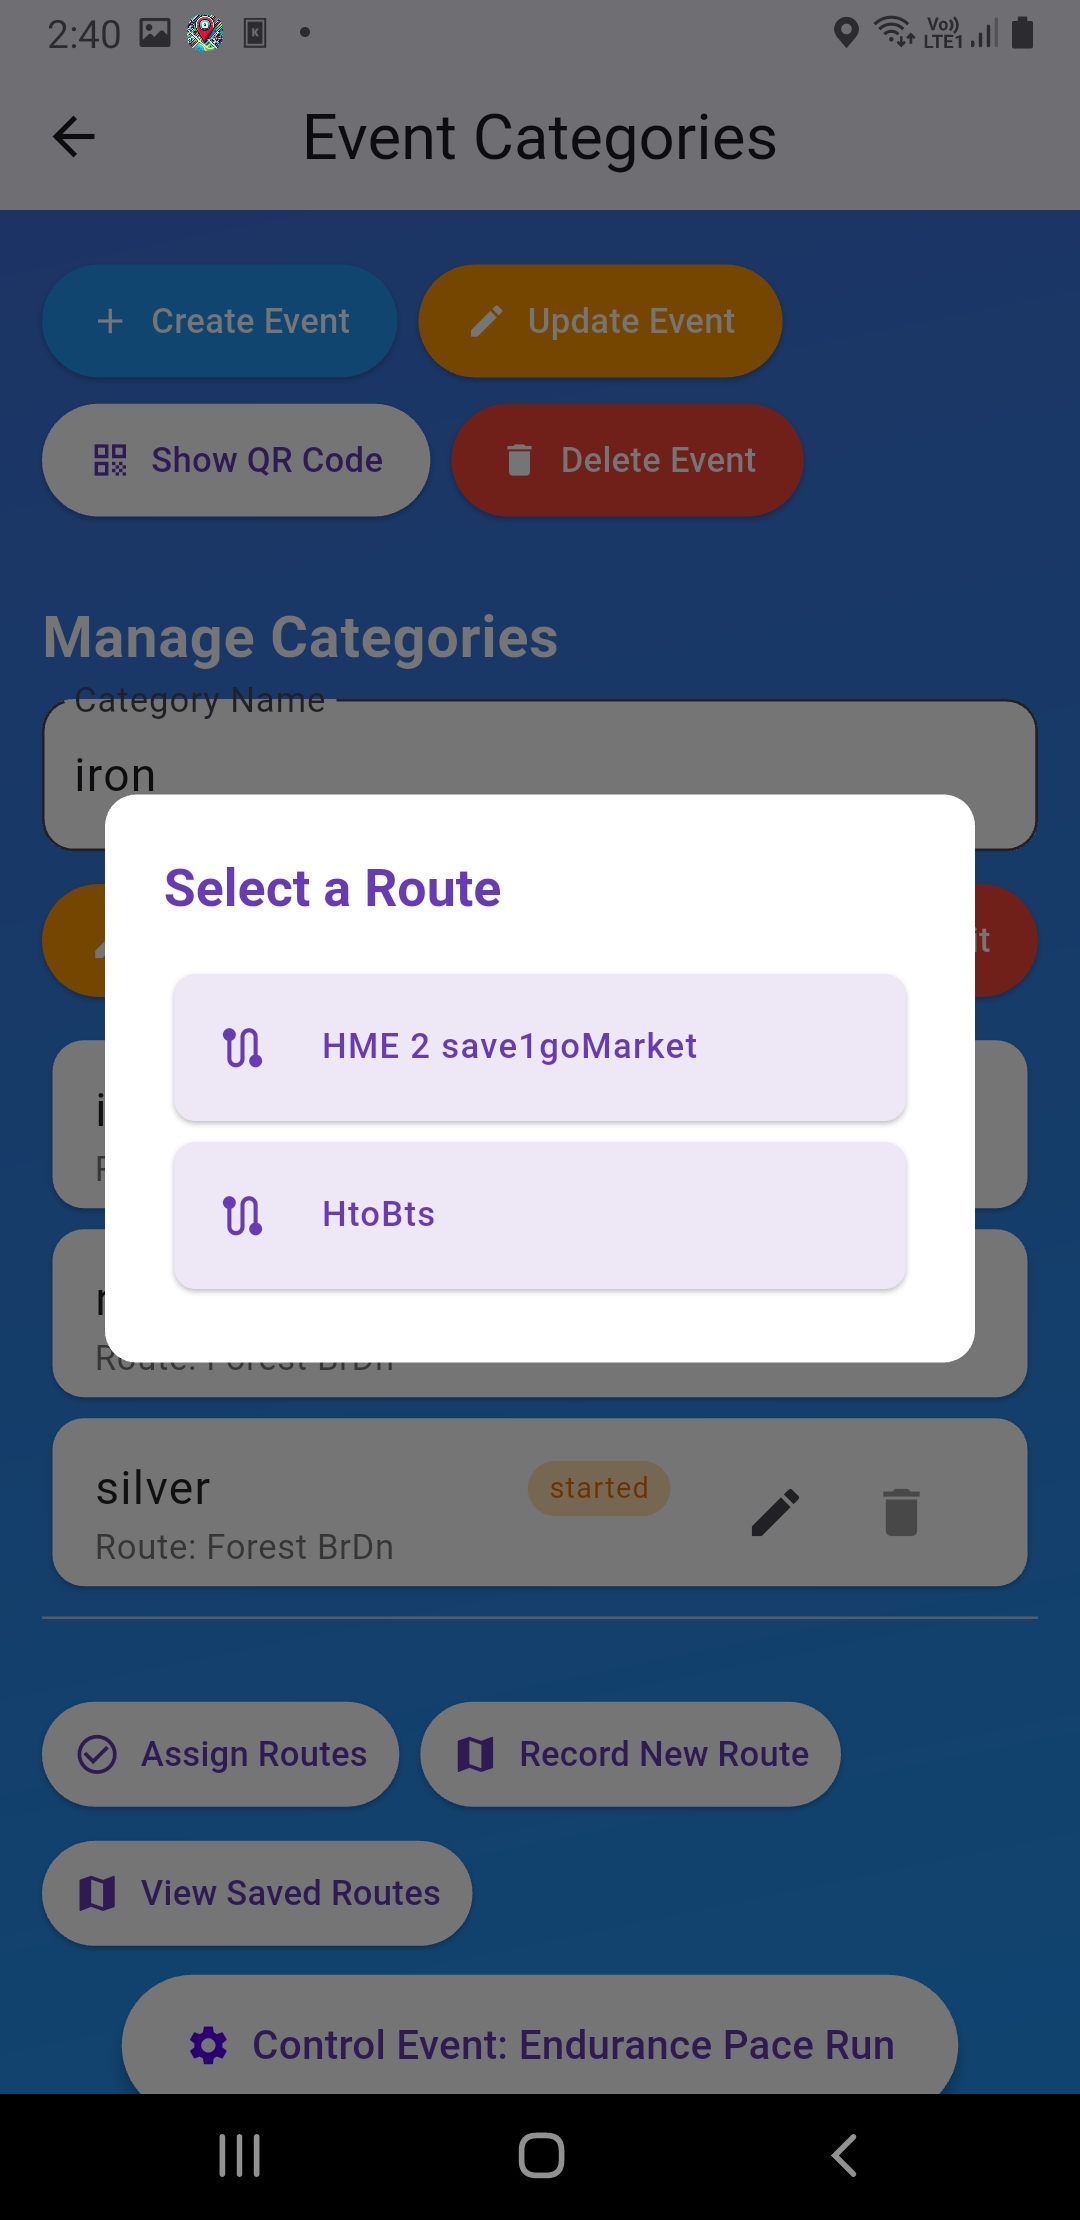
Add a route to a category/class
Add a route to a category/class(Screenshot_20260110-143855.jpg)
Choose a recorded route window
Choose a recorded route window(Screenshot_20260110-144006.jpg)
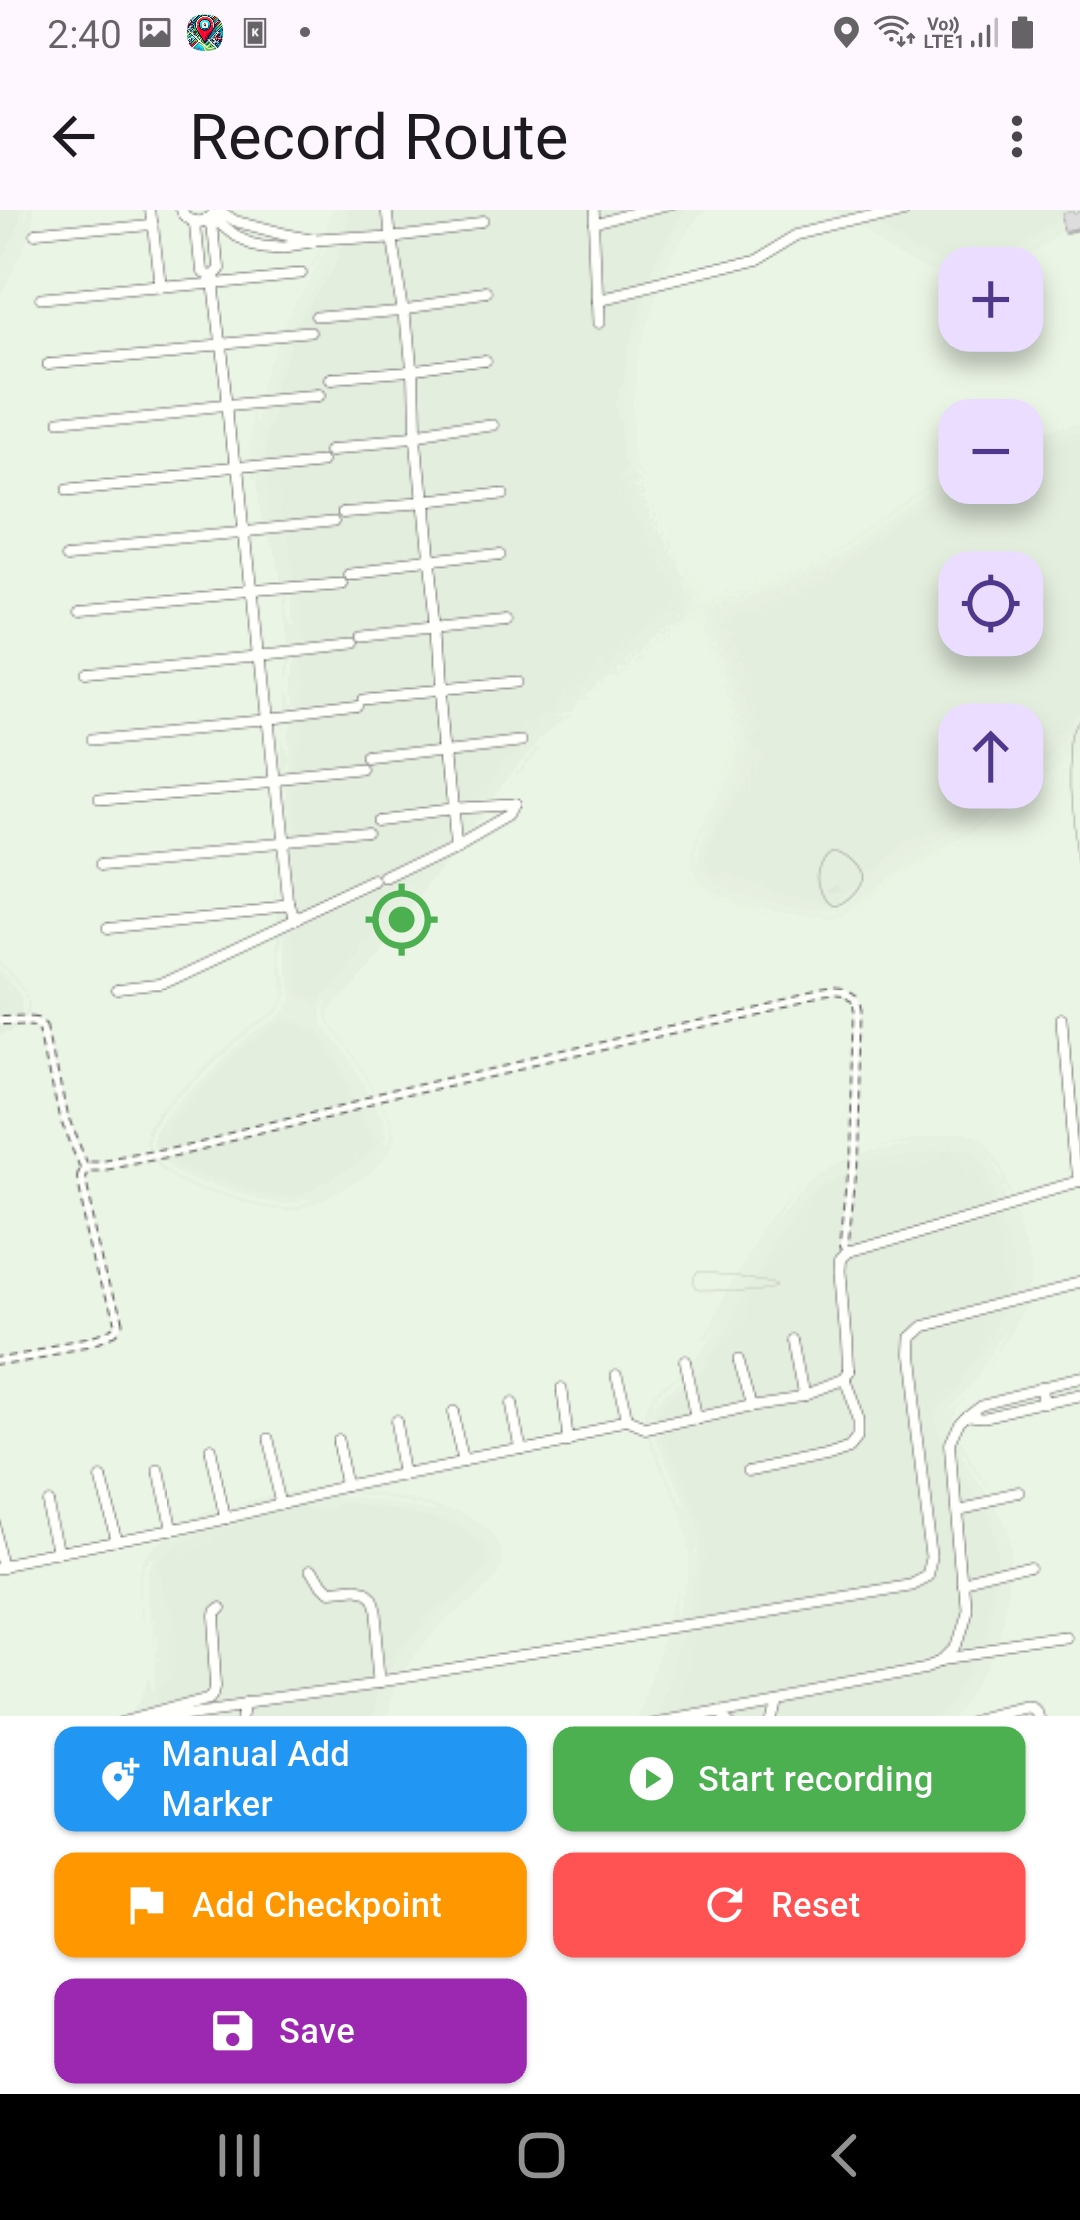
Route recording screen
Route recording screen(Screenshot_20260110-144045.jpg)

2.3 Record Route + Assign Routes

A route is the race path. Record it first, then link it to a category so viewers can see the route on the map.

2.3.1 Record Route

  1. Go to Record Route
  2. Press start -> walk/ride along the real route
  3. Add key points (checkpoints/hazard points) as supported by the UI
  4. Stop recording -> name the route clearly, then save

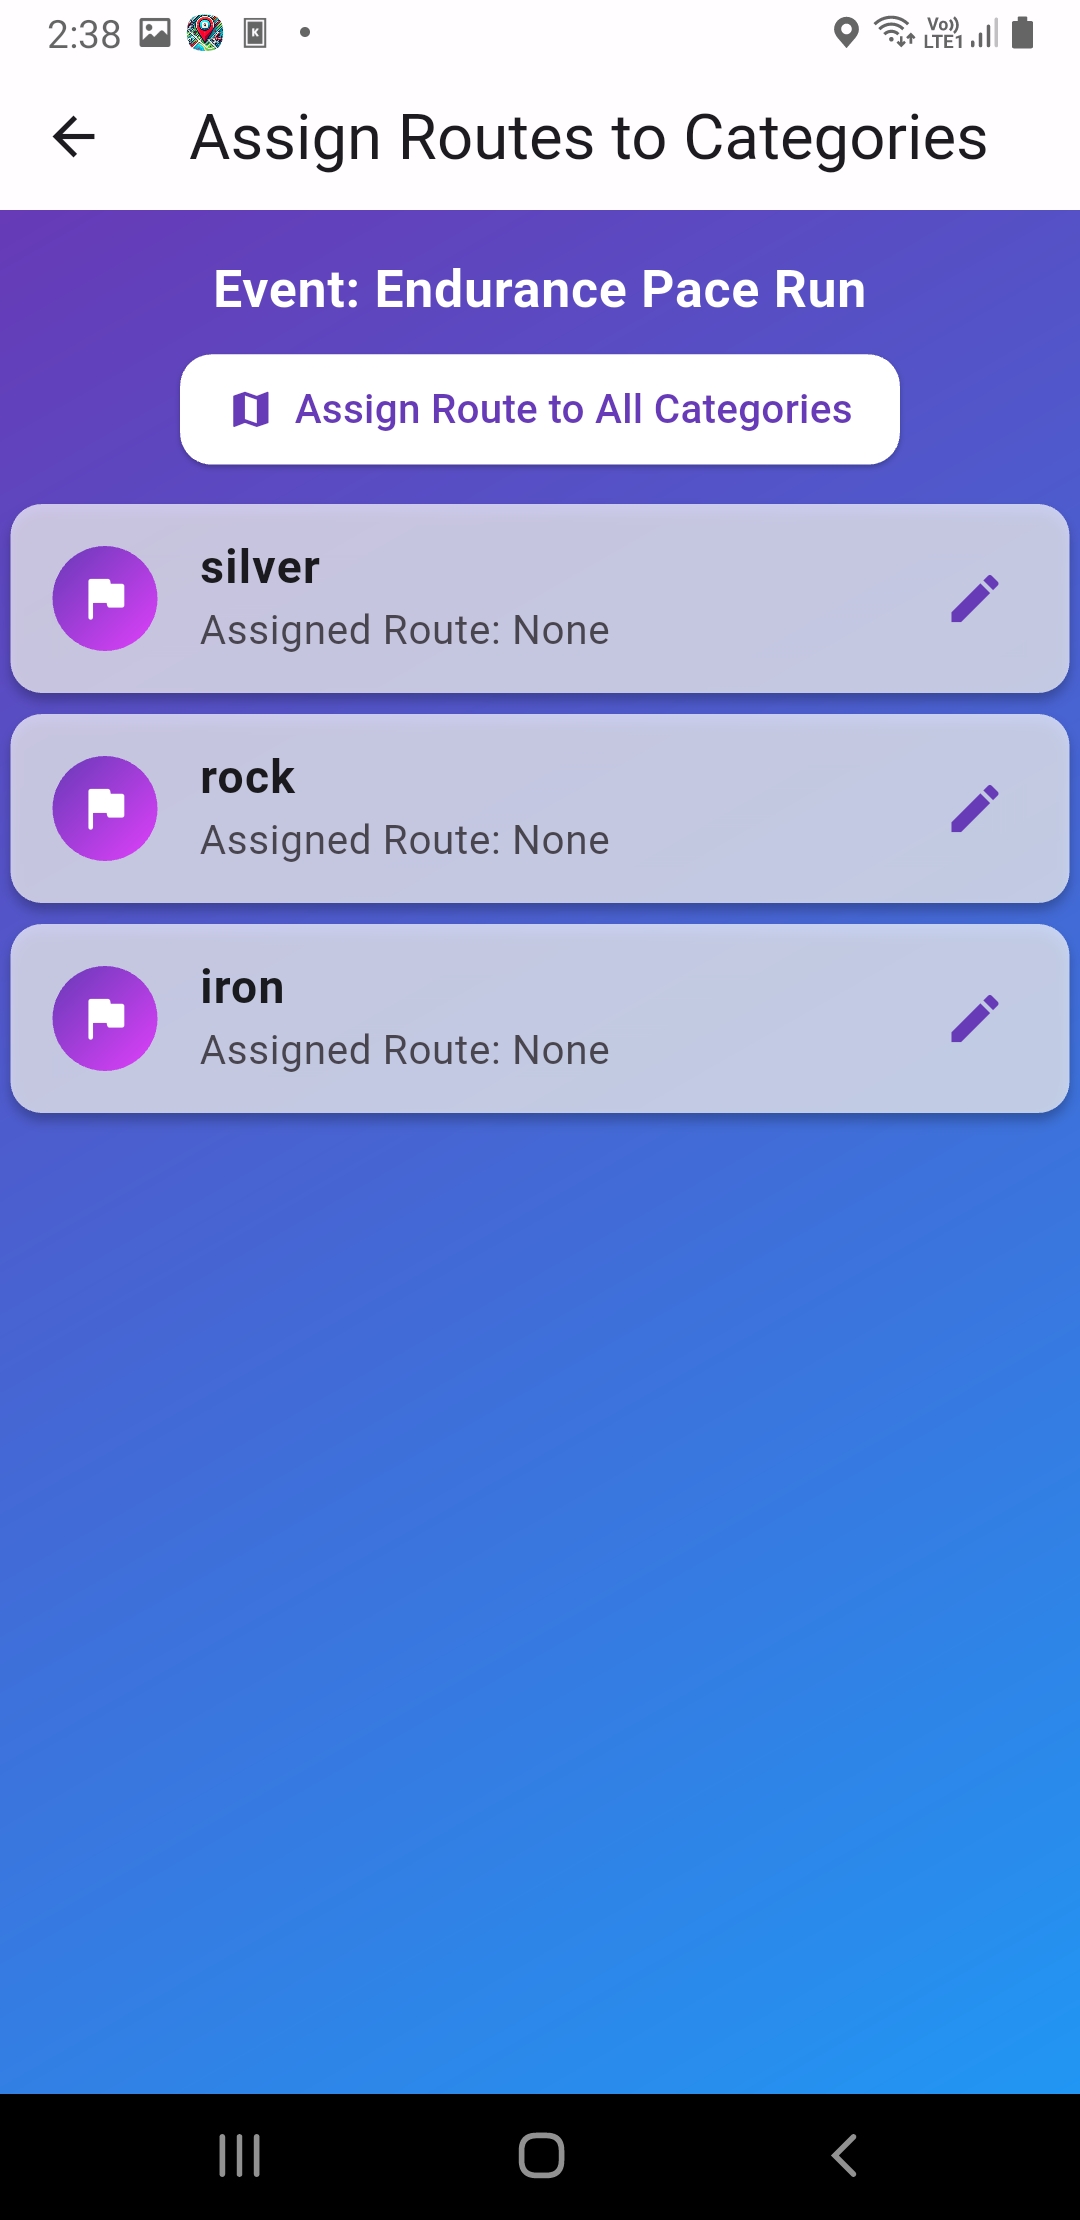
2.3.2 Assign Routes

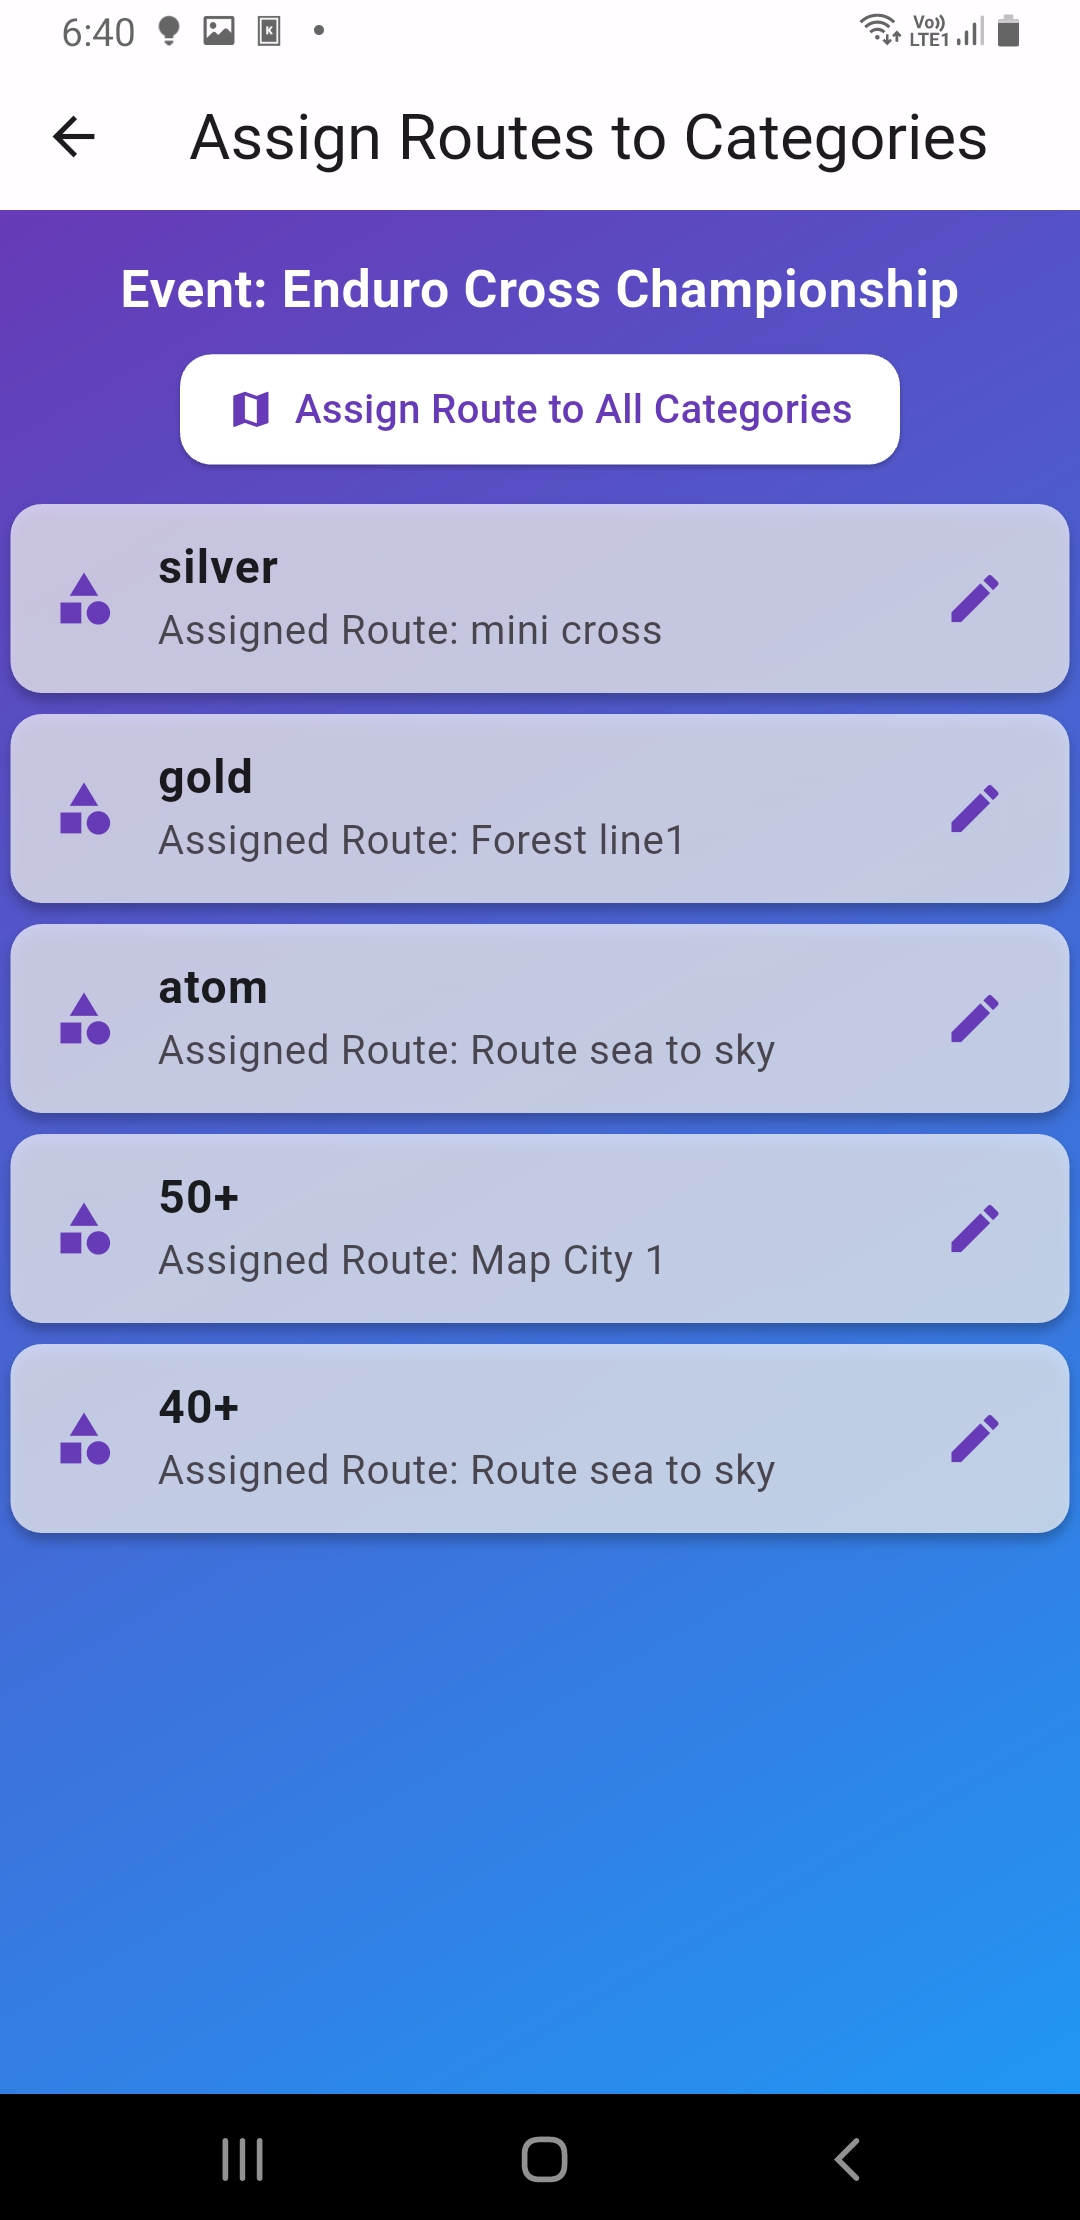
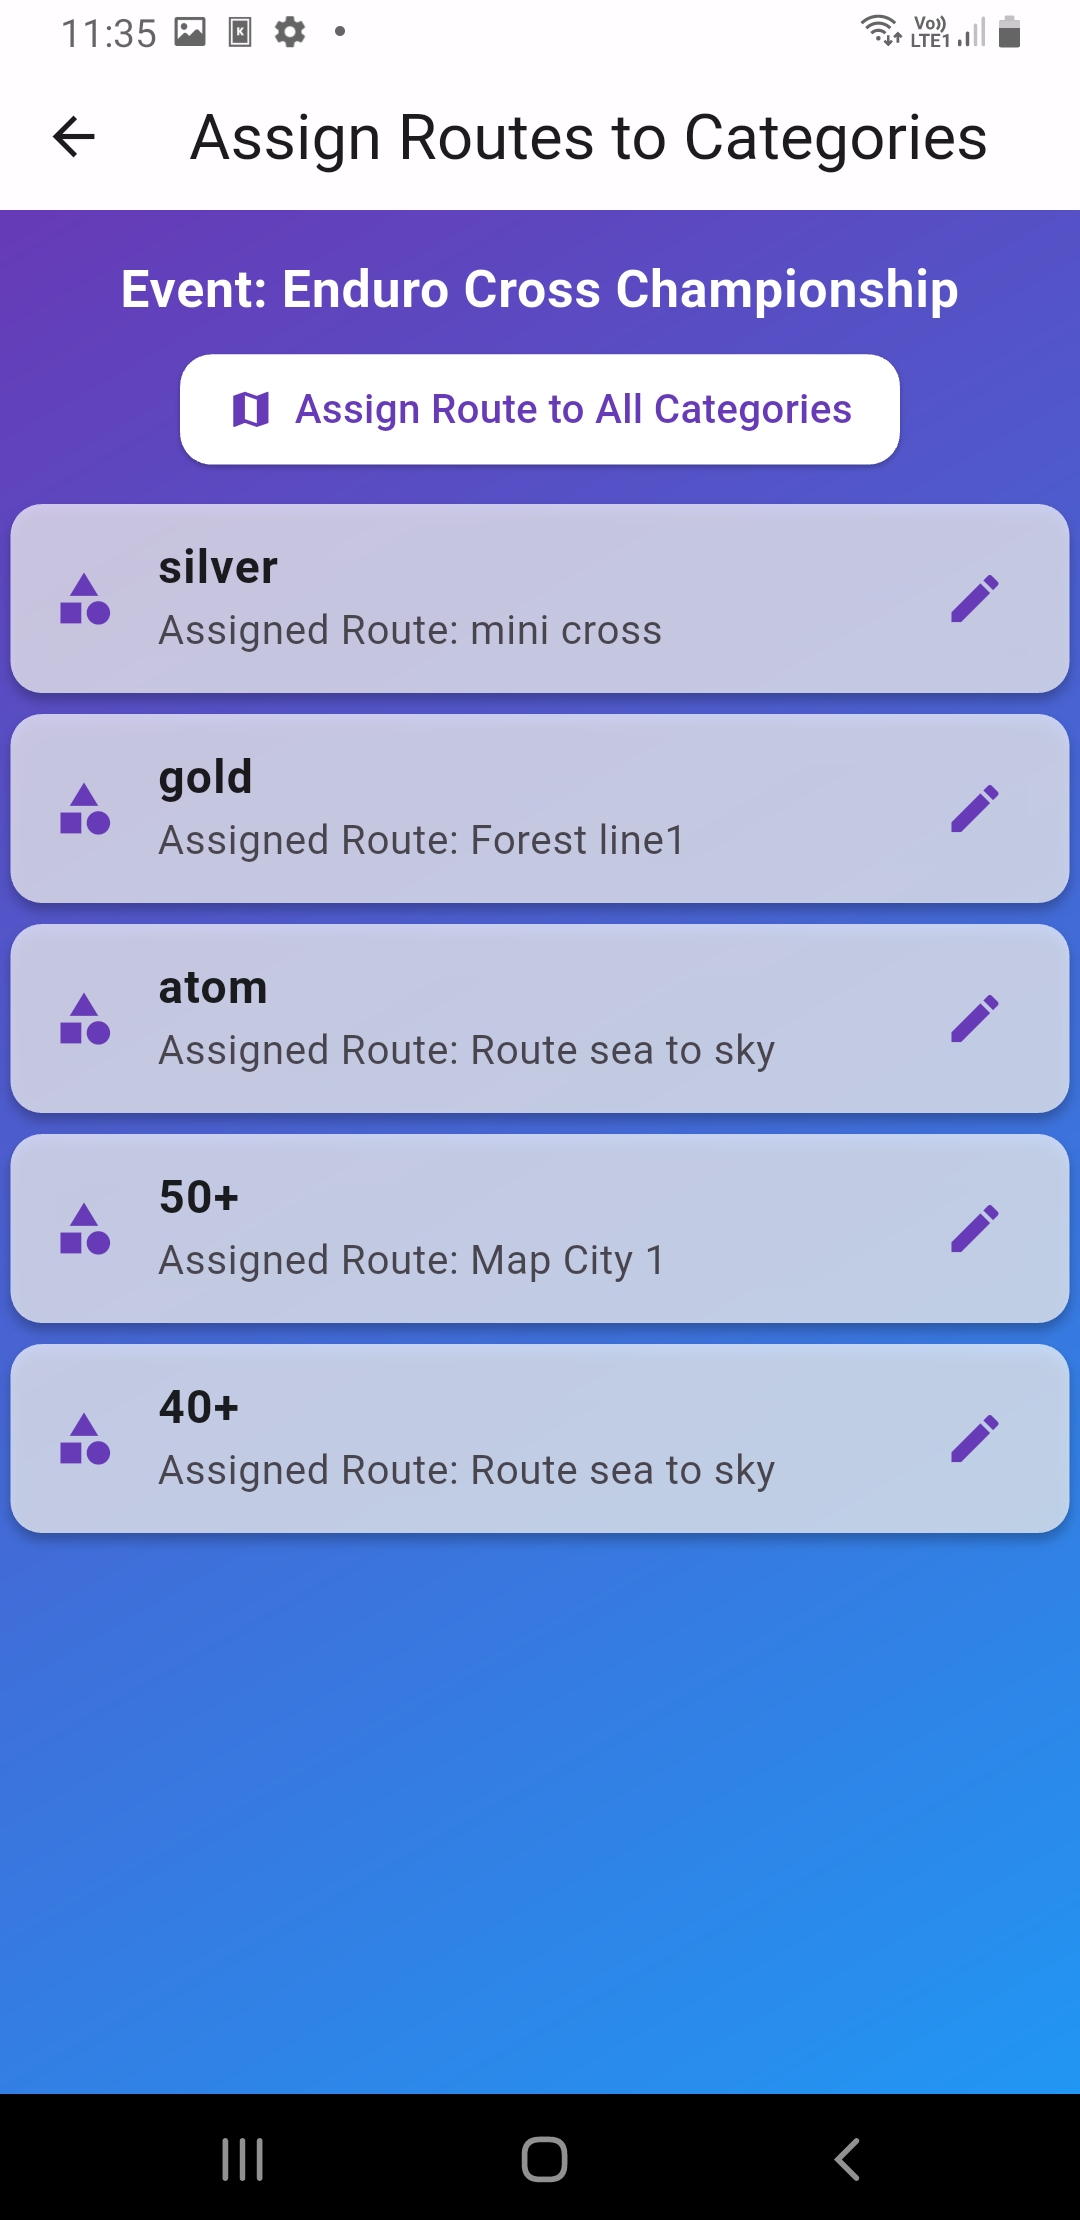
  1. Go to Assign Routes
  2. Select a category -> choose a recorded route
  3. Verify every category is linked to the correct route
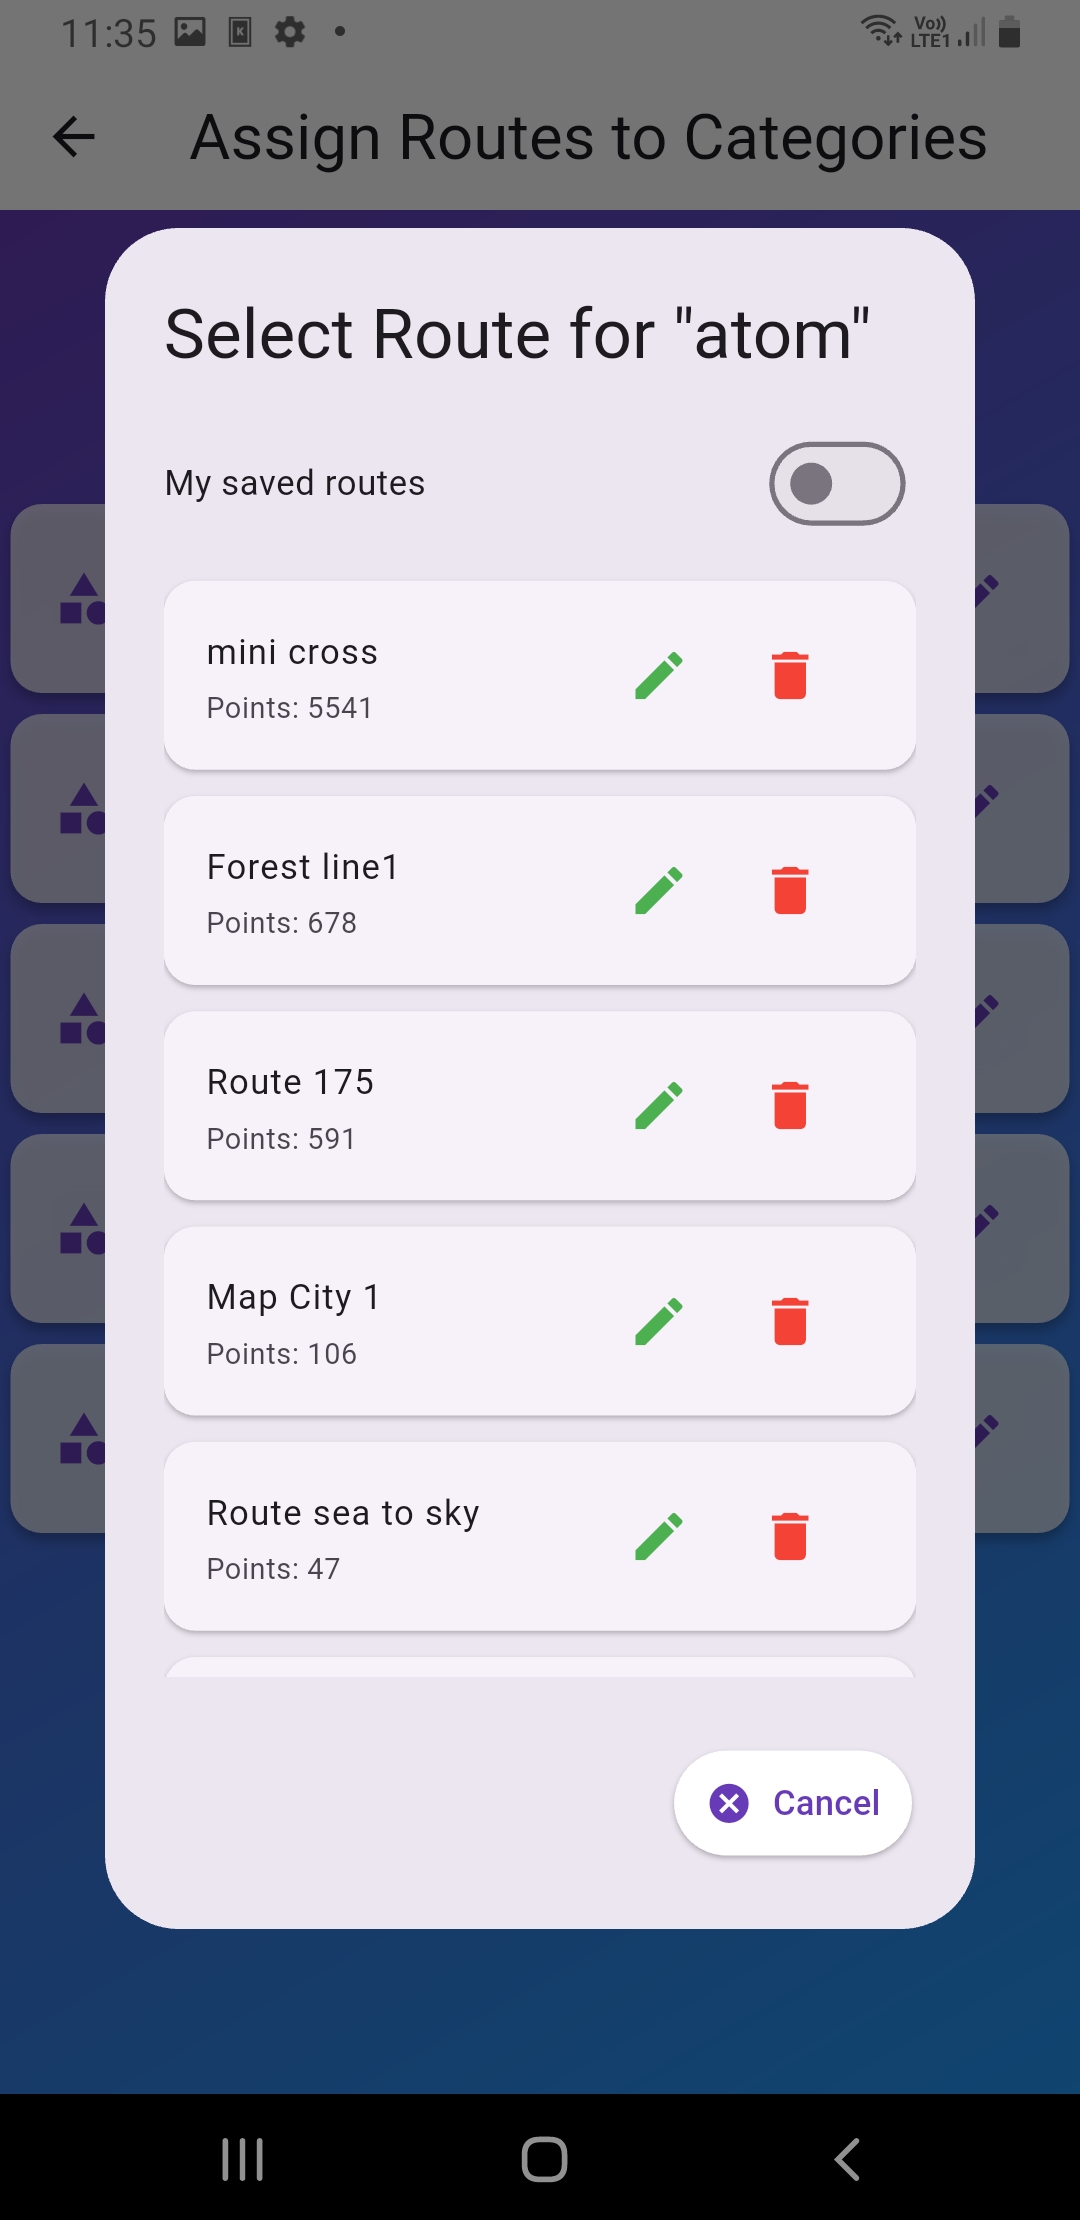
Assign Routes: set route for a category
Assign Routes: set route for a category(Screenshot_20260110-143855.jpg)
Select a recorded route for the race category
Select a recorded route for the race category(Screenshot_20260109-113515.jpg)
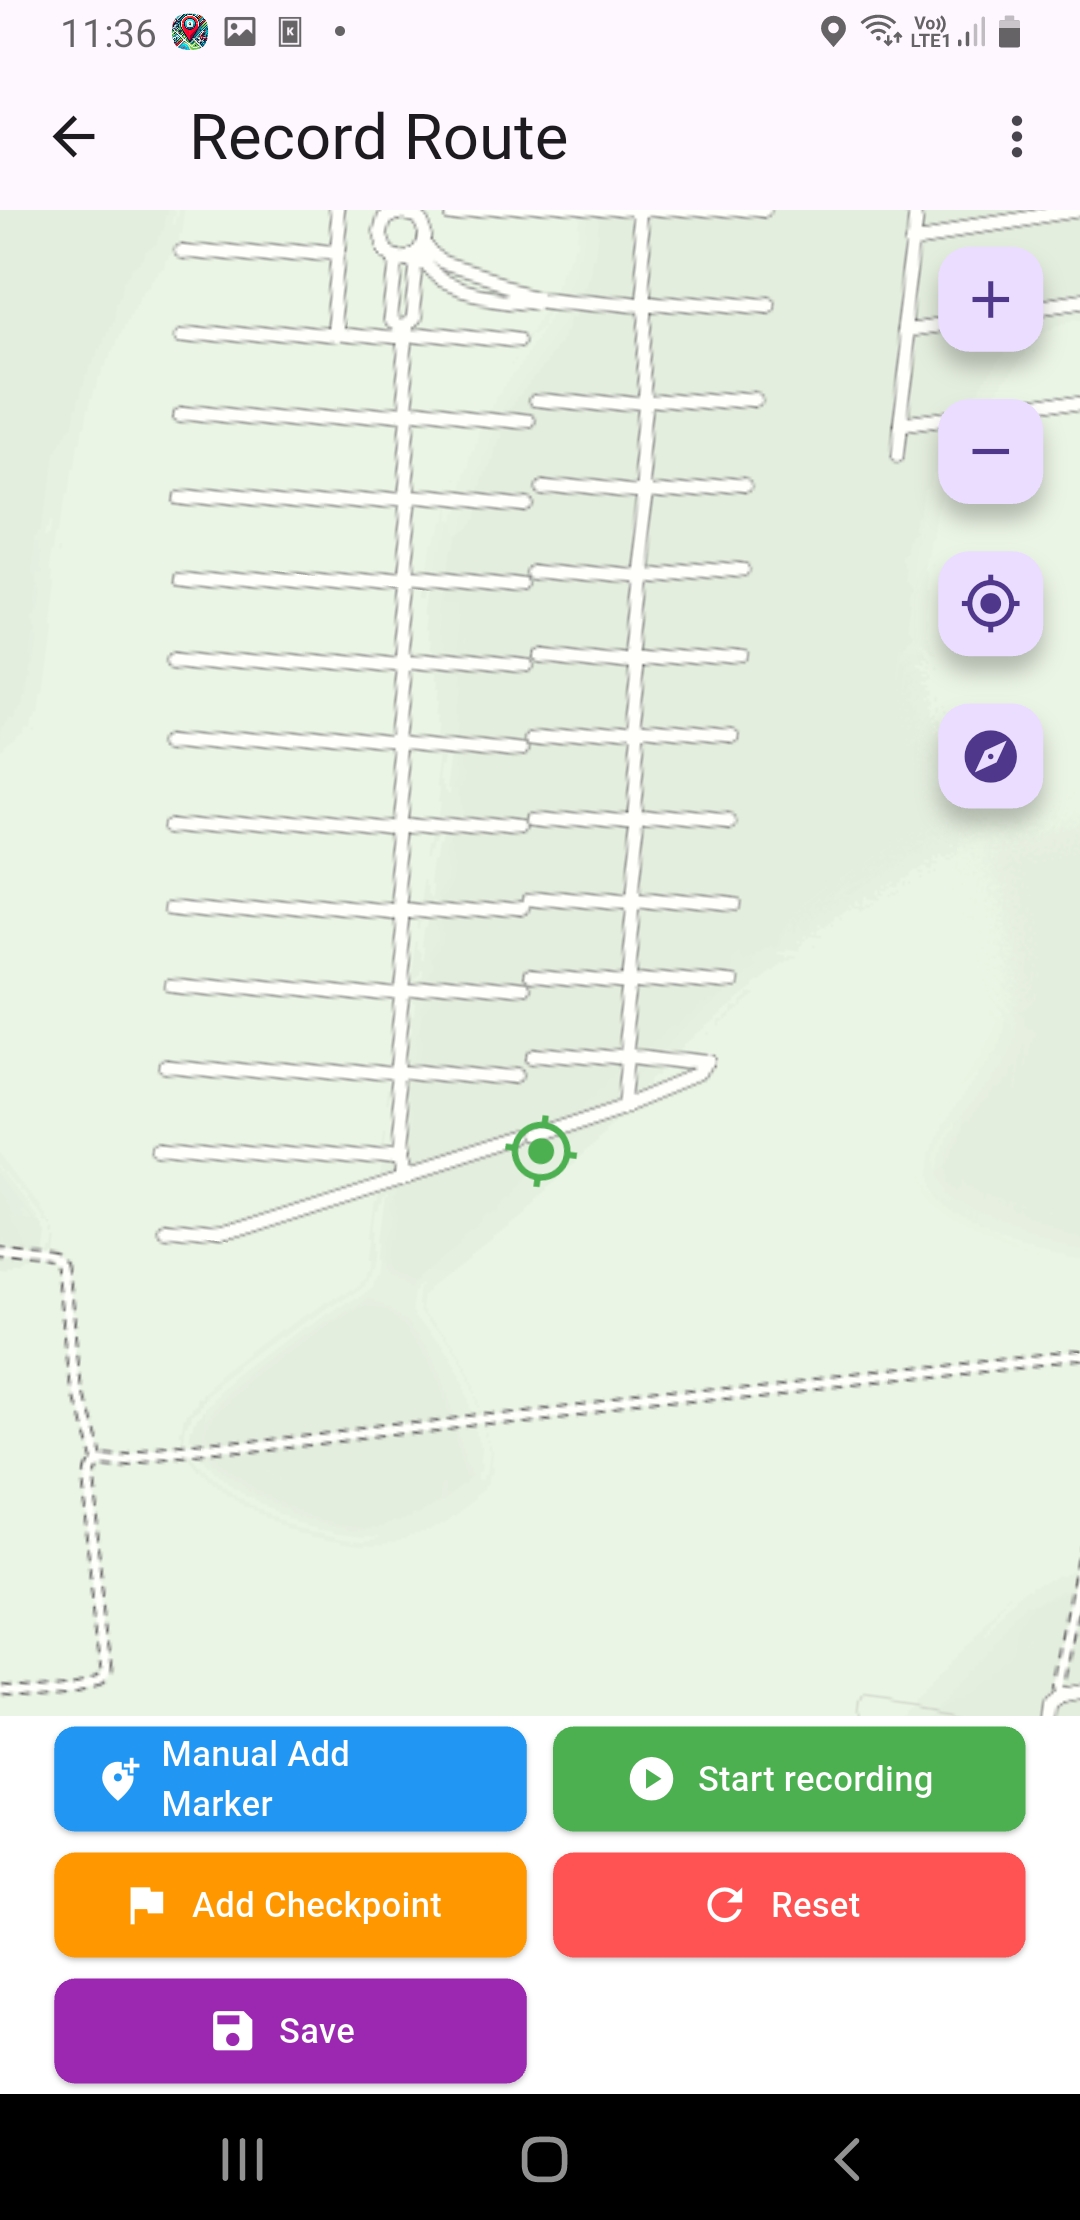
Record Route: route recording screen
Record Route: route recording screen(Screenshot_20260109-113616.jpg)
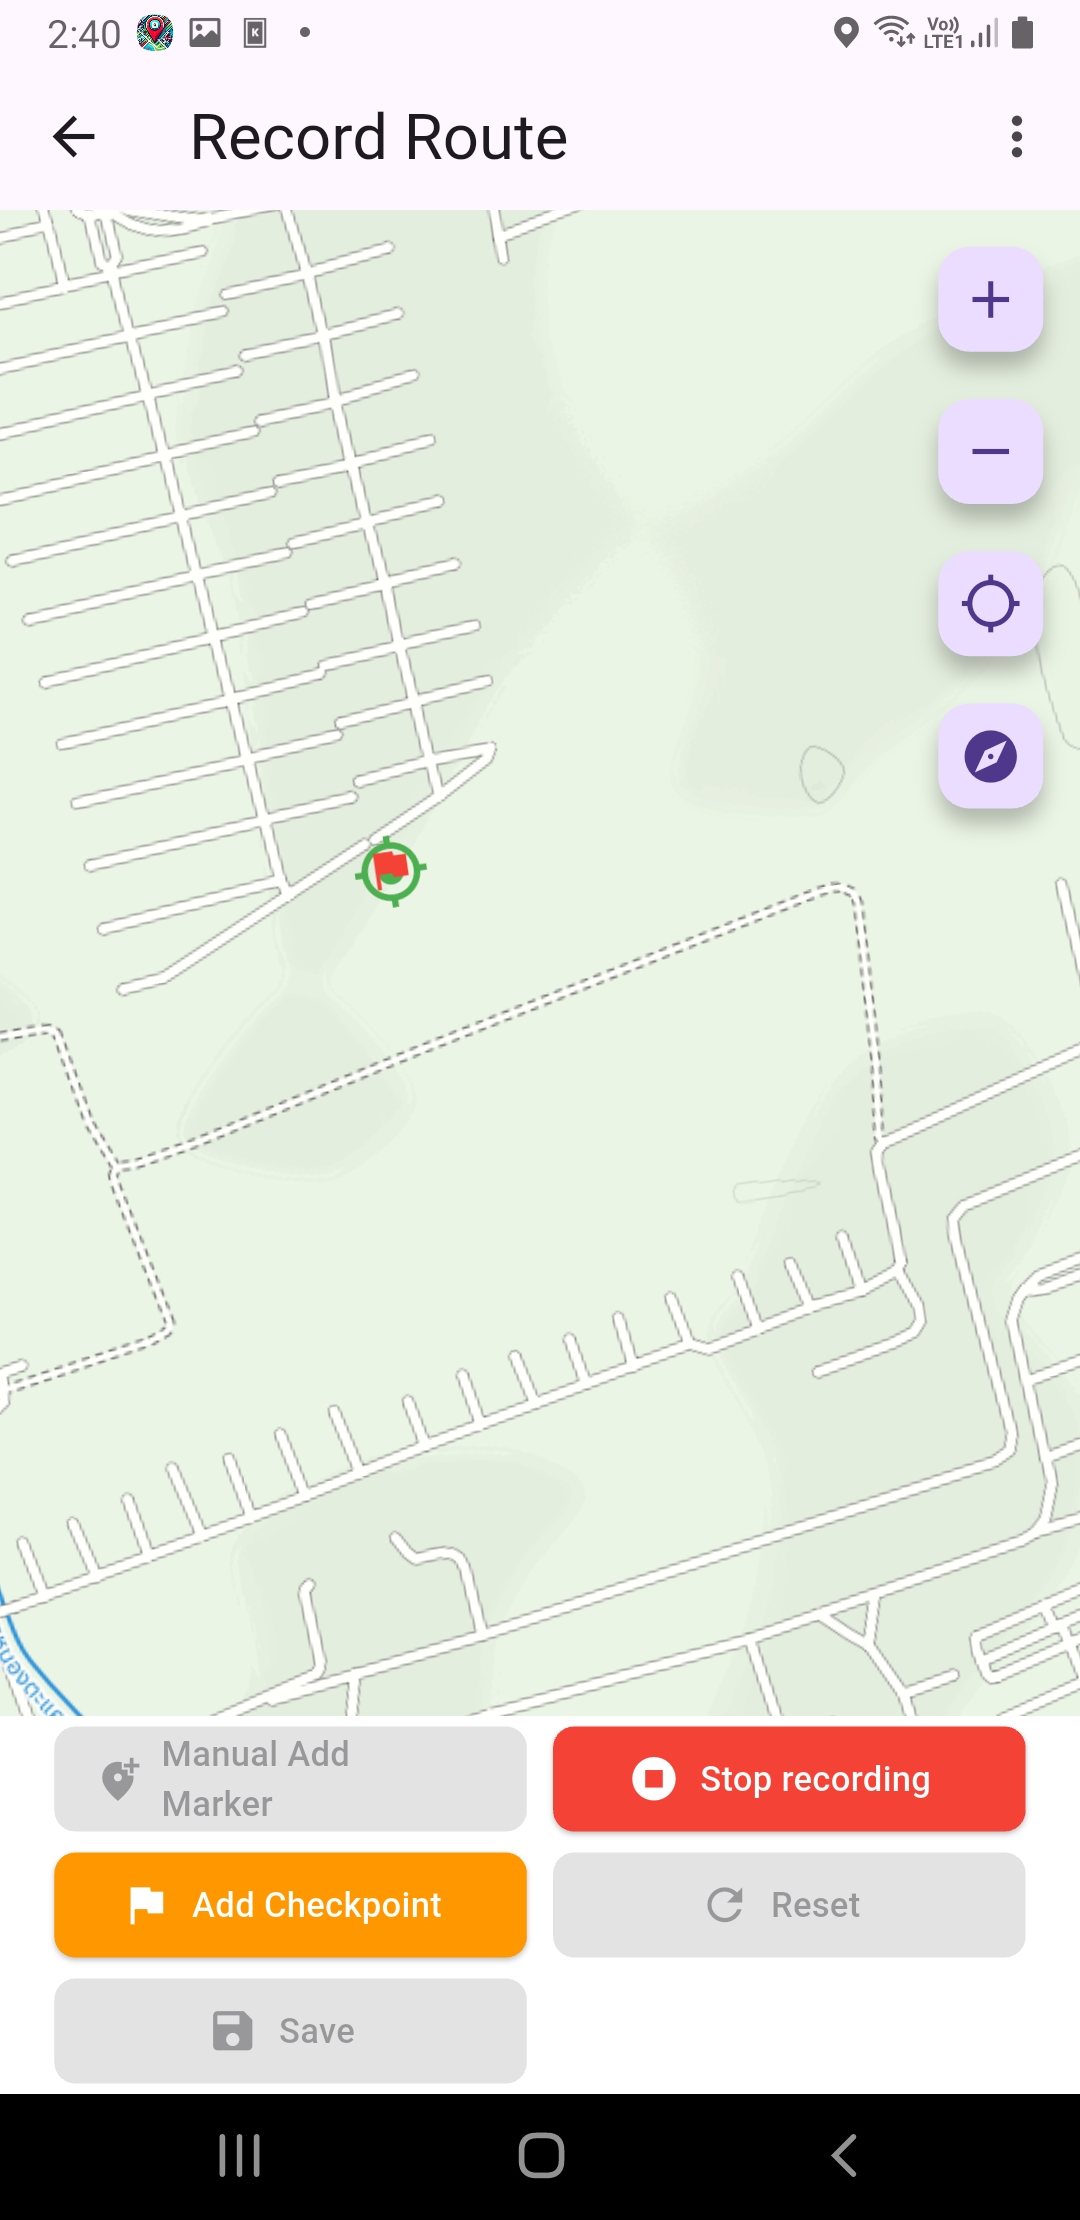
Record Route: example during recording
Record Route: example during recording(ssssss.jpg)
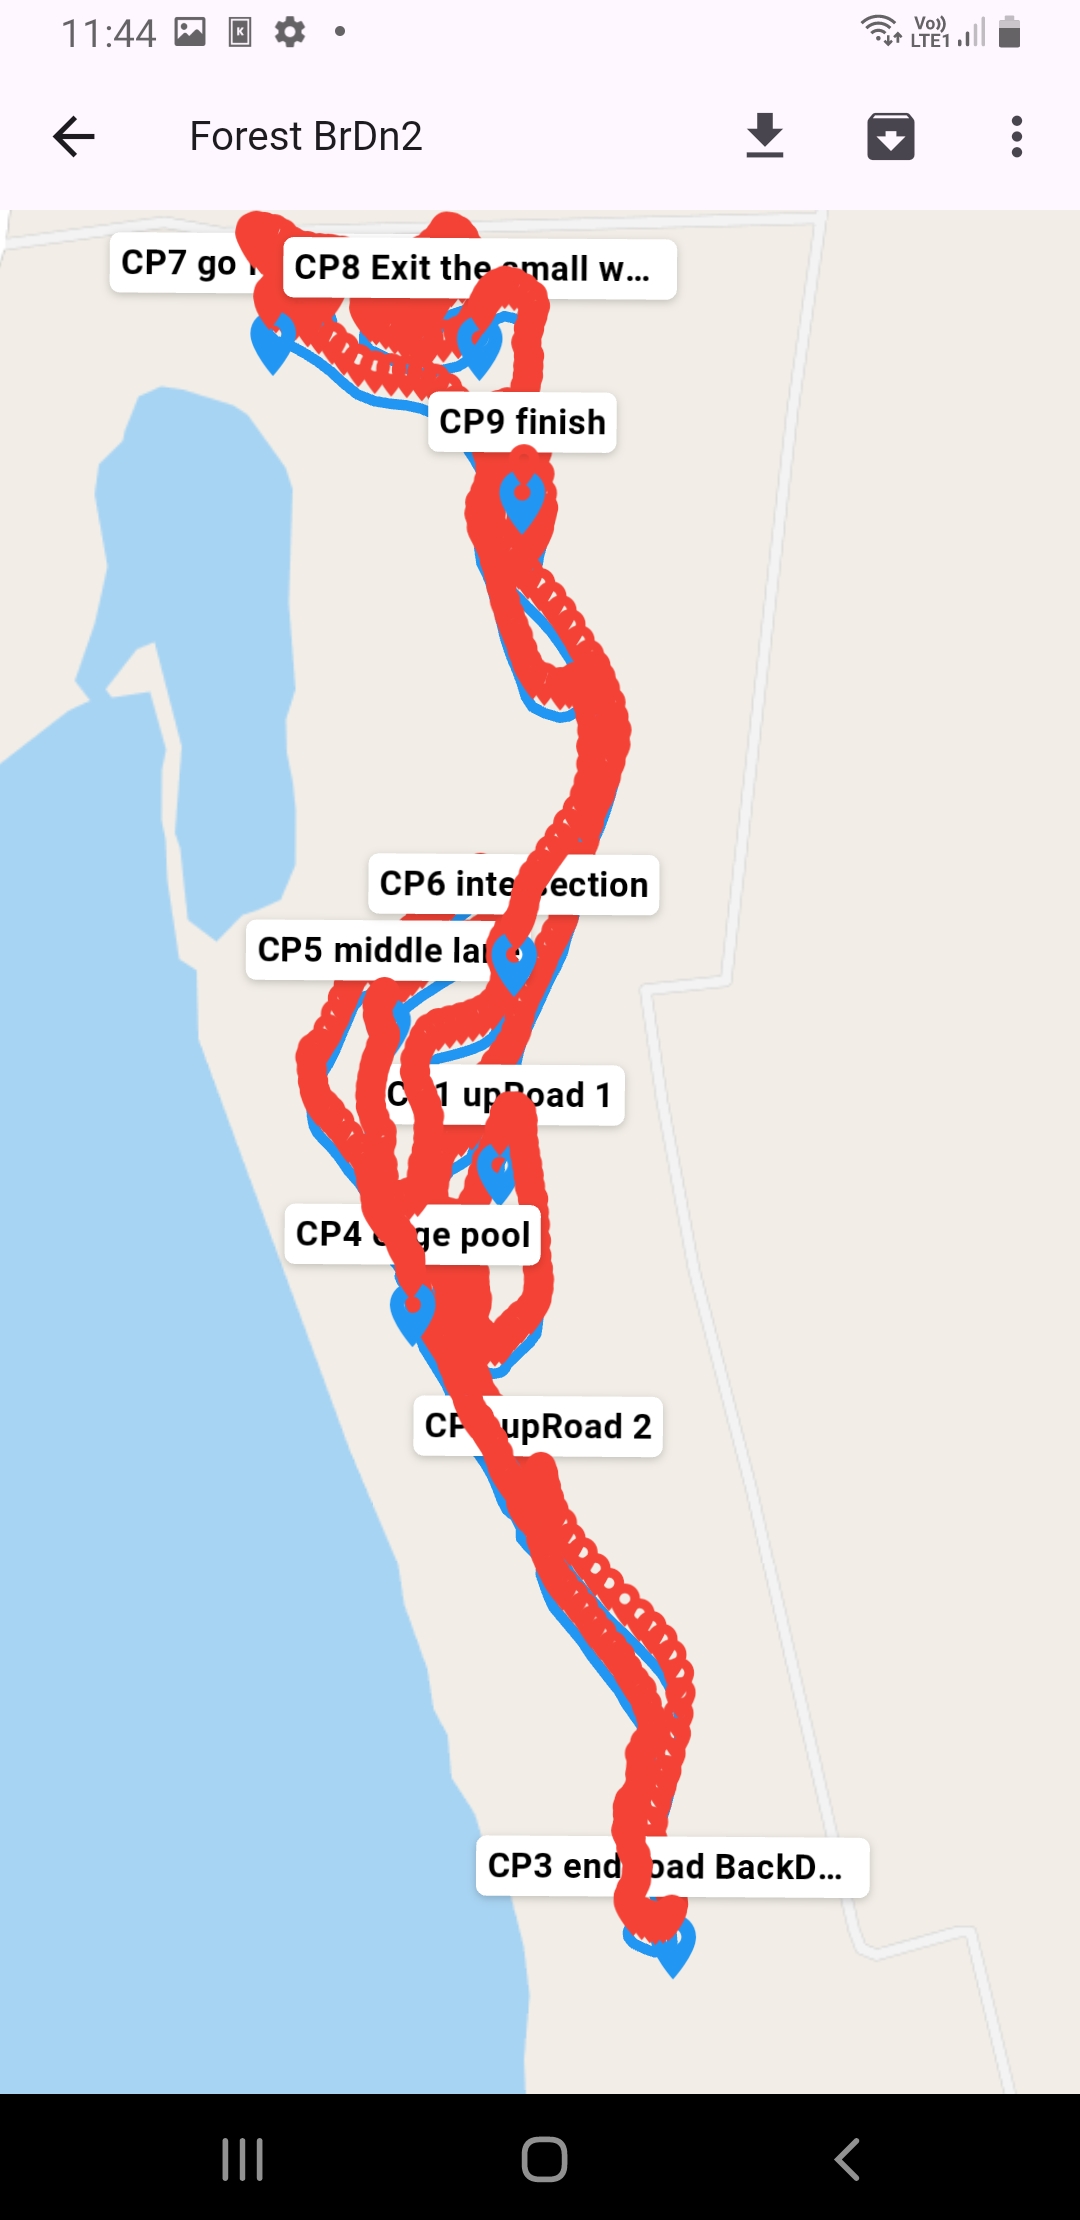
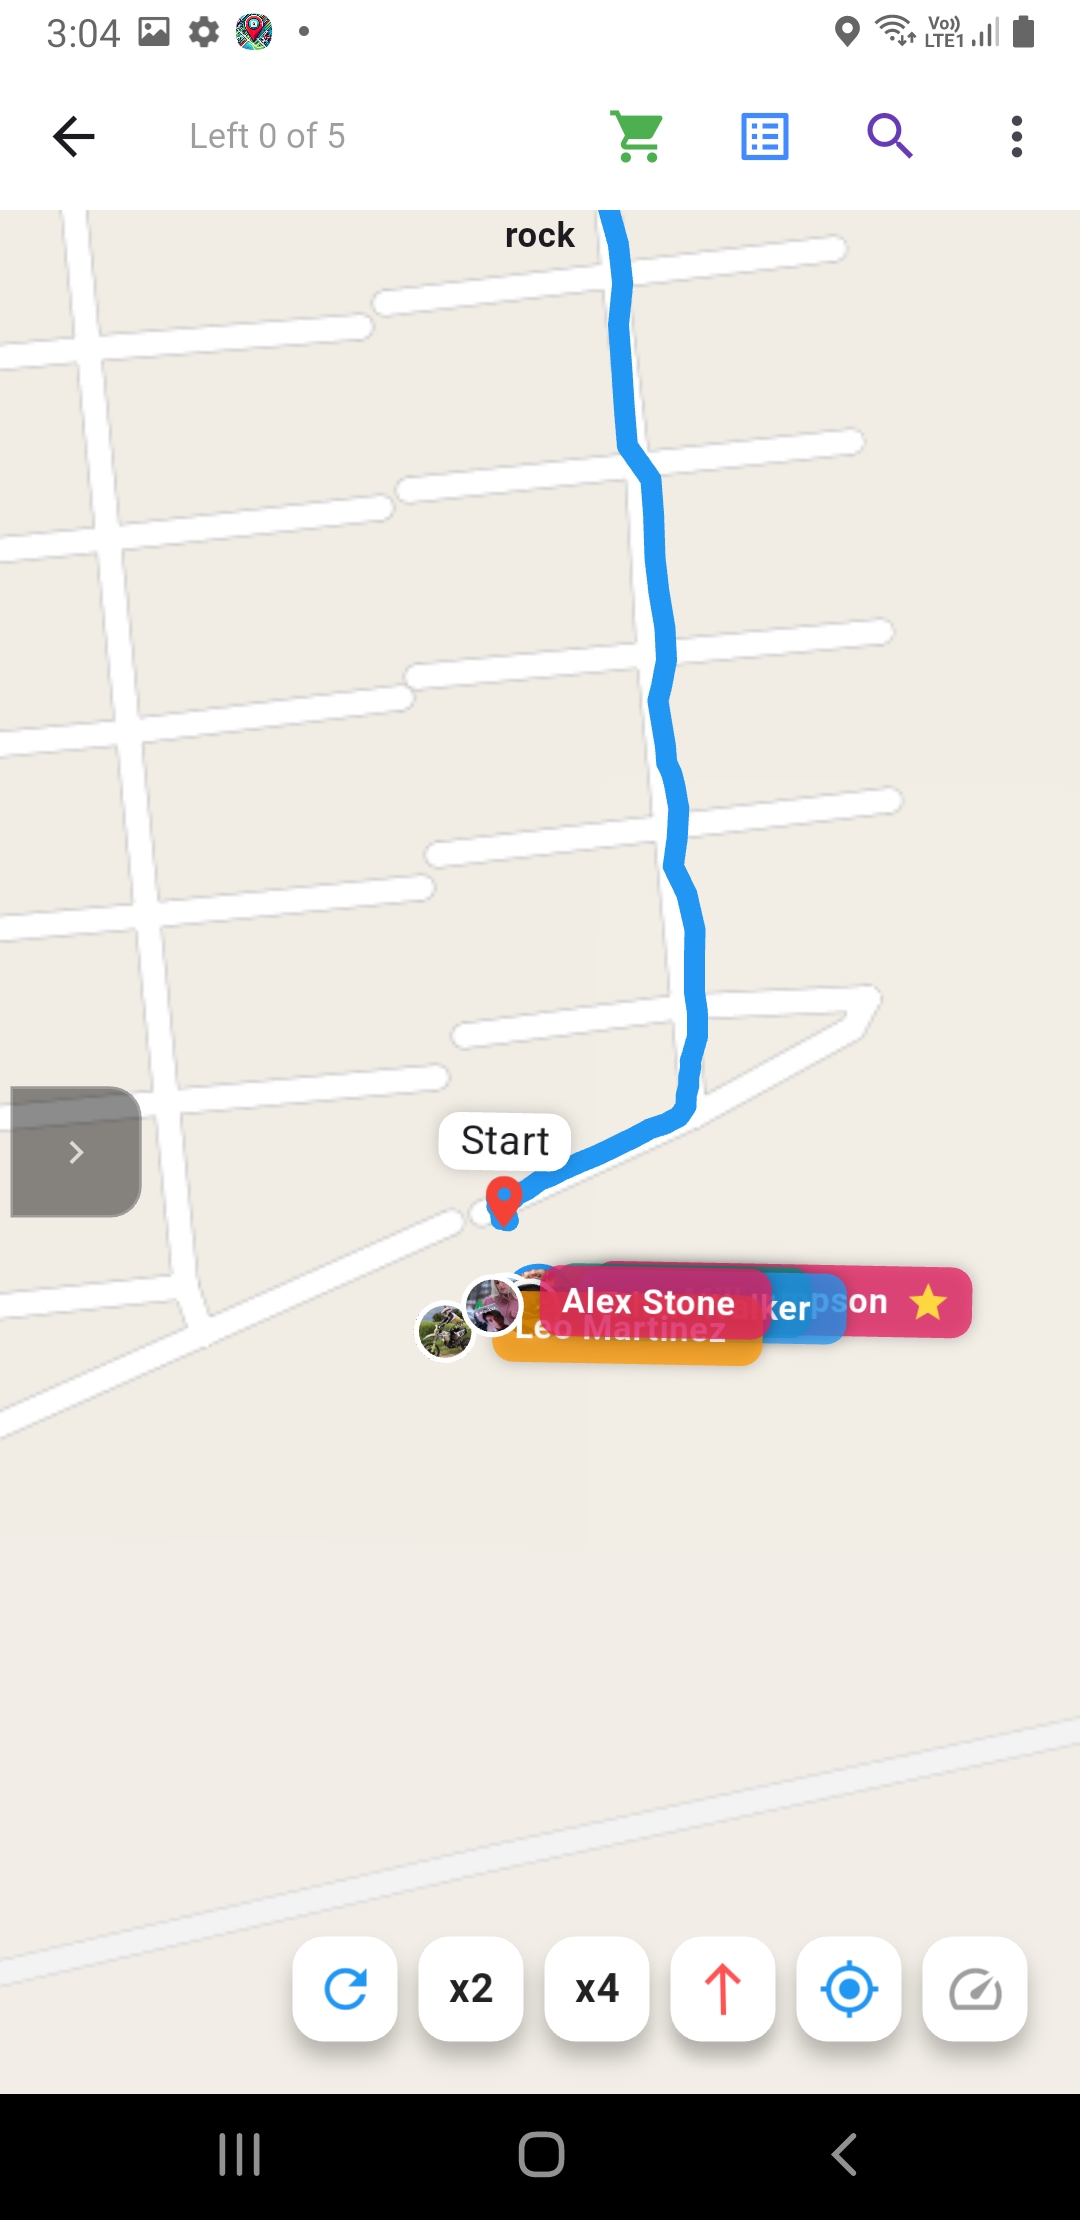
Example of a recorded route (path + start point)
Example of a recorded route (path + start point)(Screenshot_20260109-114418.jpg)
Warning: If you do not assign a route, viewers may see racers but no route line

2.4 Control Event

  1. Go to Control Event
  2. Press Start when ready / press Finish when done
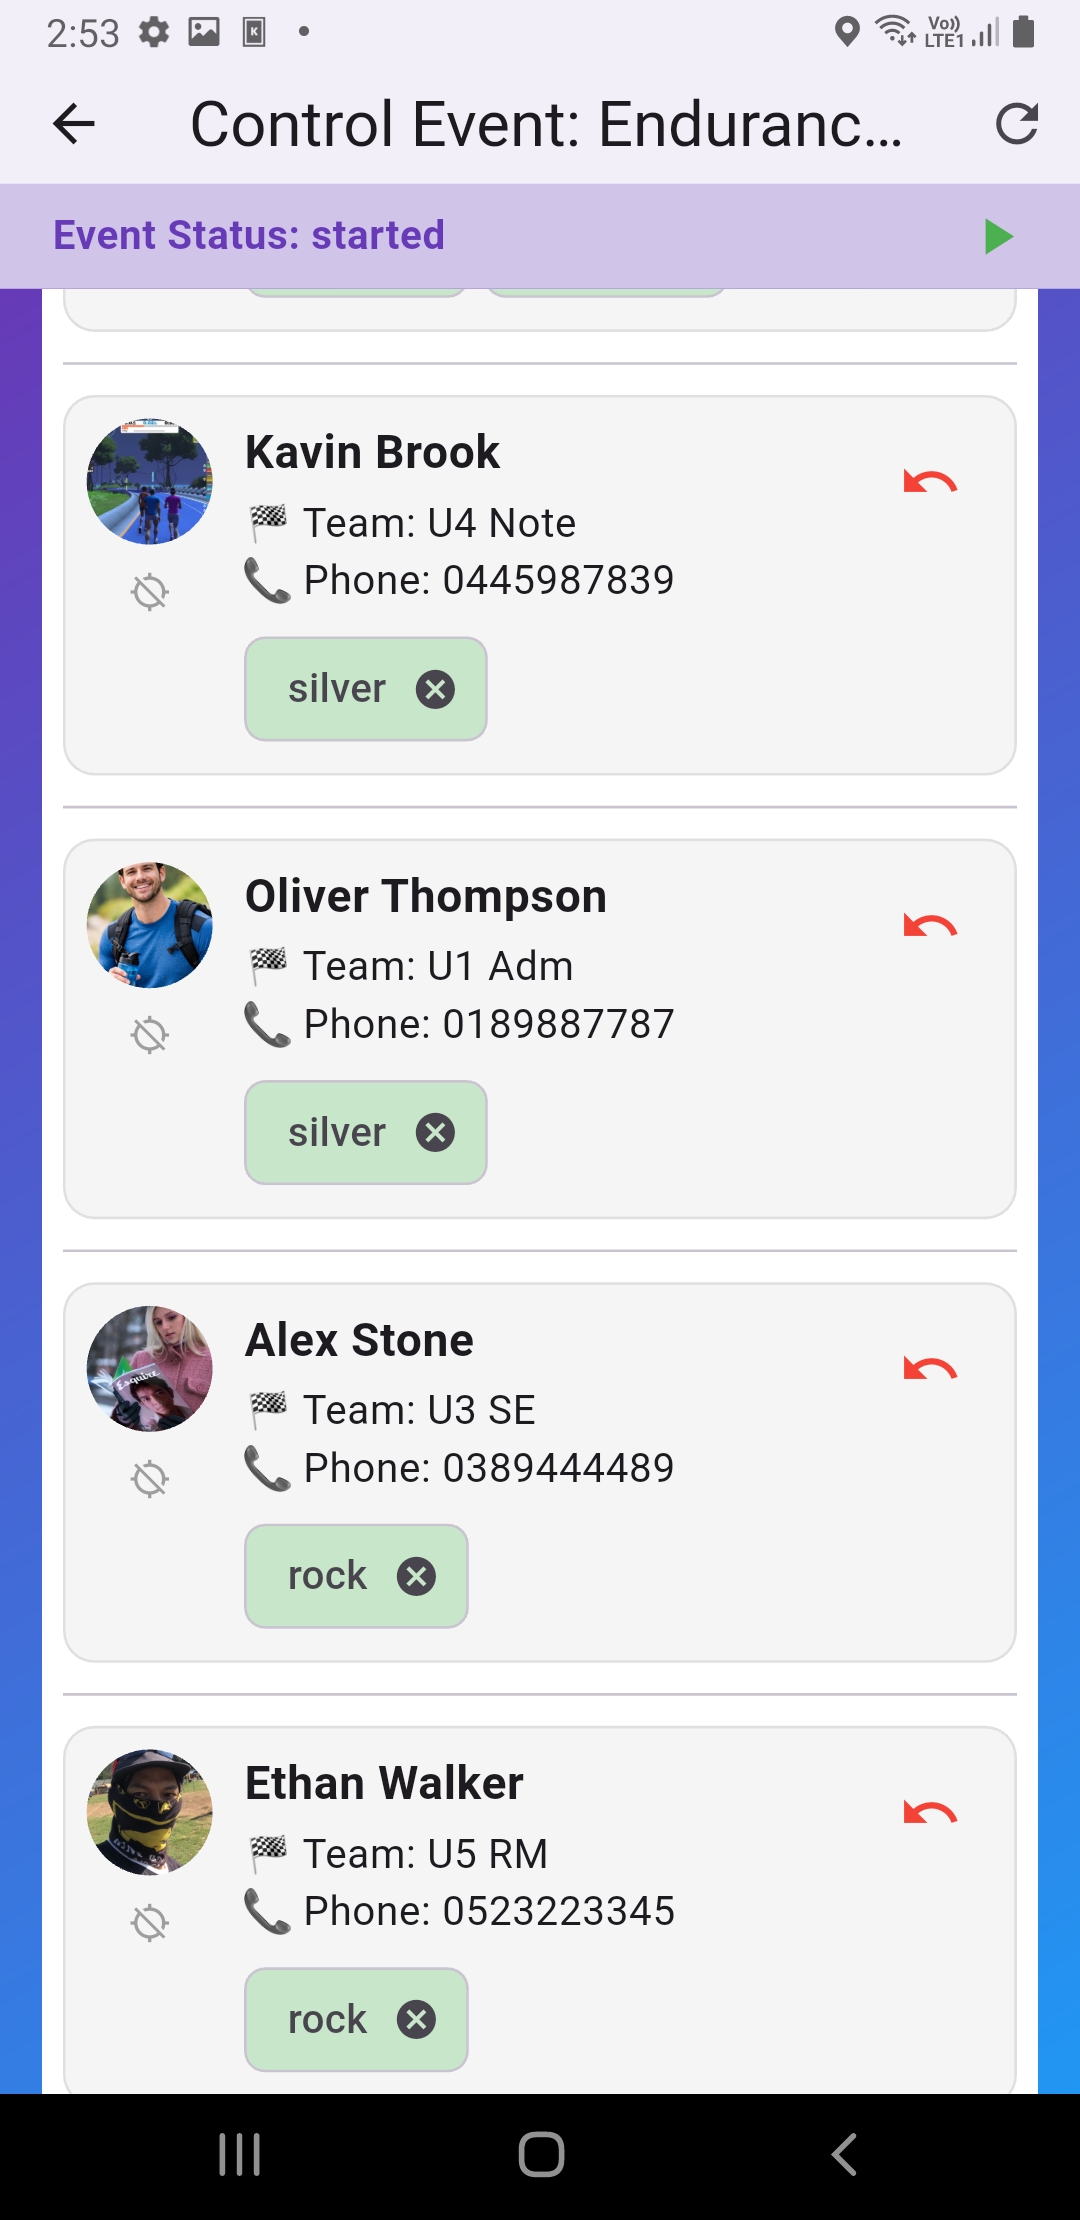
  3. Track racer names/status (search/filter)
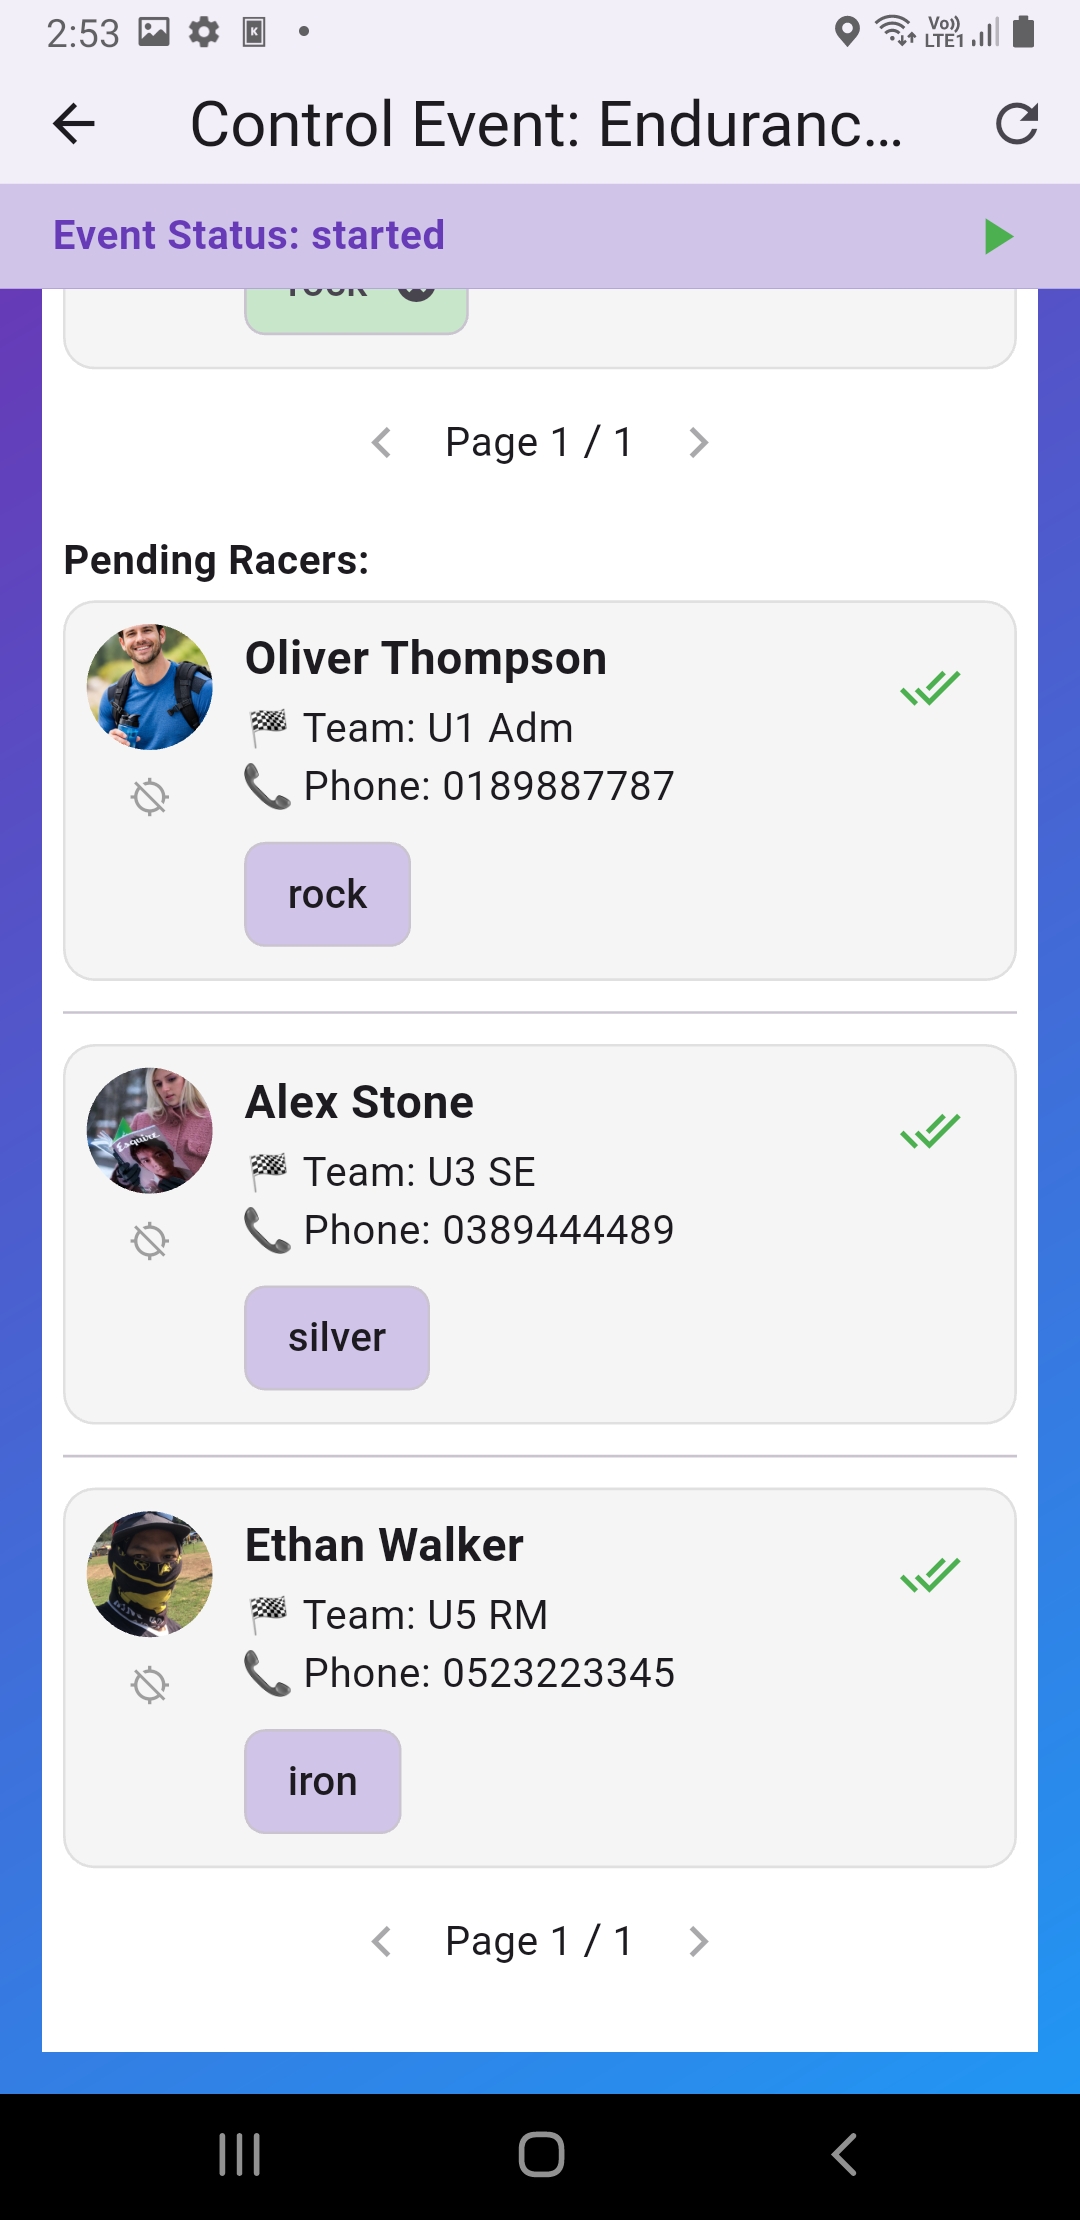
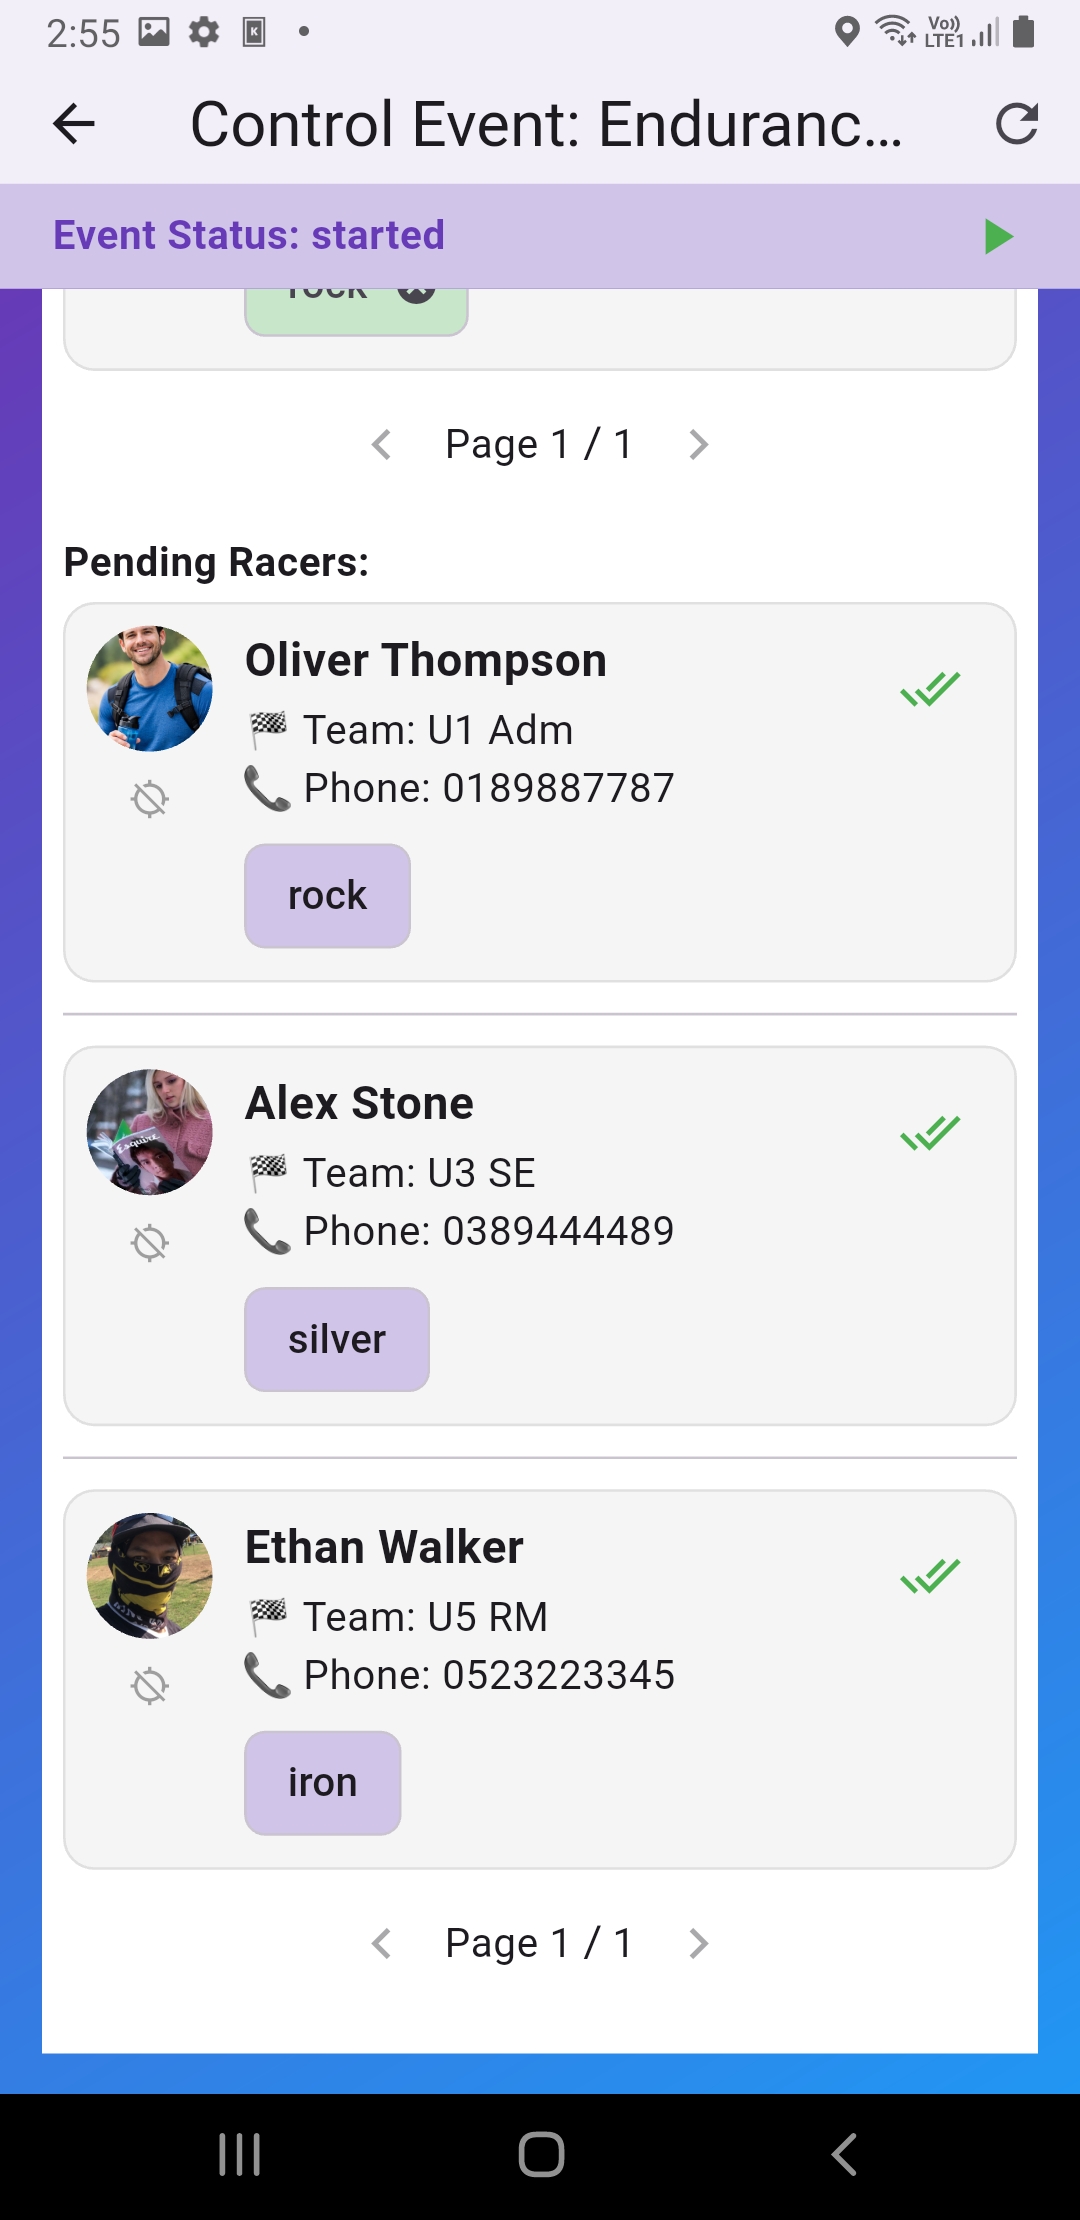
  4. Manage status approvals (approved/pending) for racer categories
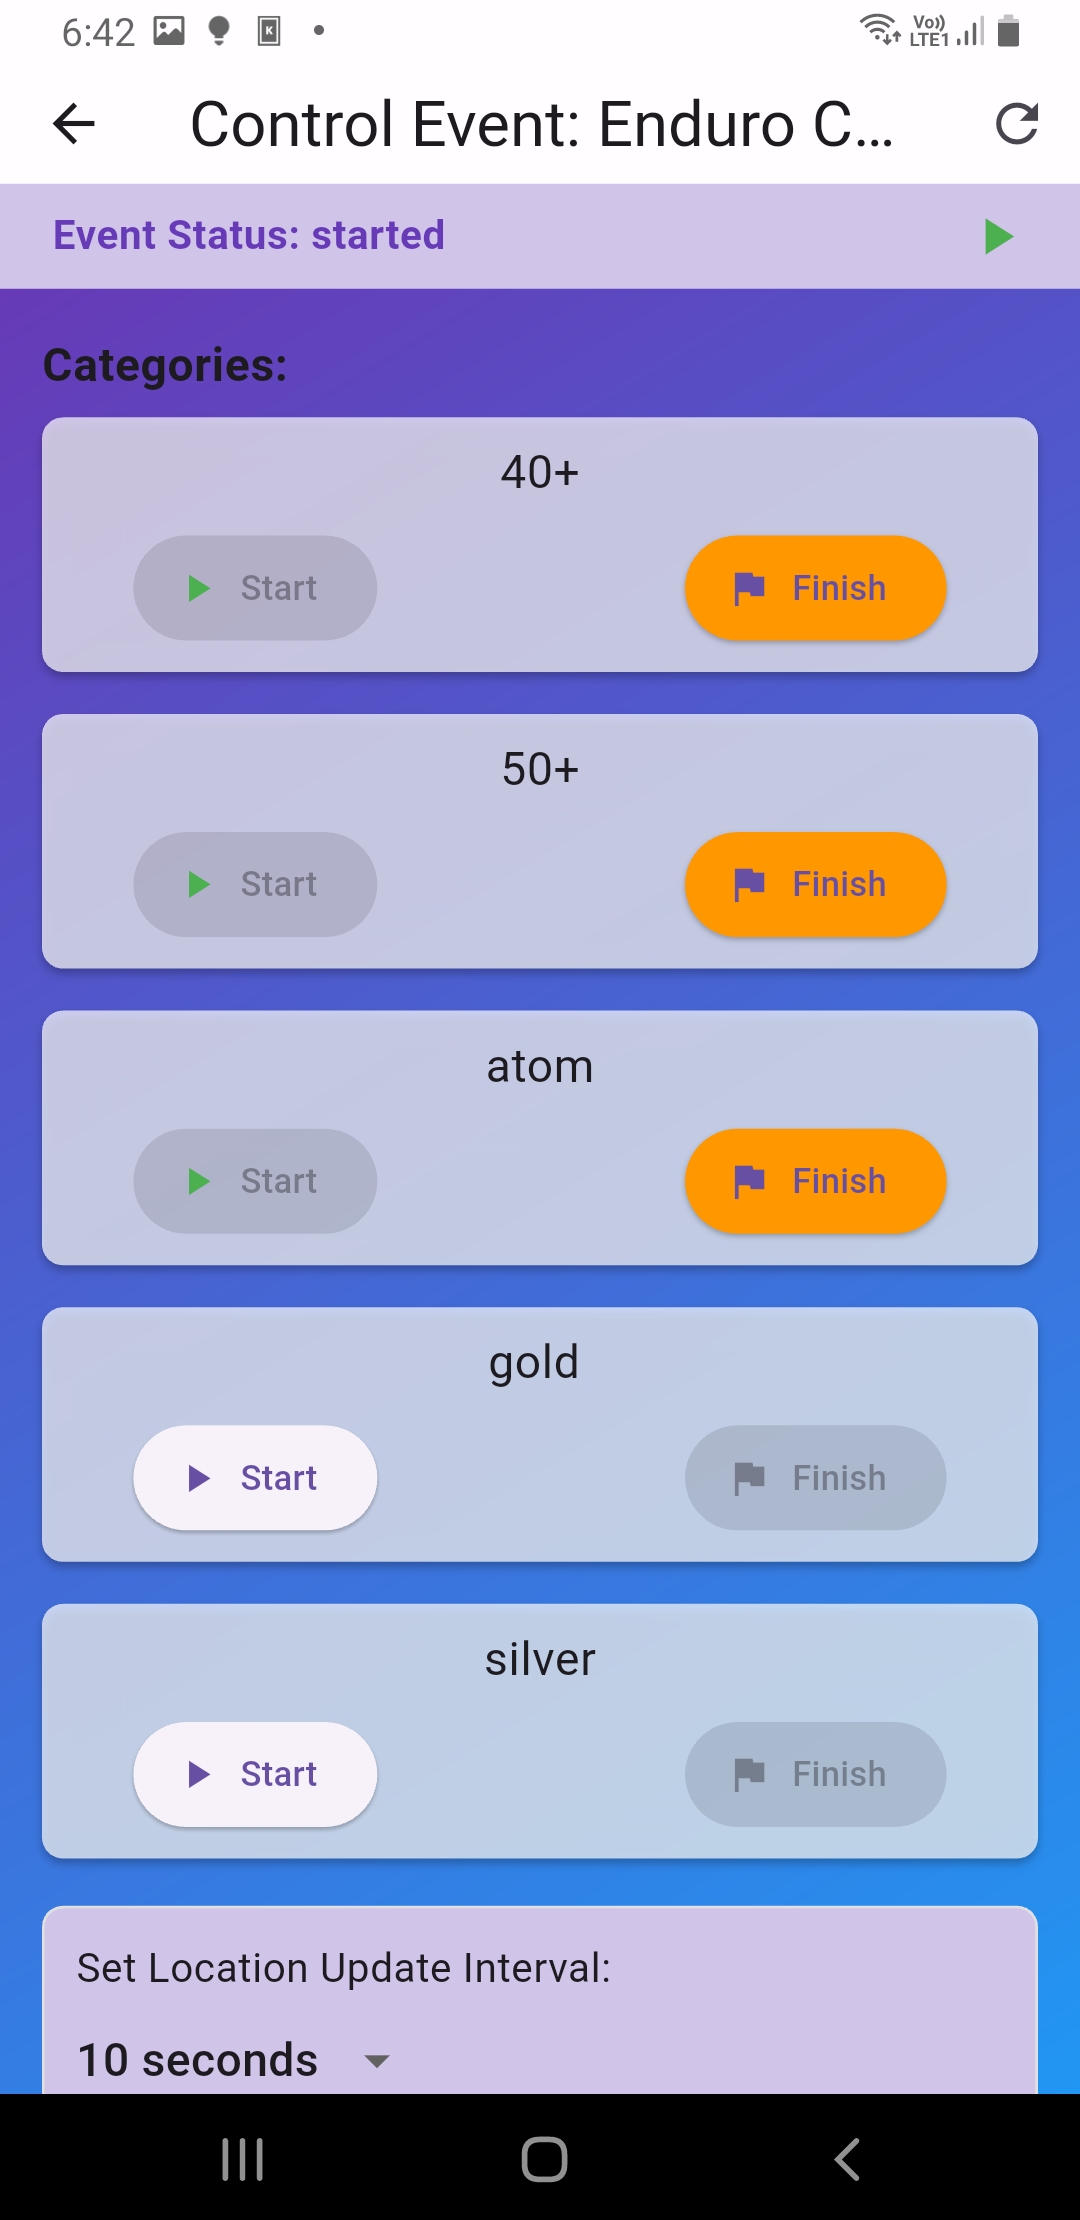
Control Event: Start/Finish for each category
Control Event: Start/Finish for each category(Screenshot_20260108-184214.jpg)
Racer list/status (search/filter)
Racer list/status (search/filter)(Screenshot_20260110-144151.jpg)
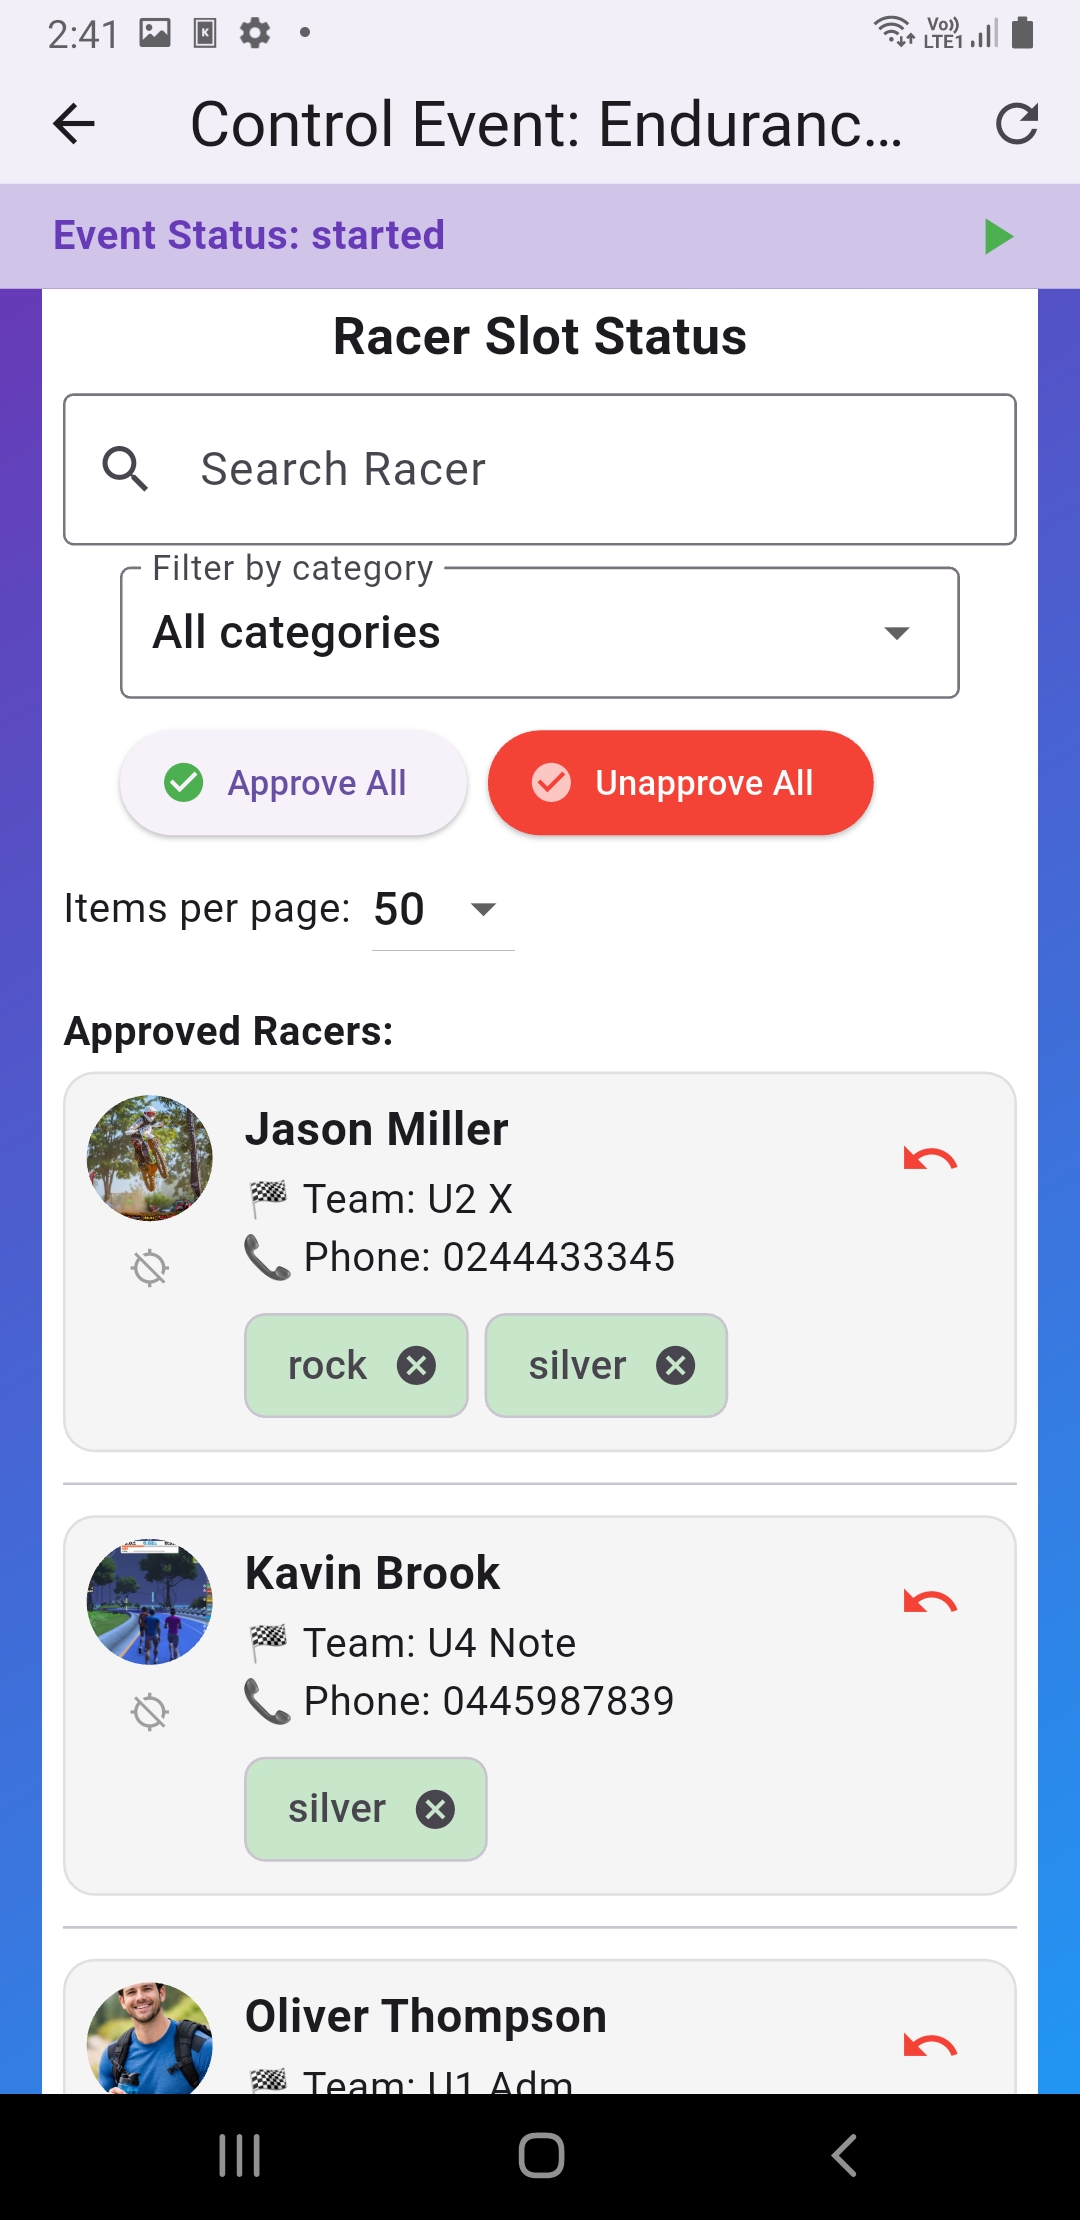
Control Event: Racer Slot Status / overview list
Control Event: Racer Slot Status / overview list(Screenshot_20260110-144216.jpg)
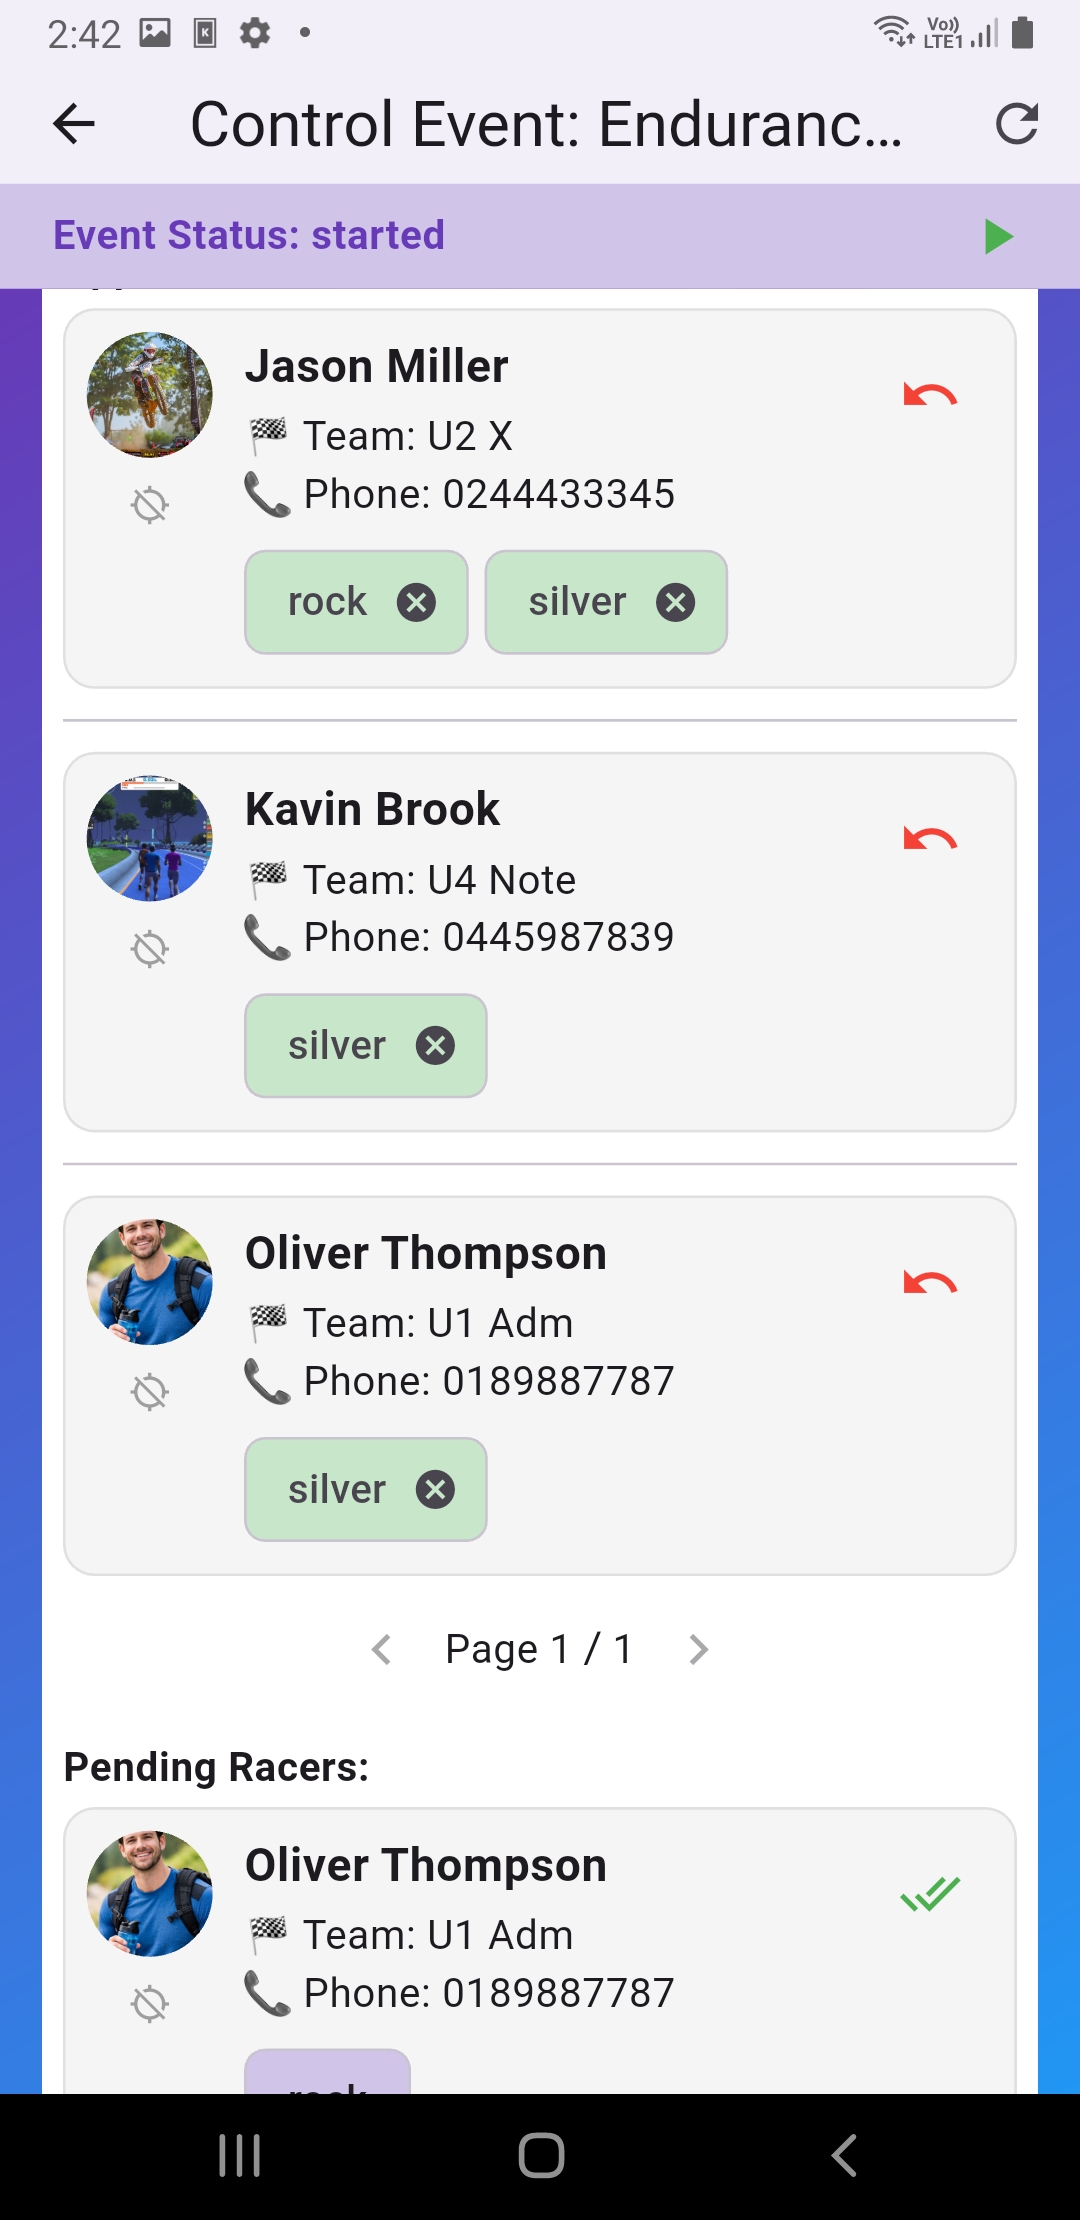
Control Event: participant list/status
Control Event: participant list/status(Screenshot_20260110-144221.jpg)
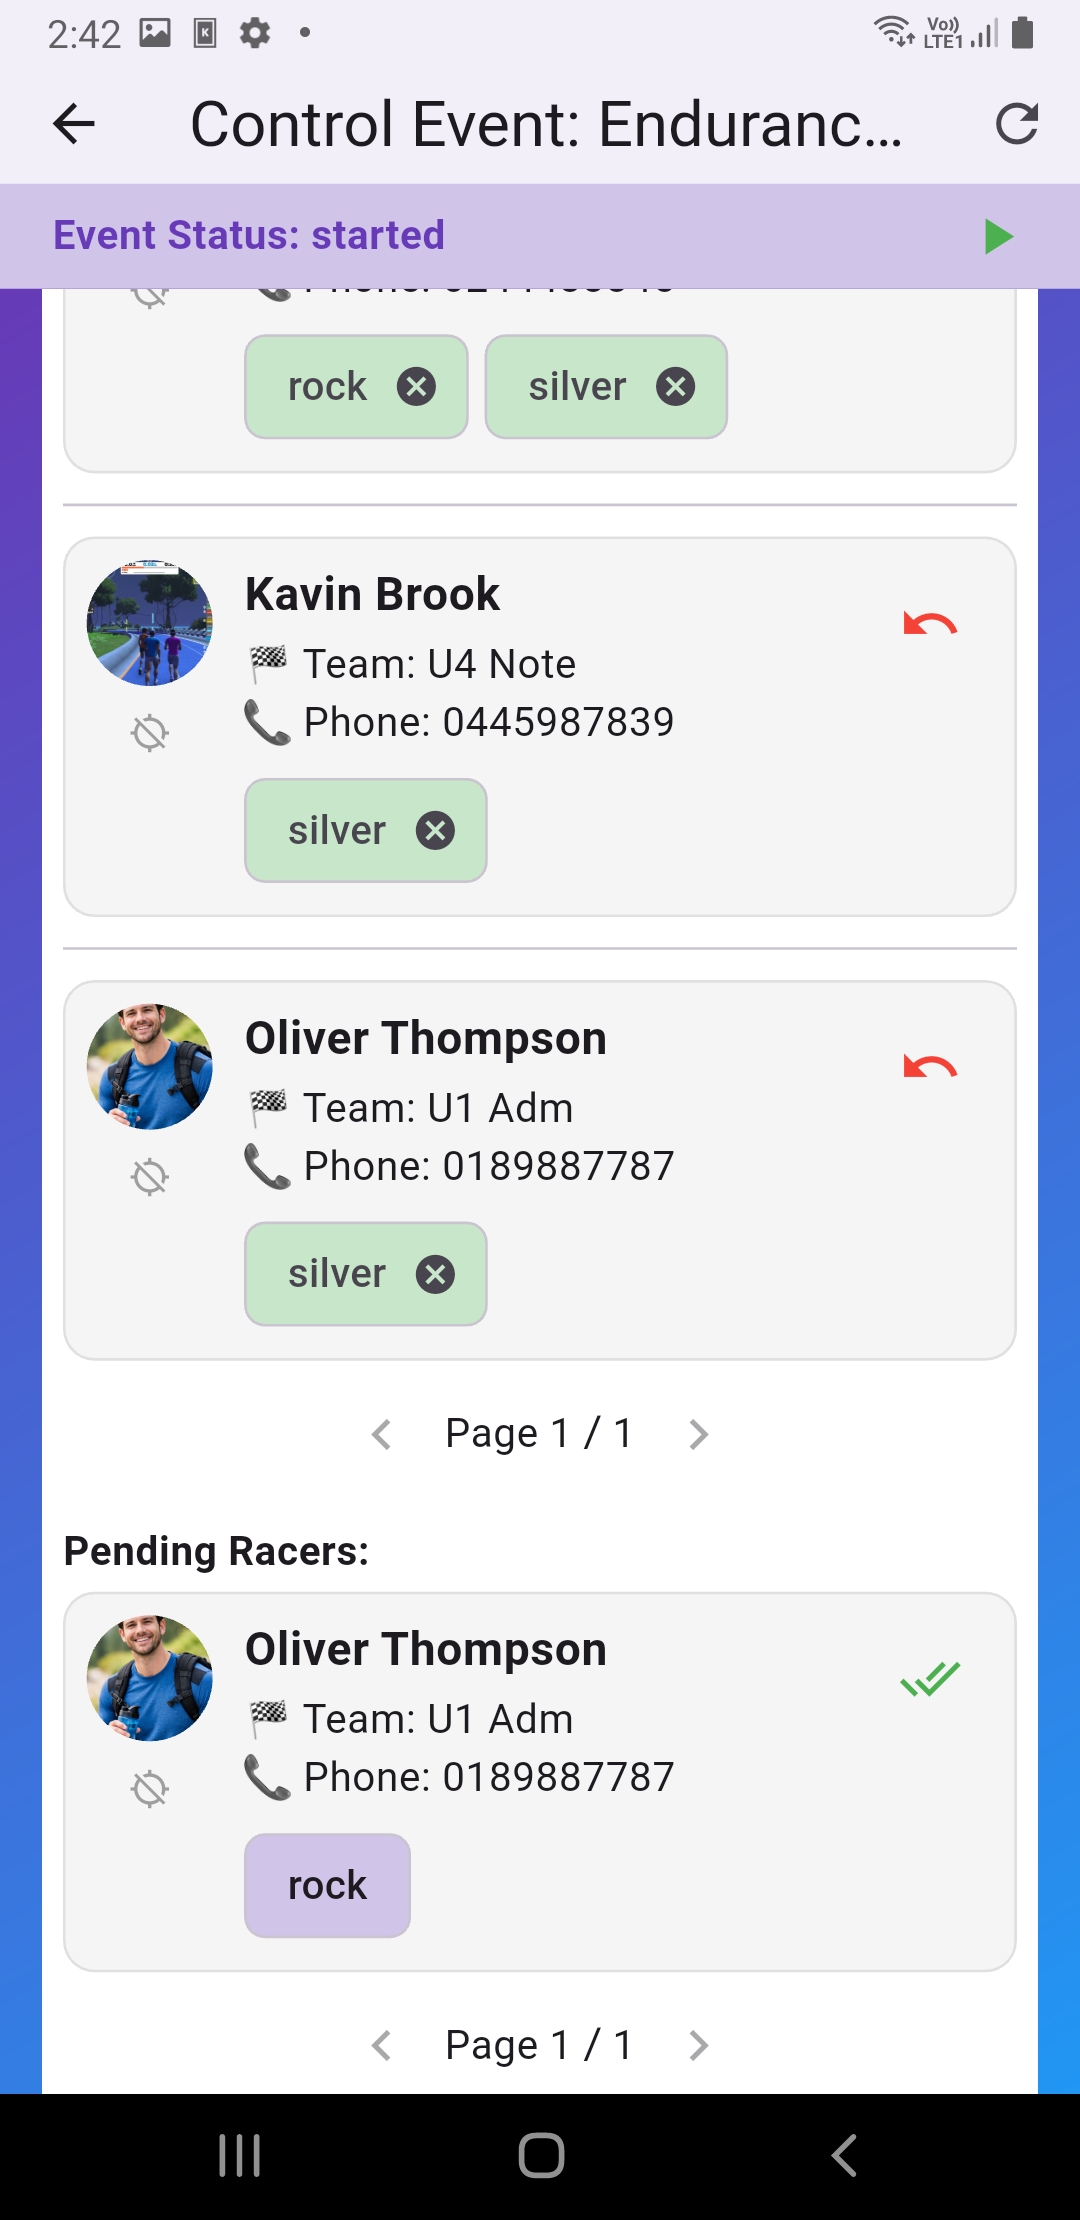
Participant list/status: approved or pending
Participant list/status: approved or pending(Screenshot_20260110-145304.jpg)
Participant list/status: approved or pending
Participant list/status: approved or pending(Screenshot_20260110-145311.jpg)
Large events: Use the "Racer Slot Status" page + search to manage big lists faster

3) Racer guide

3.1 Register + Enable Tracking

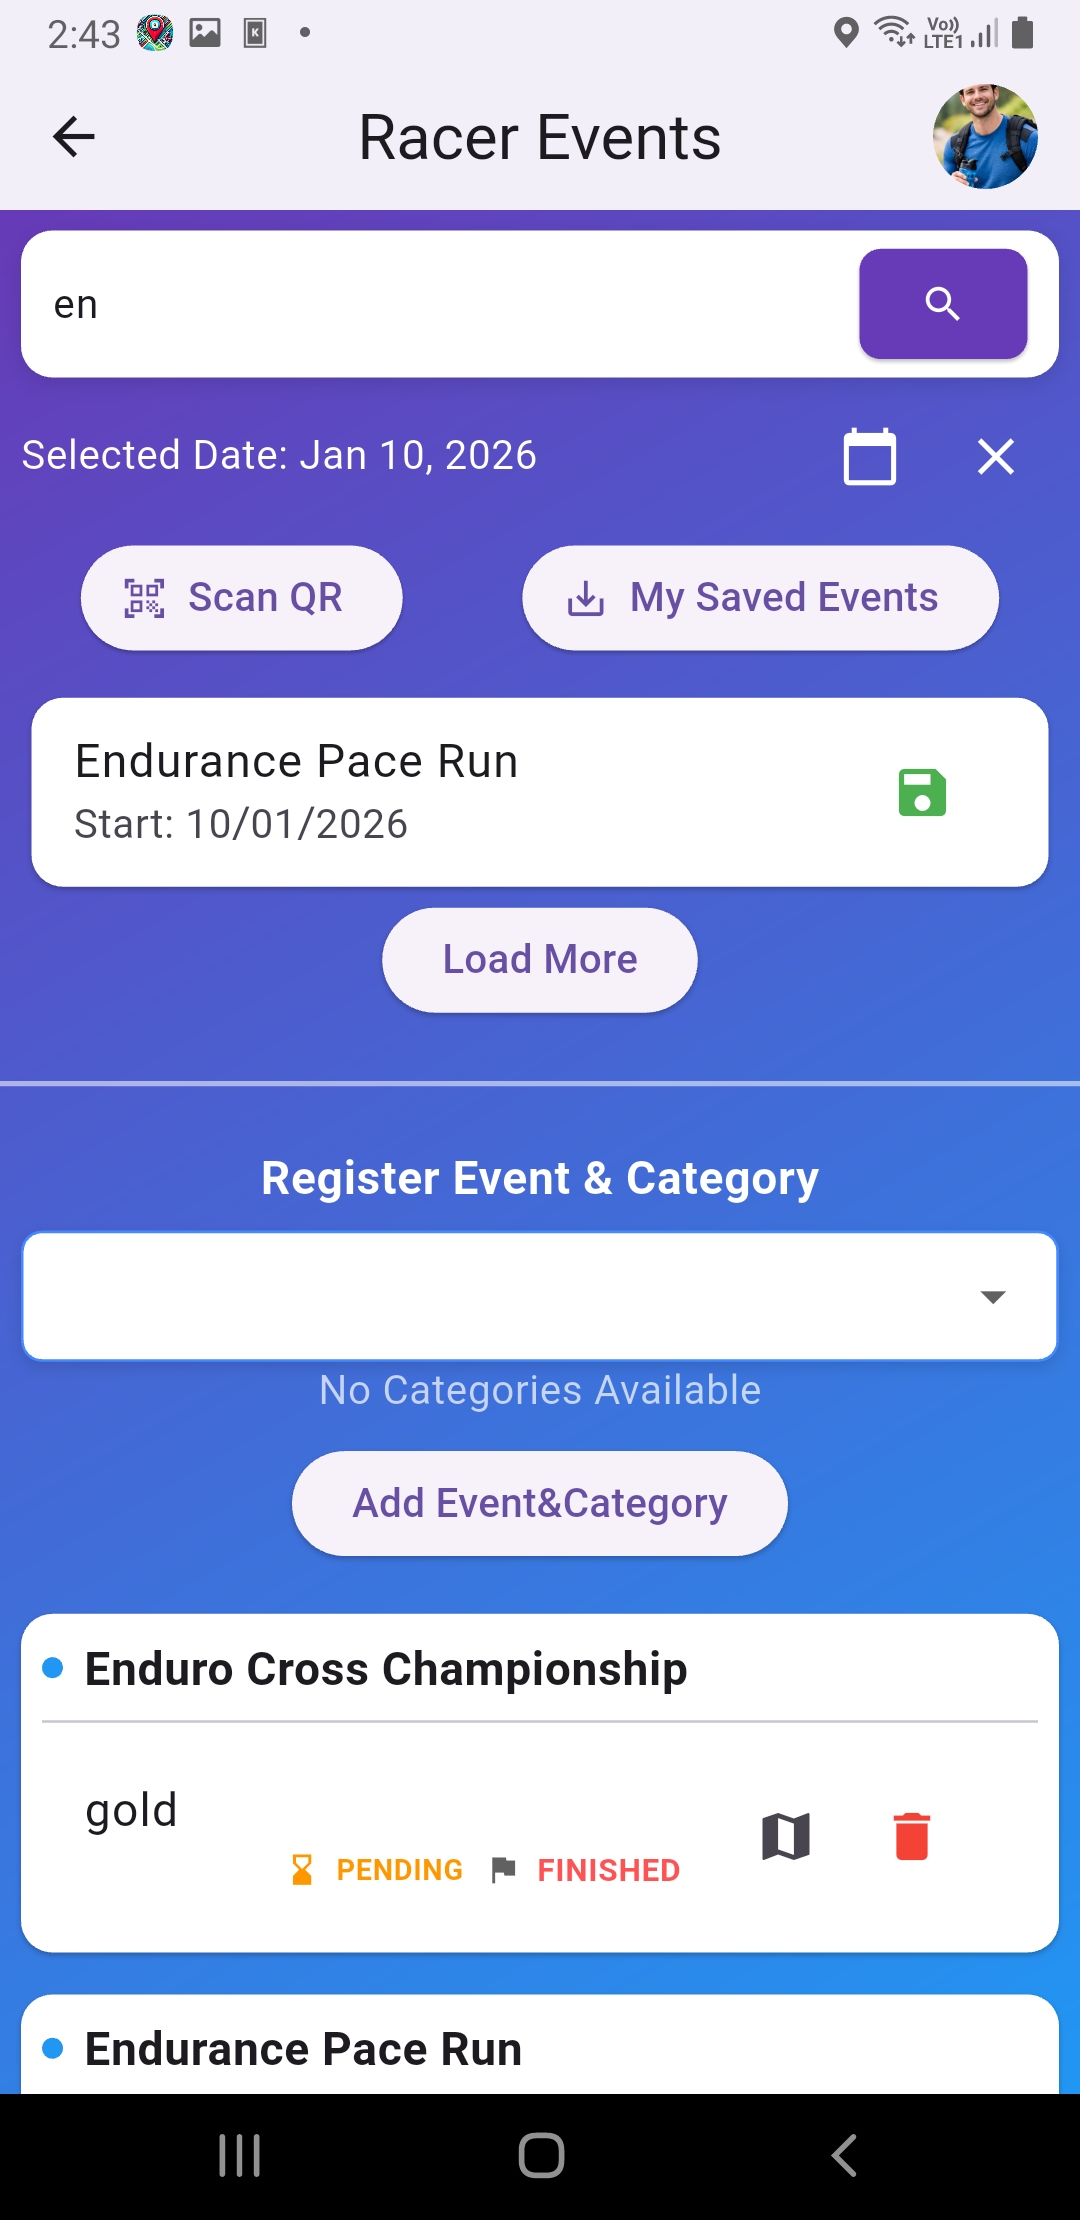
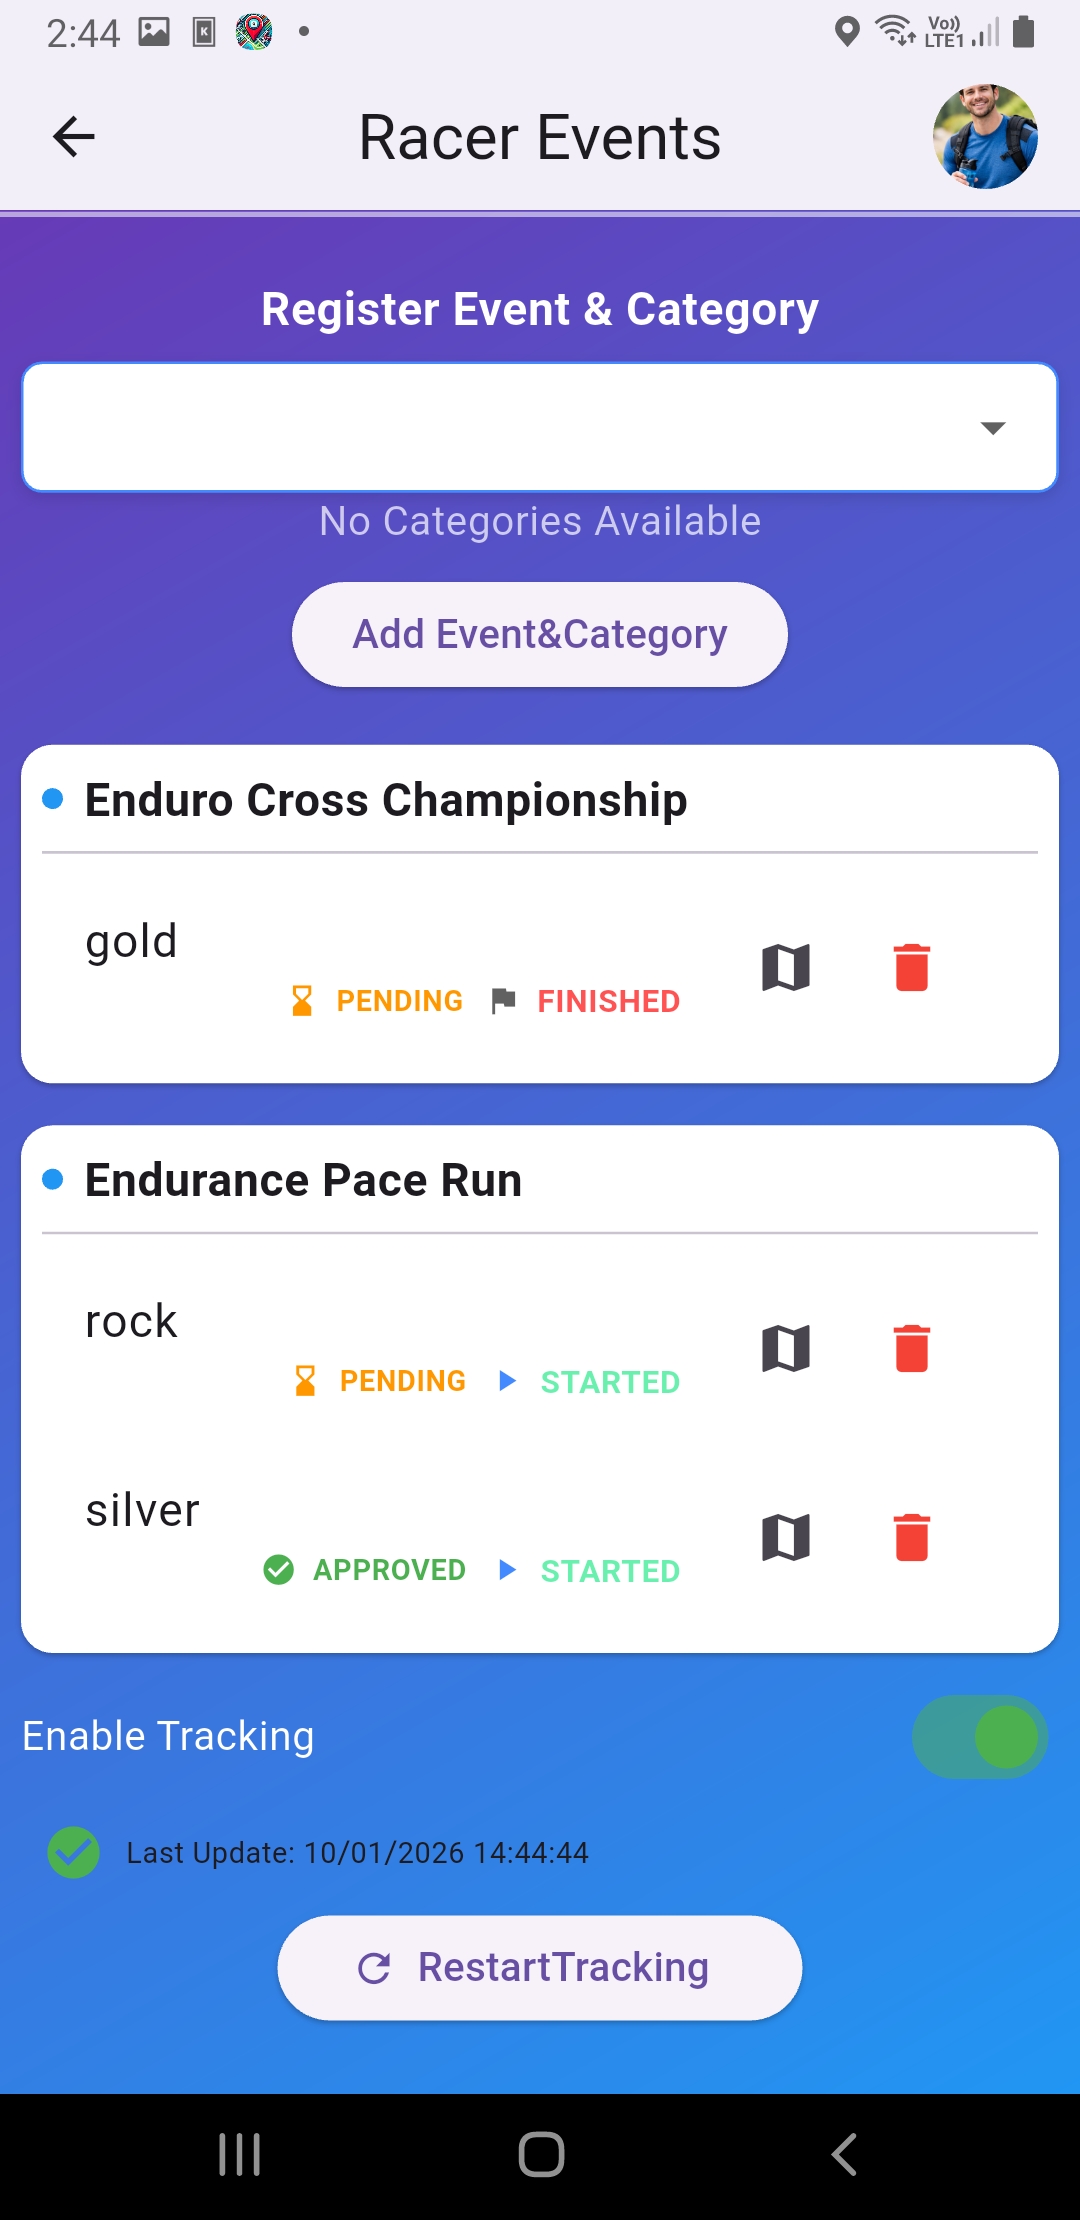
  1. Go to Racer Events
  2. Select an event -> choose the category you race in
  3. Allow Location -> turn on Enable Tracking
  4. During the race: avoid closing the app or turning off internet
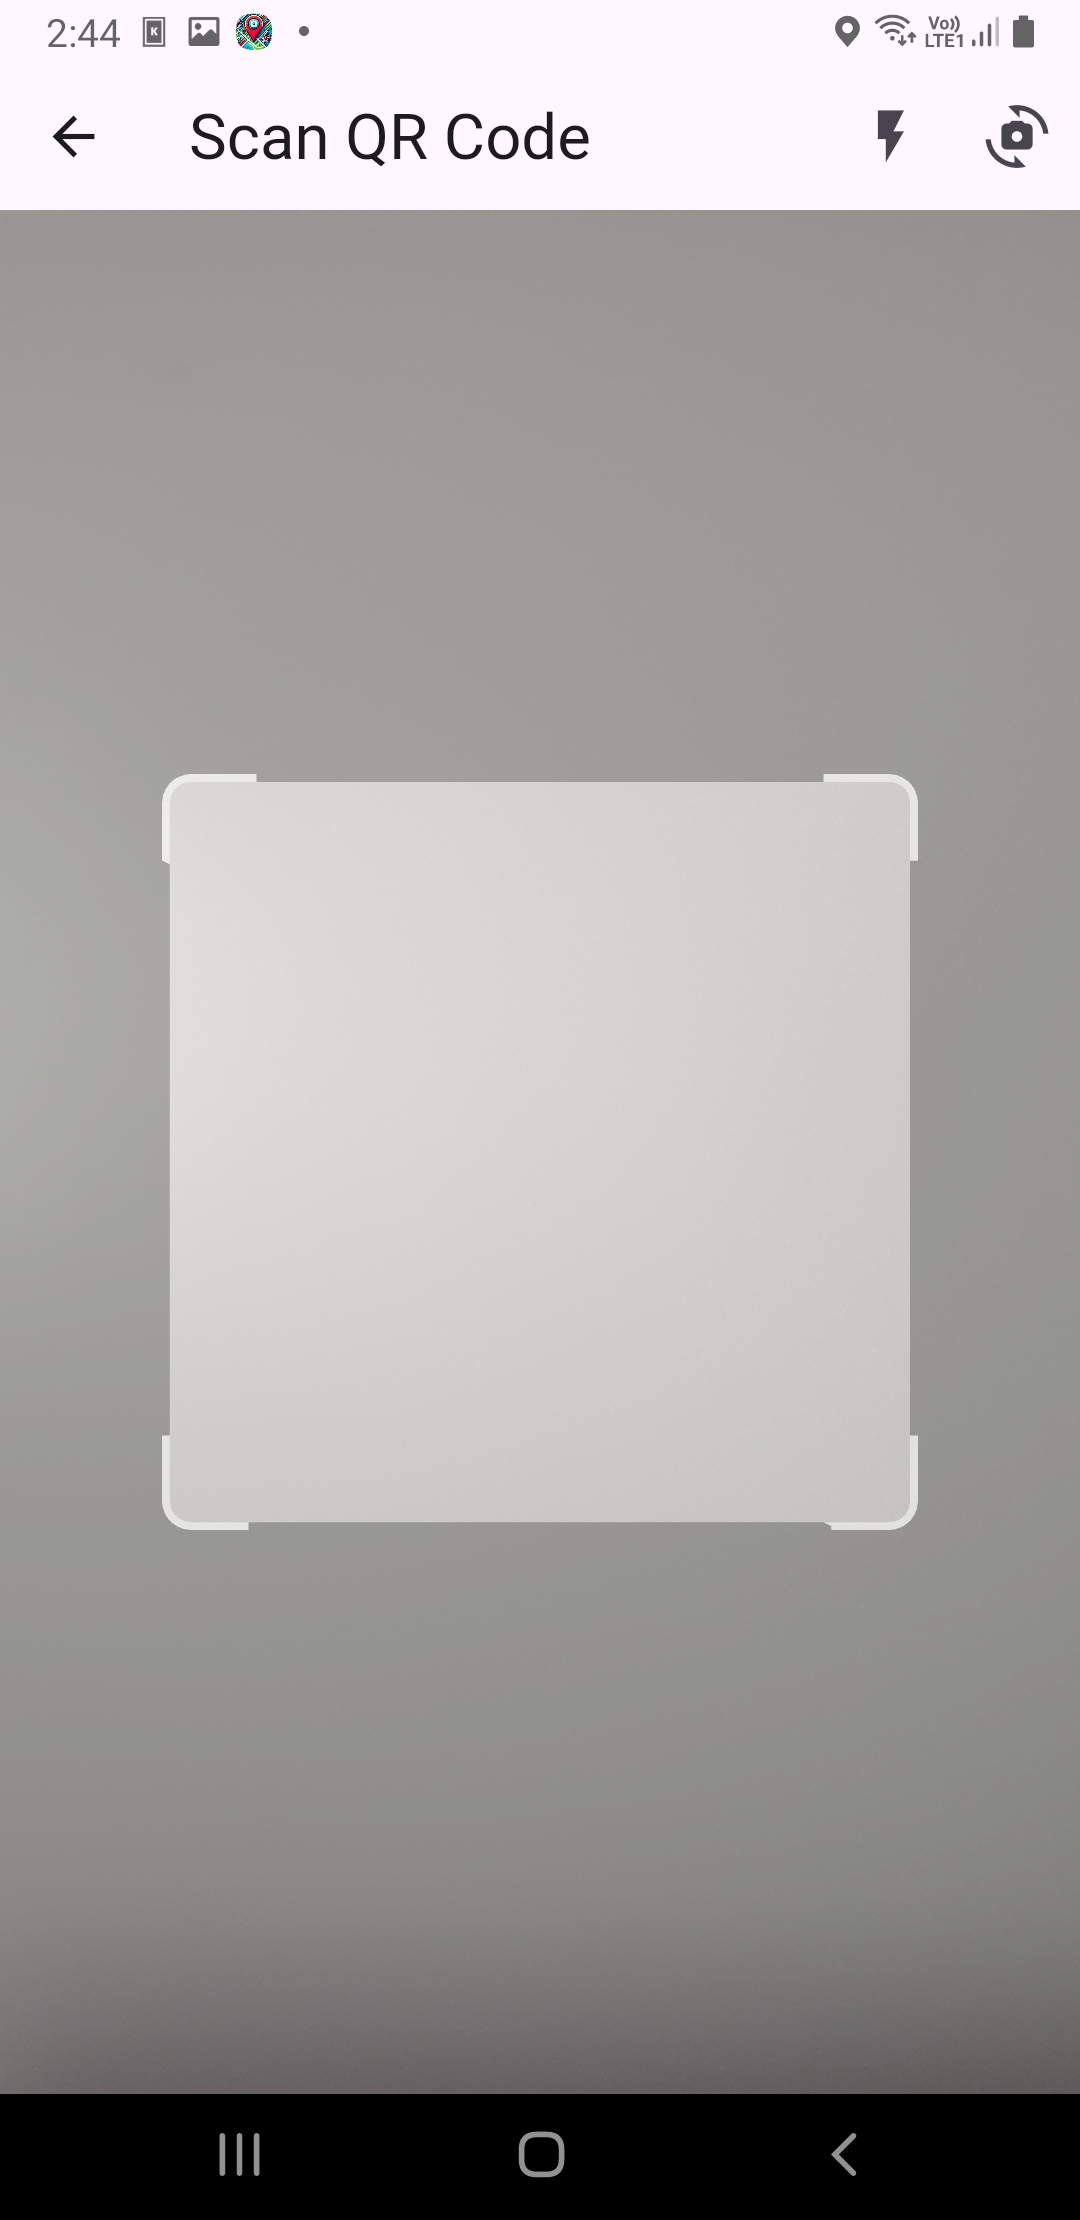
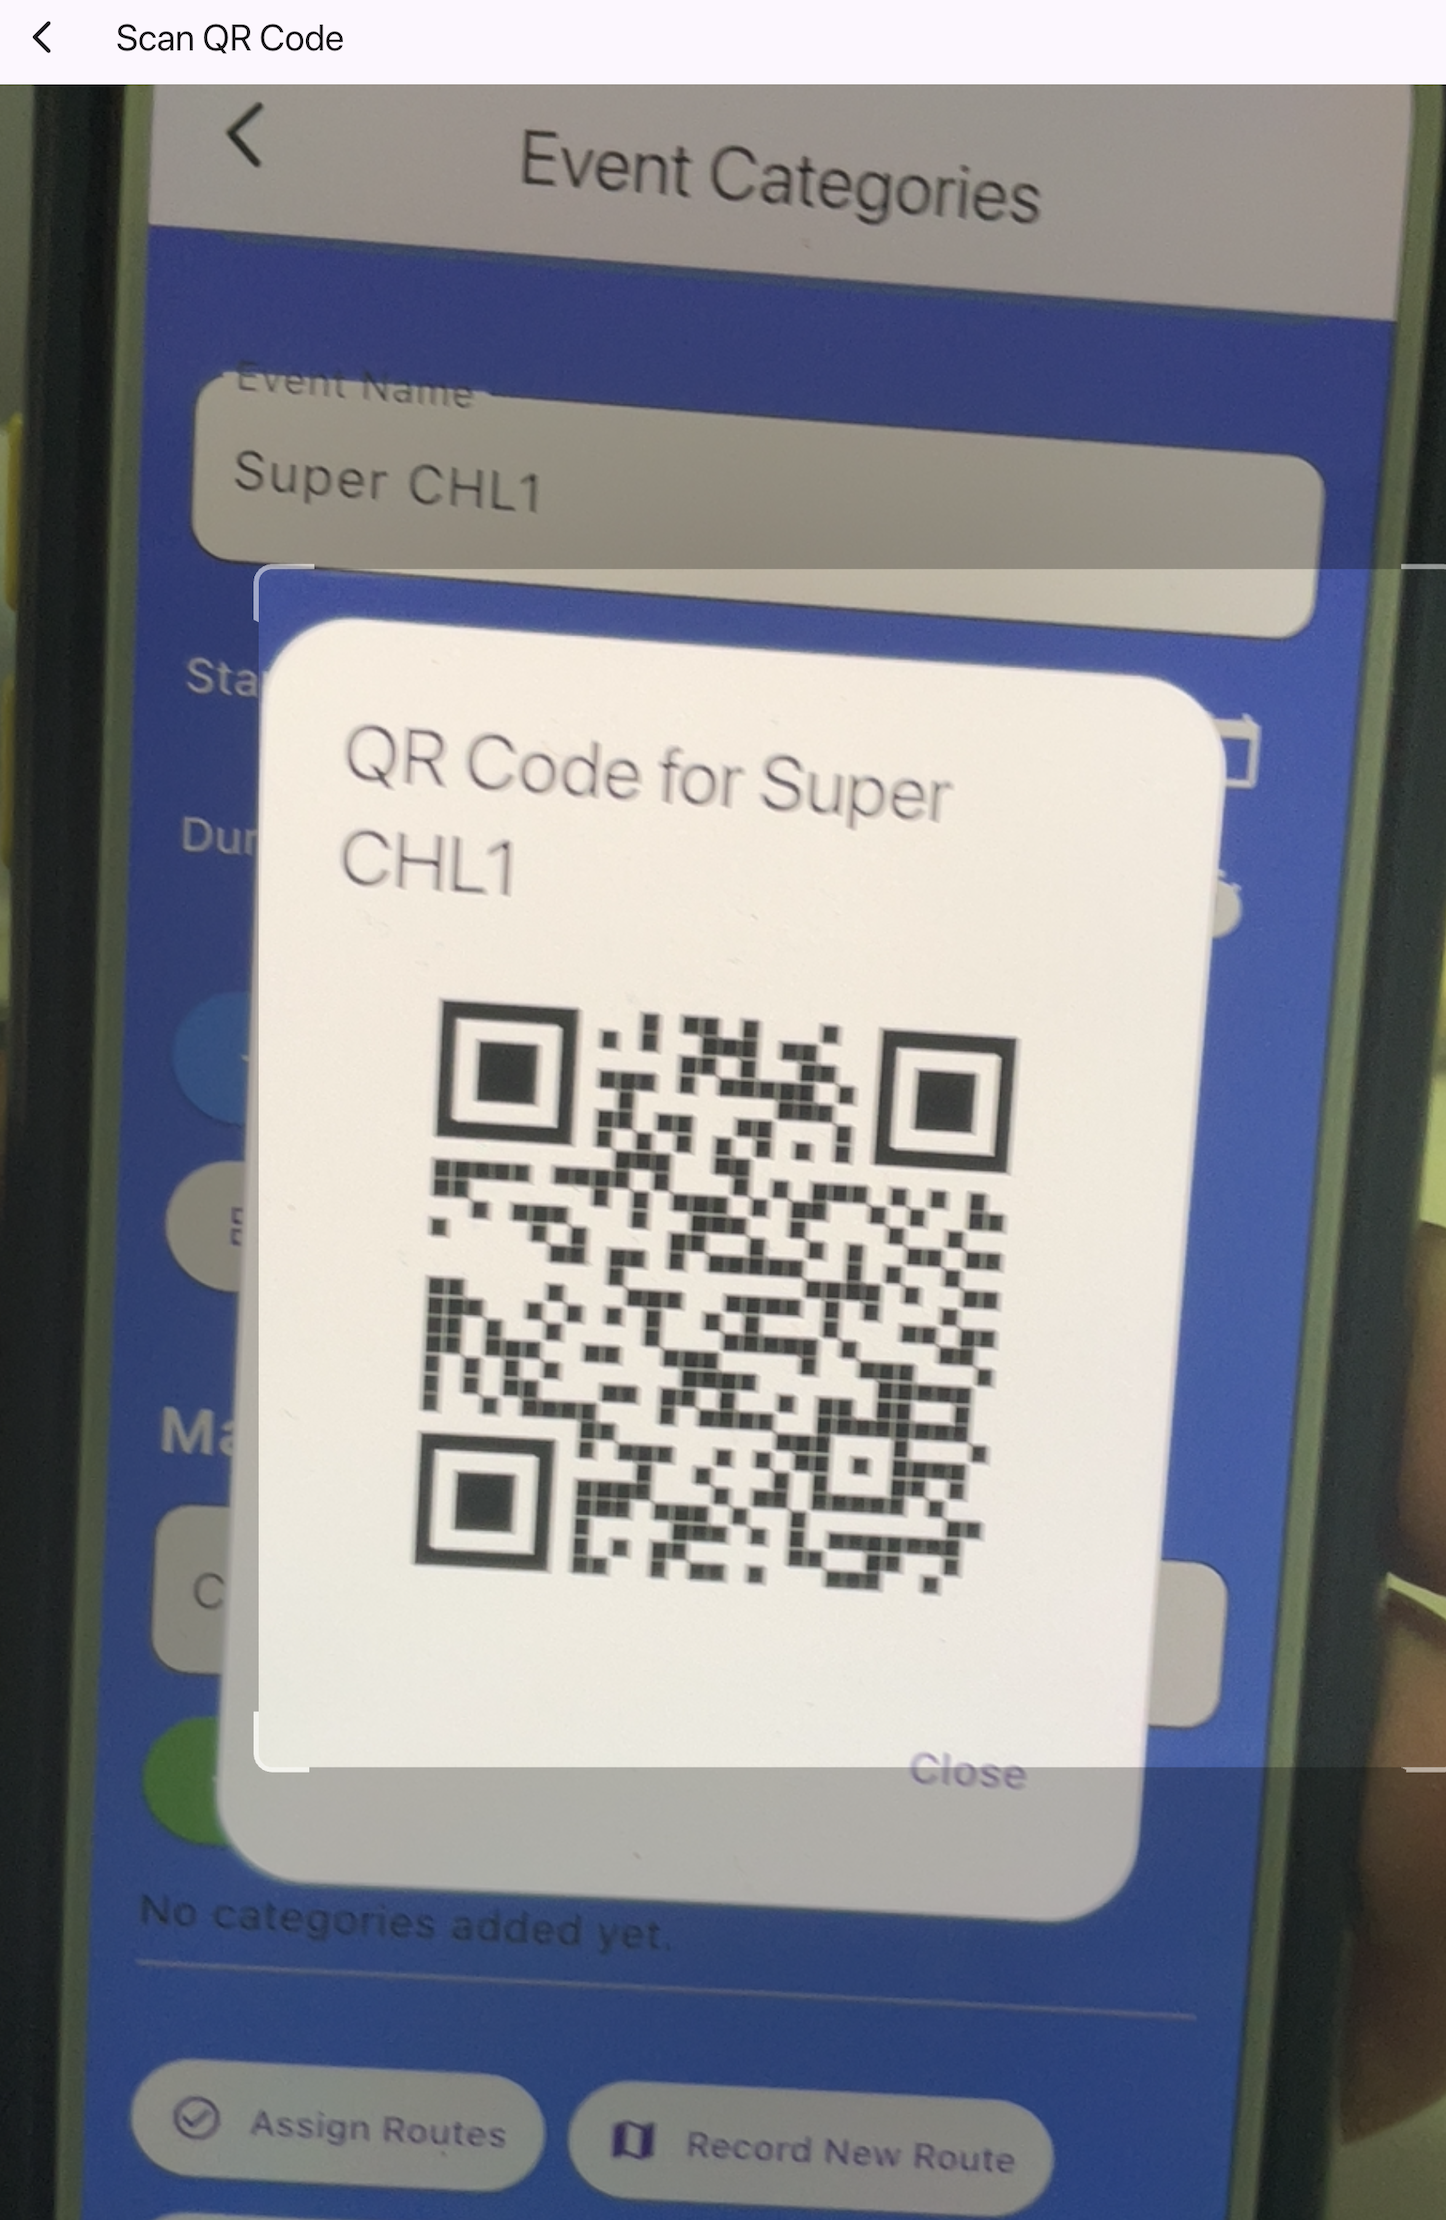
Scan QR Code: scan to enter event/category
Scan QR Code: scan to enter event/category(Screenshot_20260110-144434.jpg)
Scan QR Code: scan to enter event/category
Scan QR Code: scan to enter event/category(IMG_0486.PNG)
Scan QR Code: scan to enter event/category
Scan QR Code: scan to enter event/category(3.jpg)
Racer Events: register + enable tracking
Racer Events: register + enable tracking(ssss7.jpg)
Racer Events: register + enable tracking
Racer Events: register + enable tracking(Screenshot_20260110-144450.jpg)
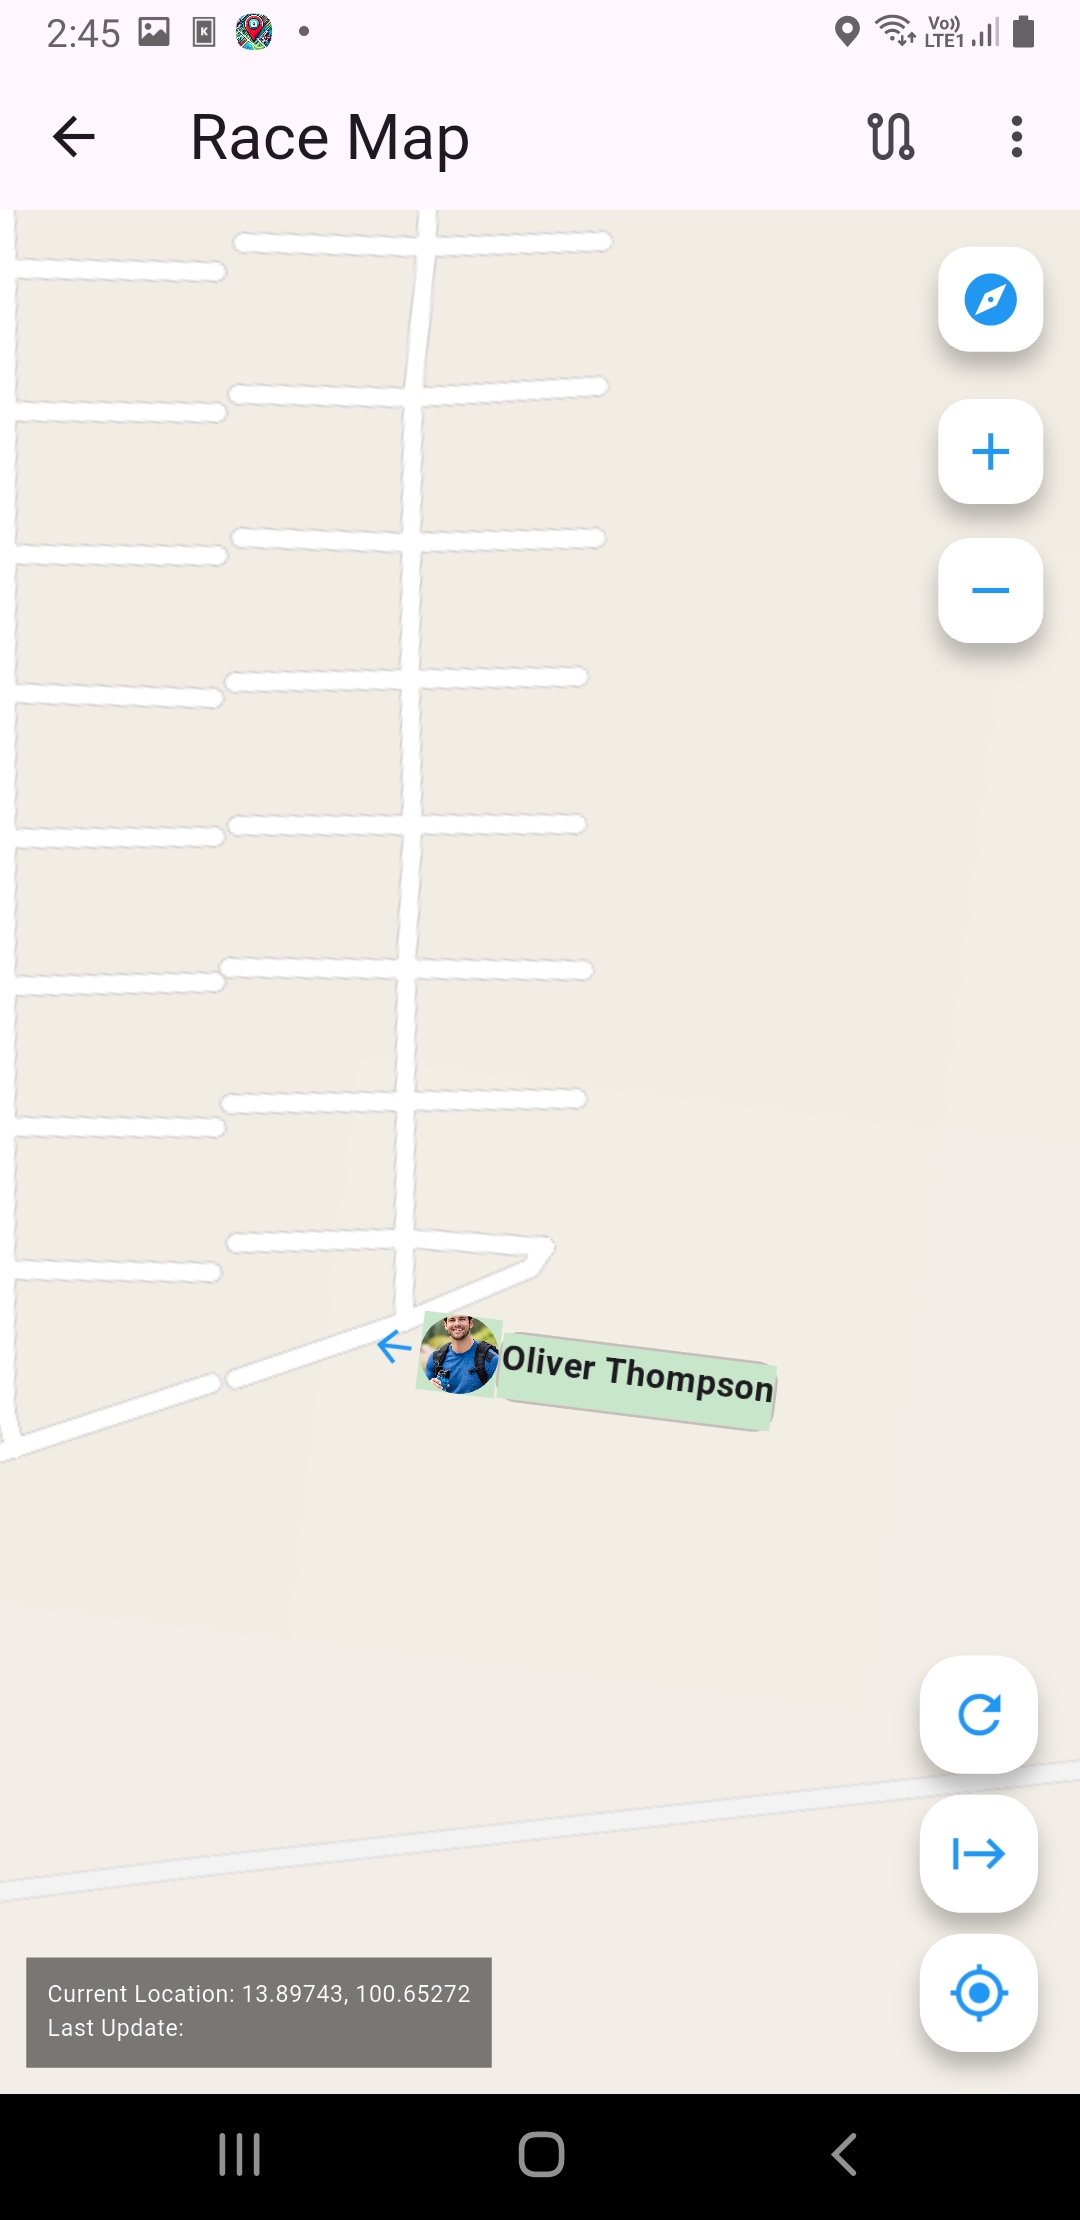
View your own position on the map
View your own position on the map(Screenshot_20260110-144519.jpg)
Tip: Fully charge + high GPS accuracy helps keep tracking stable

4) Viewer guide

4.1 Enter an event

  1. Enter Viewer mode
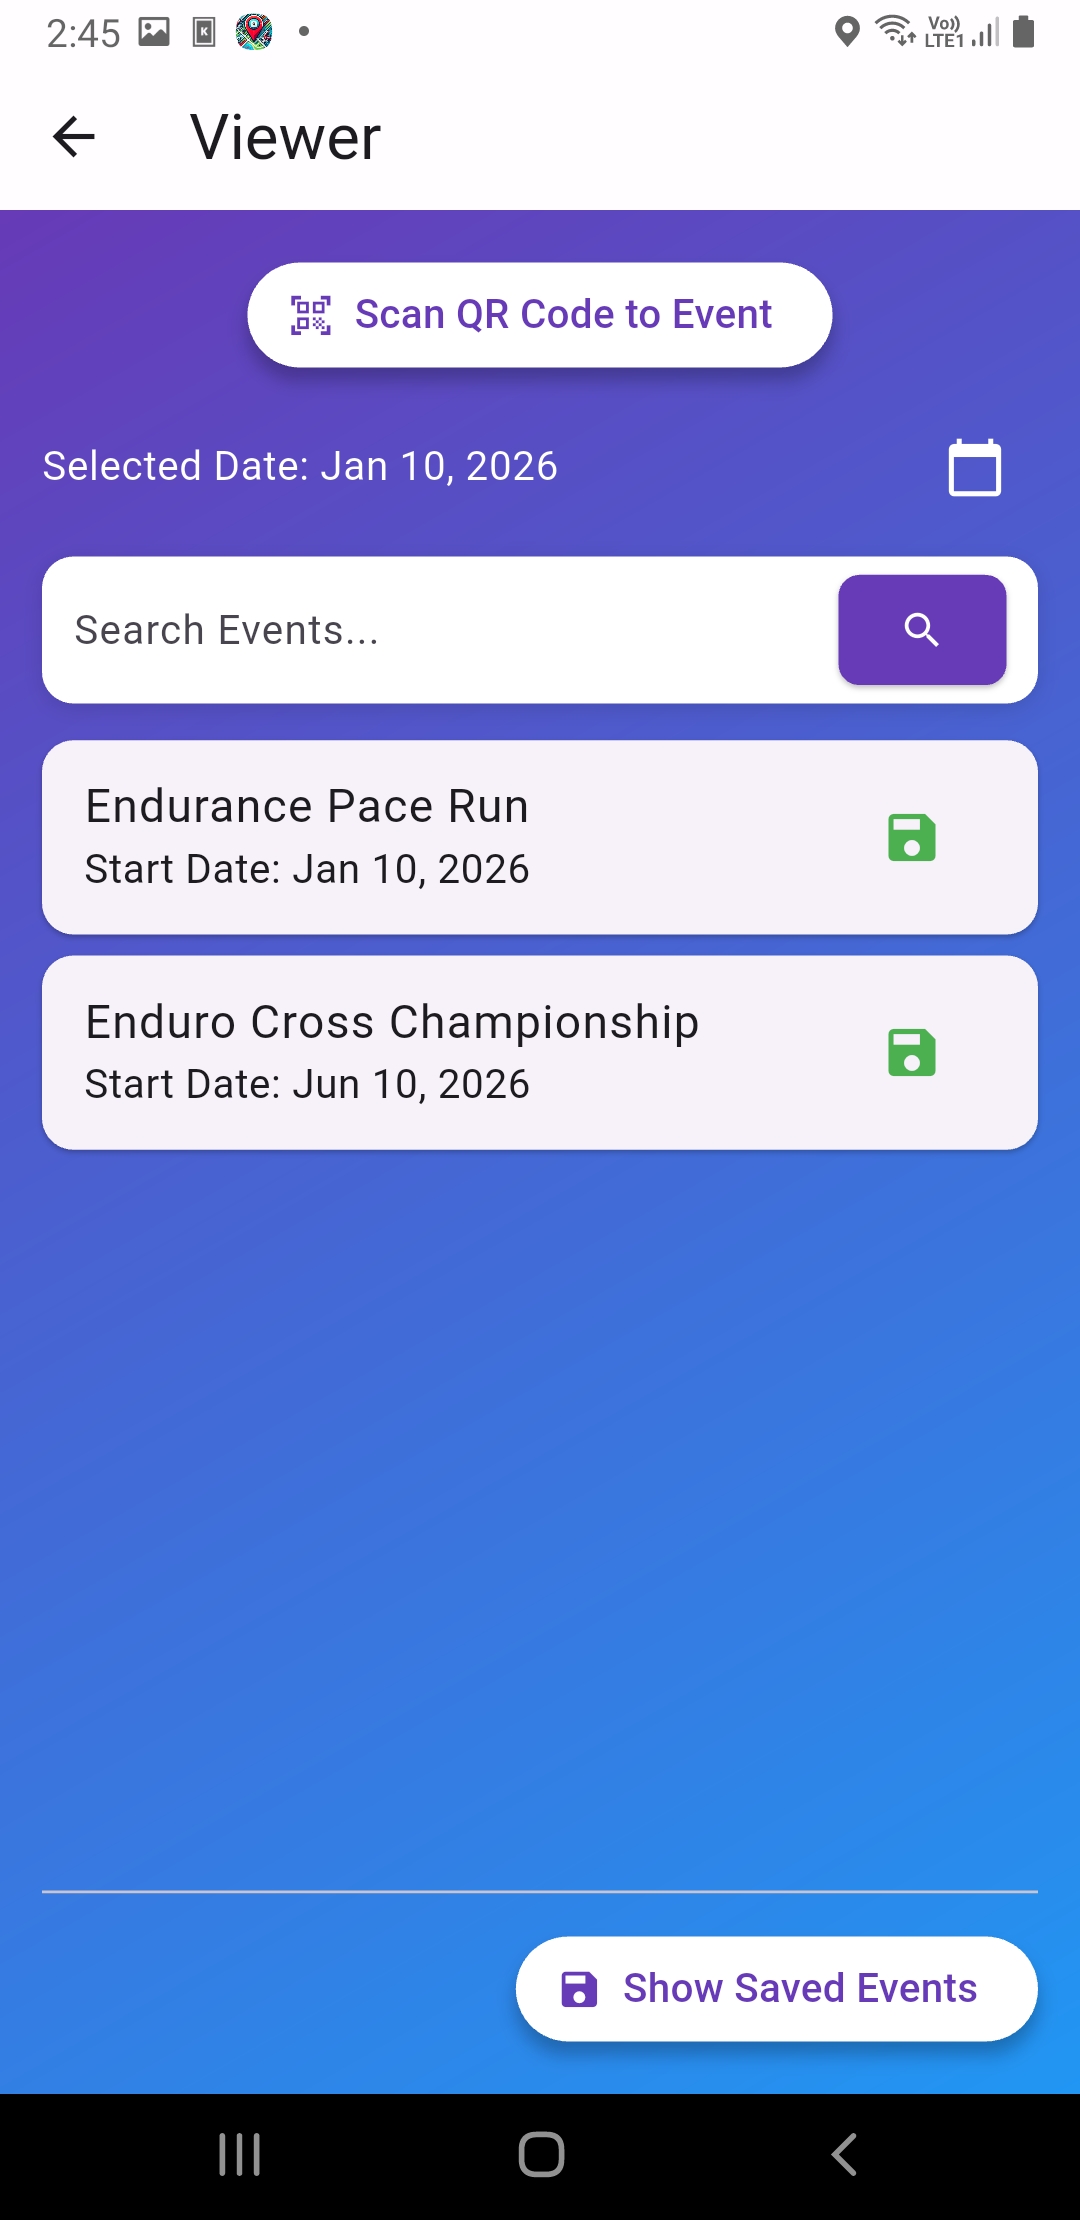
  2. Select an event from the list, or use Scan QR Code
  3. Select the Category you want to view
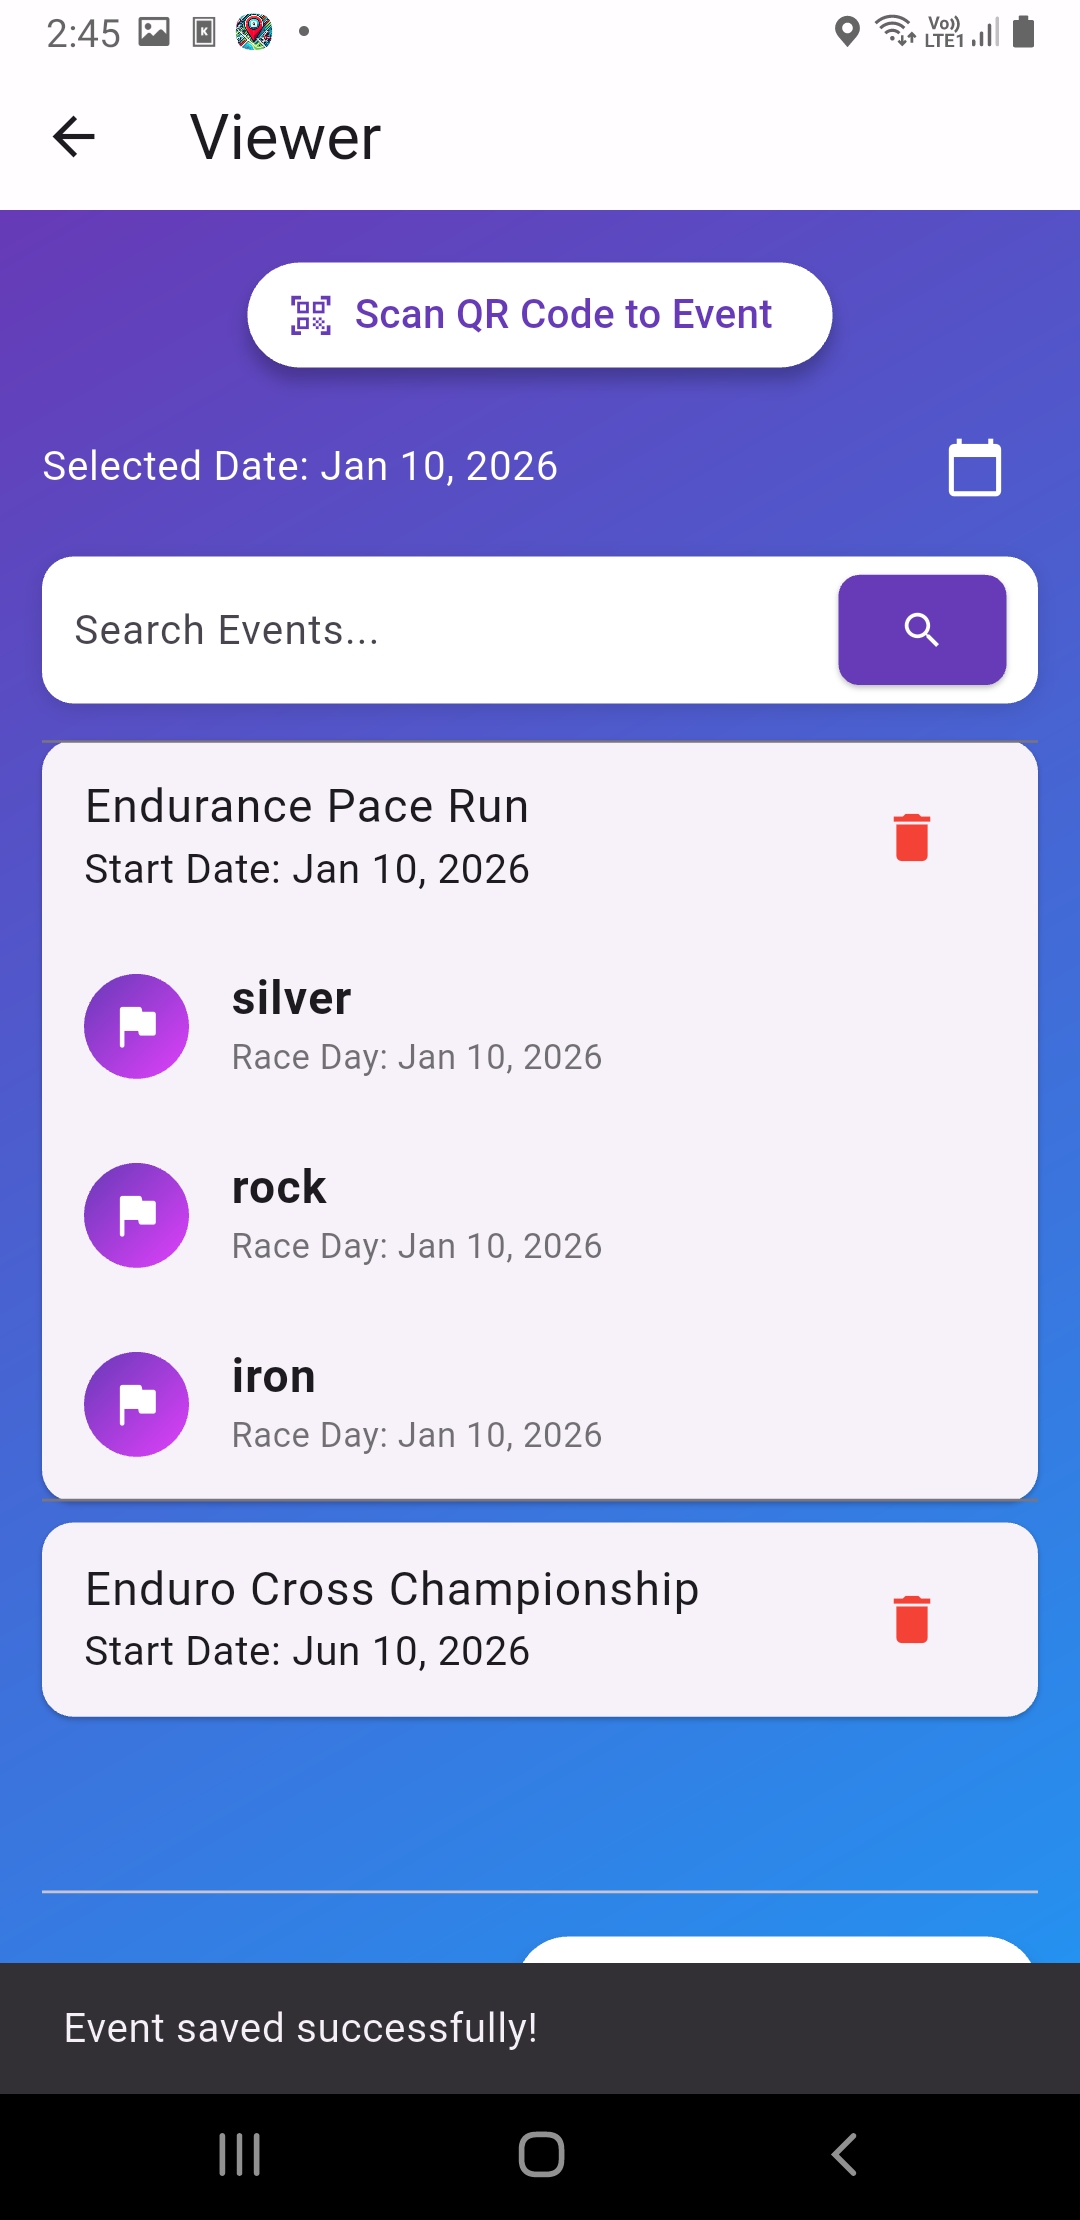
Search events by name and date
Search events by name and date(Screenshot_20260110-144542.jpg)
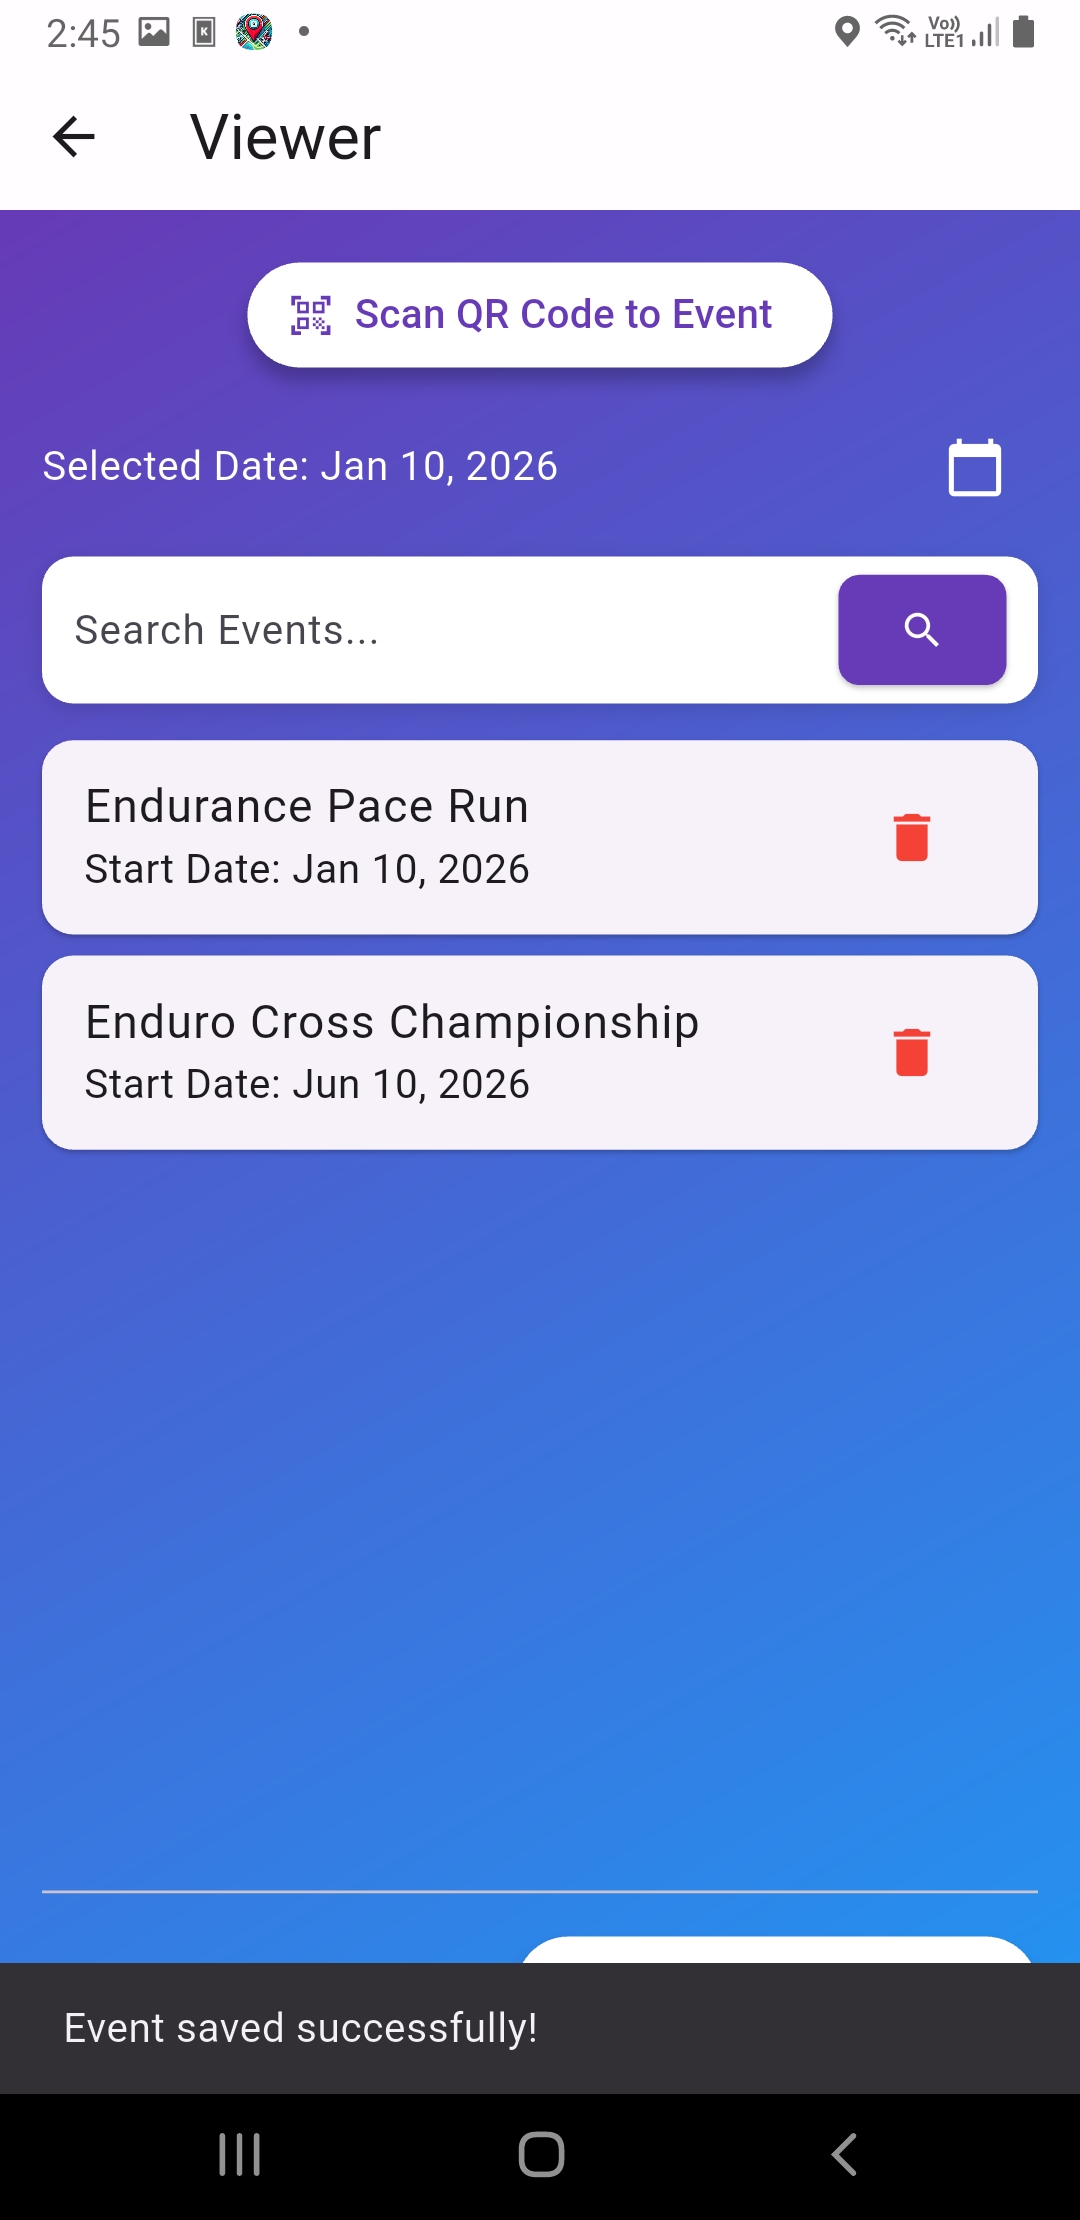
Save event list for quick access
Save event list for quick access(Screenshot_20260110-144550.jpg)
Select a category from the event
Select a category from the event to view on the map(Screenshot_20260110-144555.jpg)
Scan QR Code: scan instead of searching
Scan QR Code: scan instead of searching(3.jpg)
Scan instead of searching
Scan QR Code: scan instead of searching(IMG_0486.PNG)
Concept: Viewers pick racers by slot so the map stays light and smooth

4.2 Viewer map + choose racers

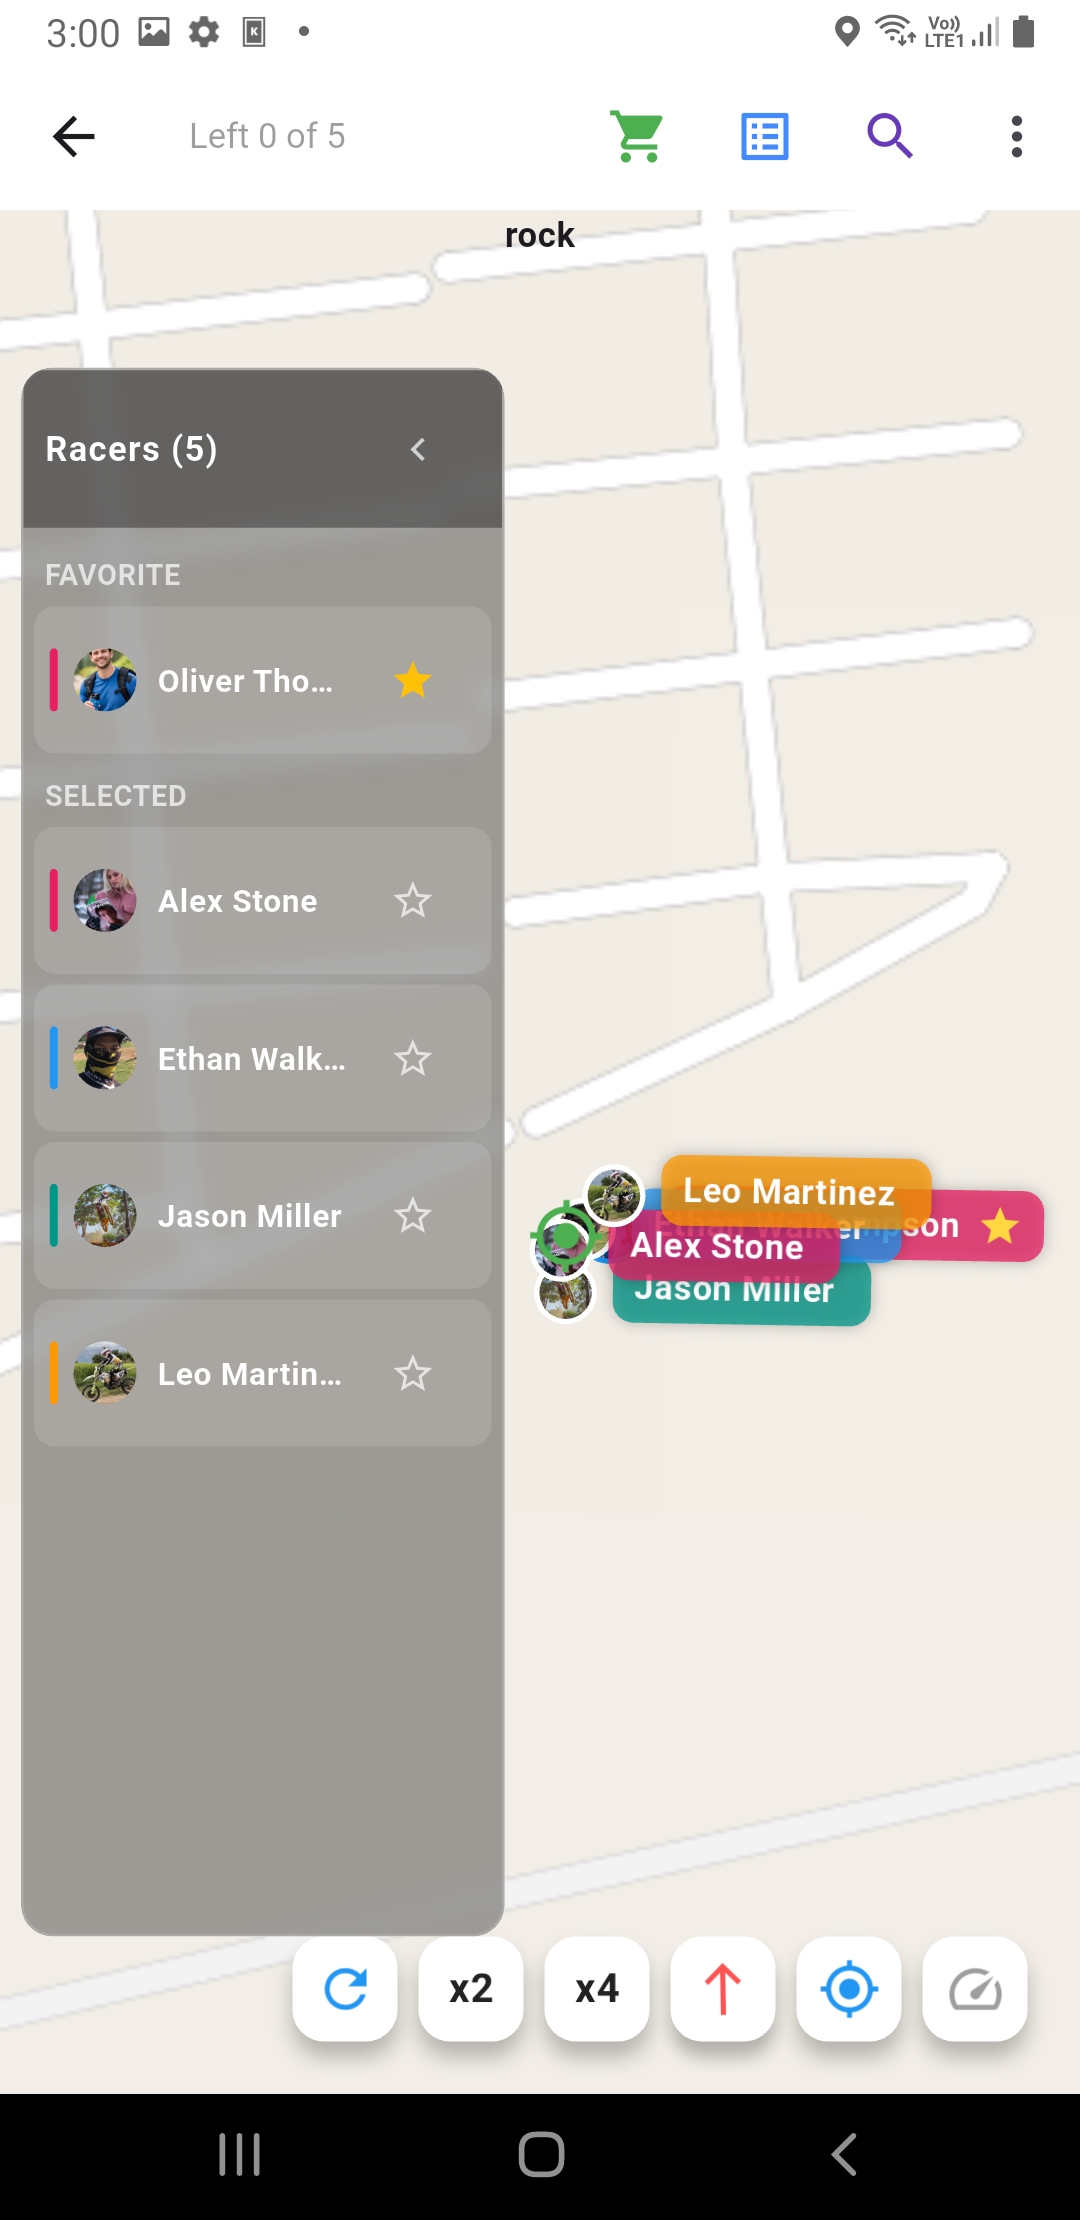
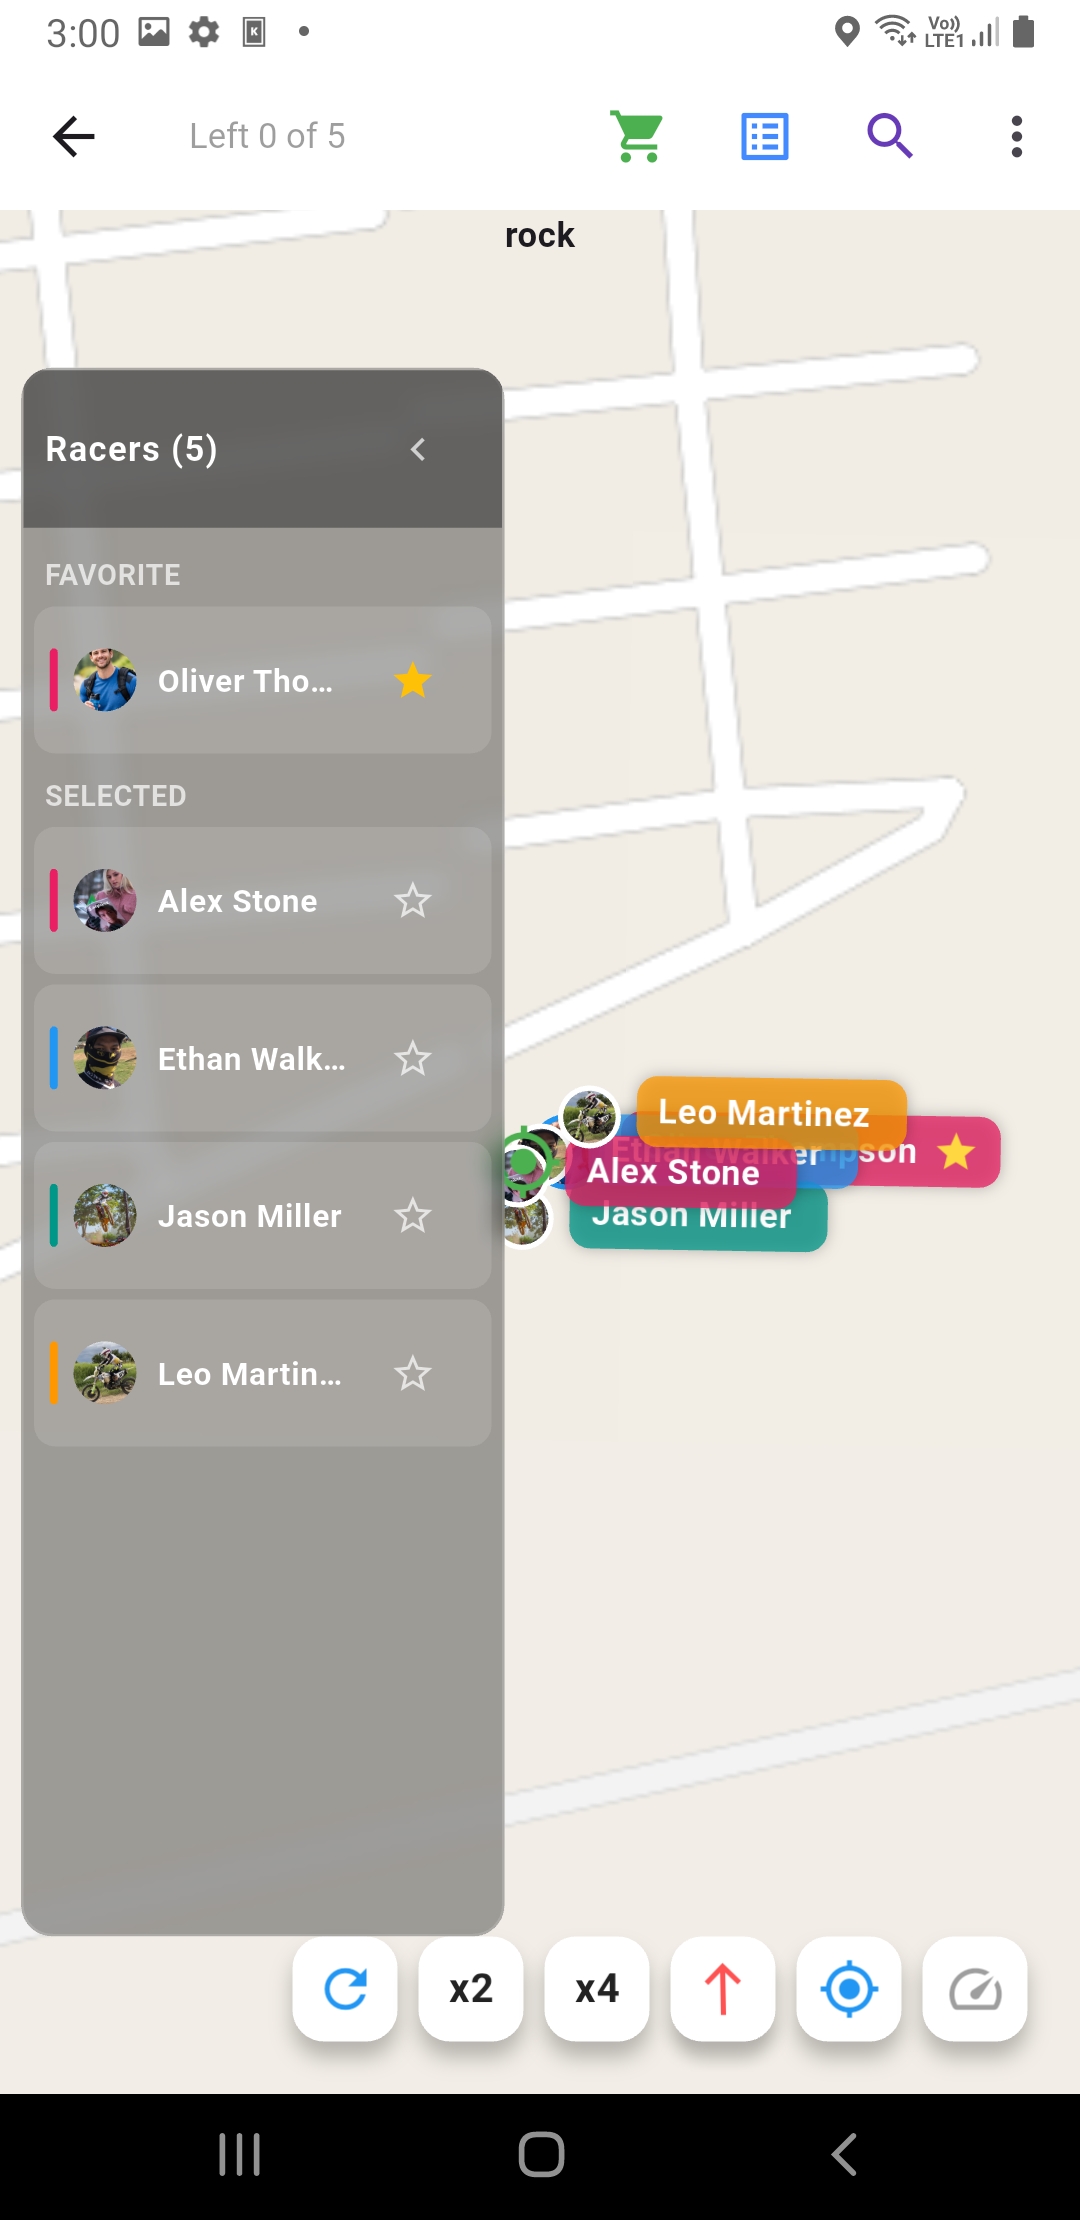
  1. Open the Racers panel -> choose racers to display on the map
  2. Use search to select faster
  3. Confirm -> see locations in real time
  4. Tap a name/pin to focus a racer (per UI)
Select racers (use slots) + search + confirm
Select racers (use slots) + search + confirm(Screenshot_20260110-150550.jpg)
Show selected racers on the map
Show selected racers on the map(Screenshot_20260110-150015.jpg)
Favorite racers you want to follow
Favorite racers you want to follow(Screenshot_20260110-150022.jpg)
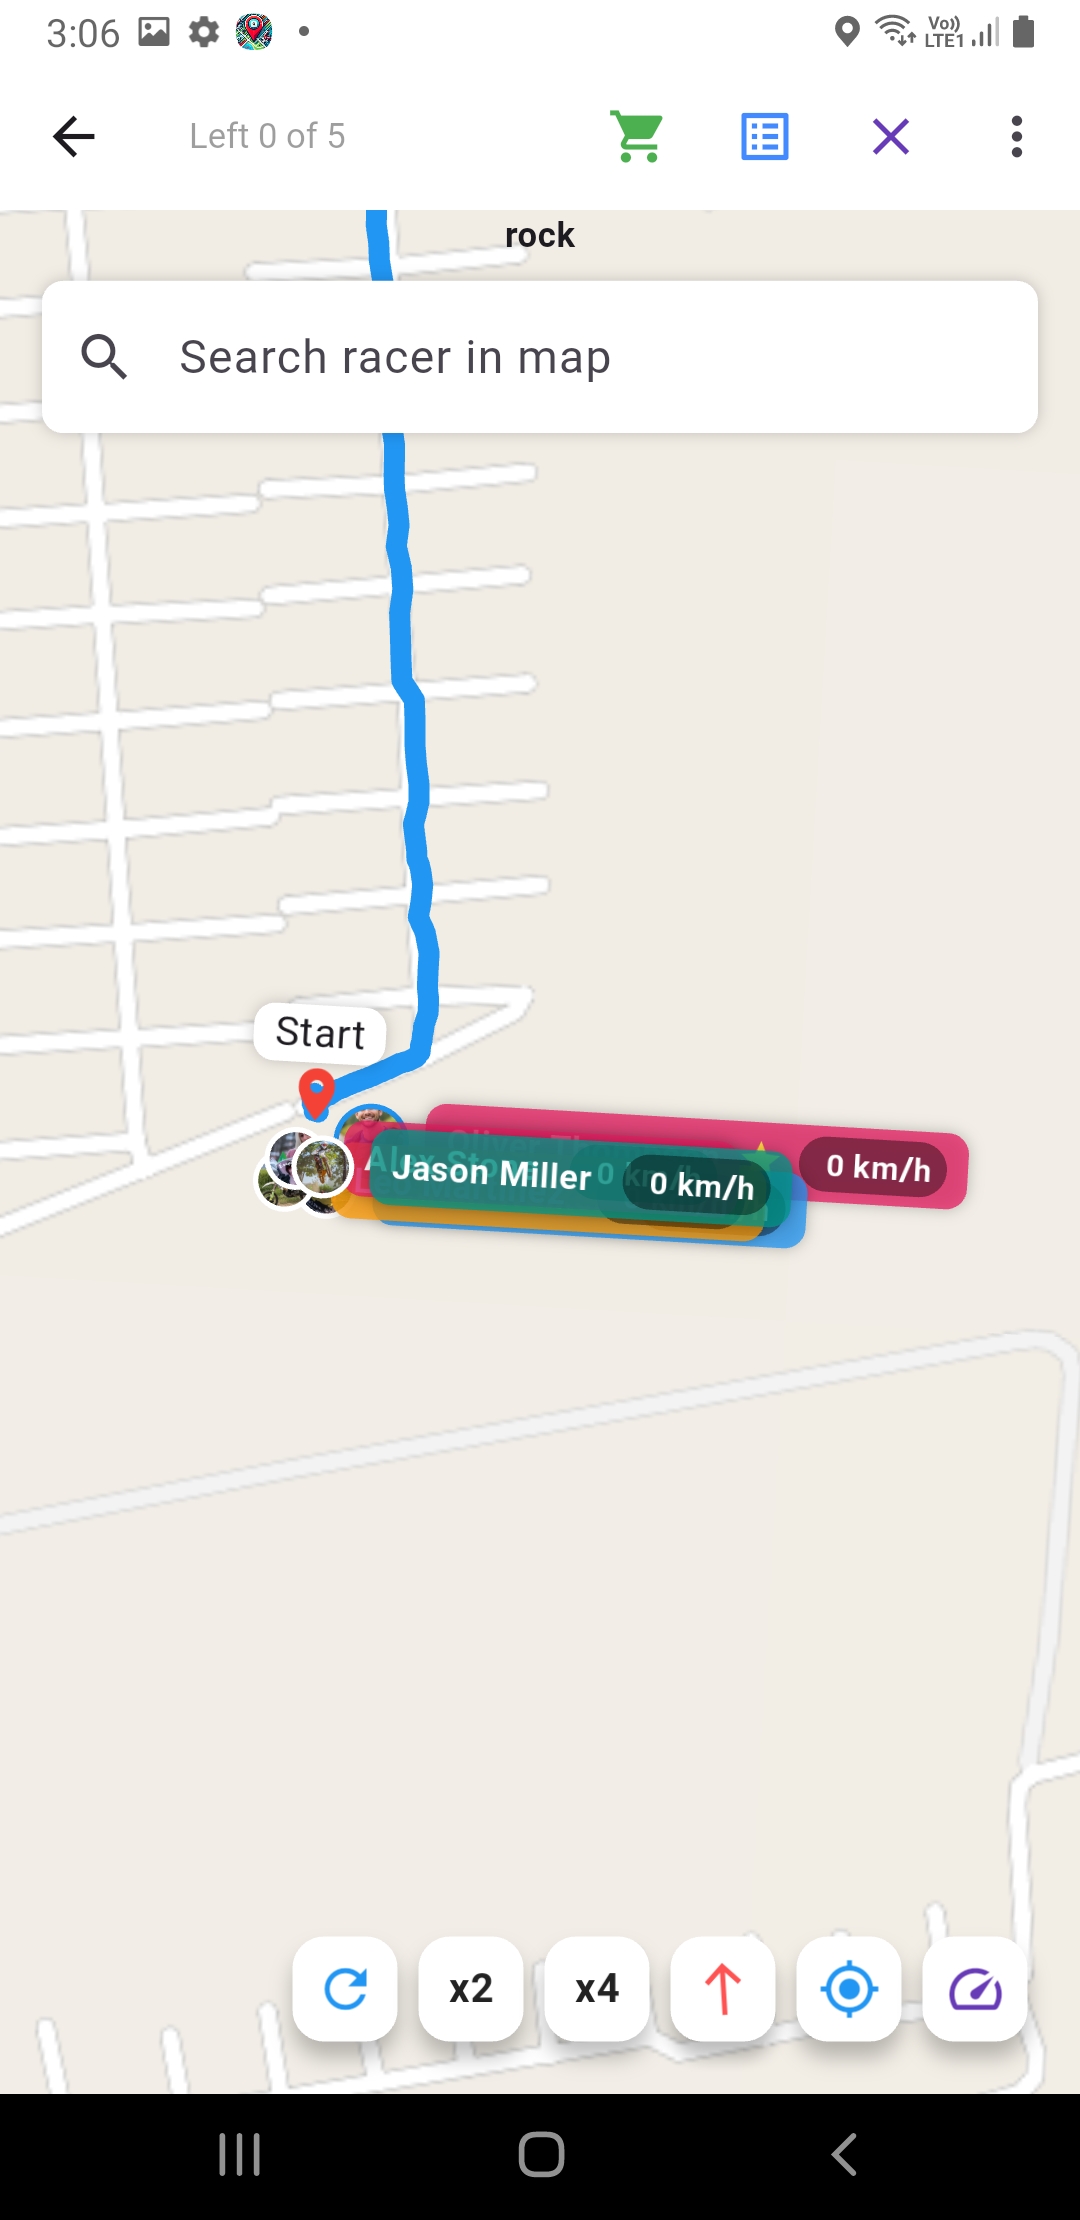
Show racer speed
Show racer speed(8.jpg)
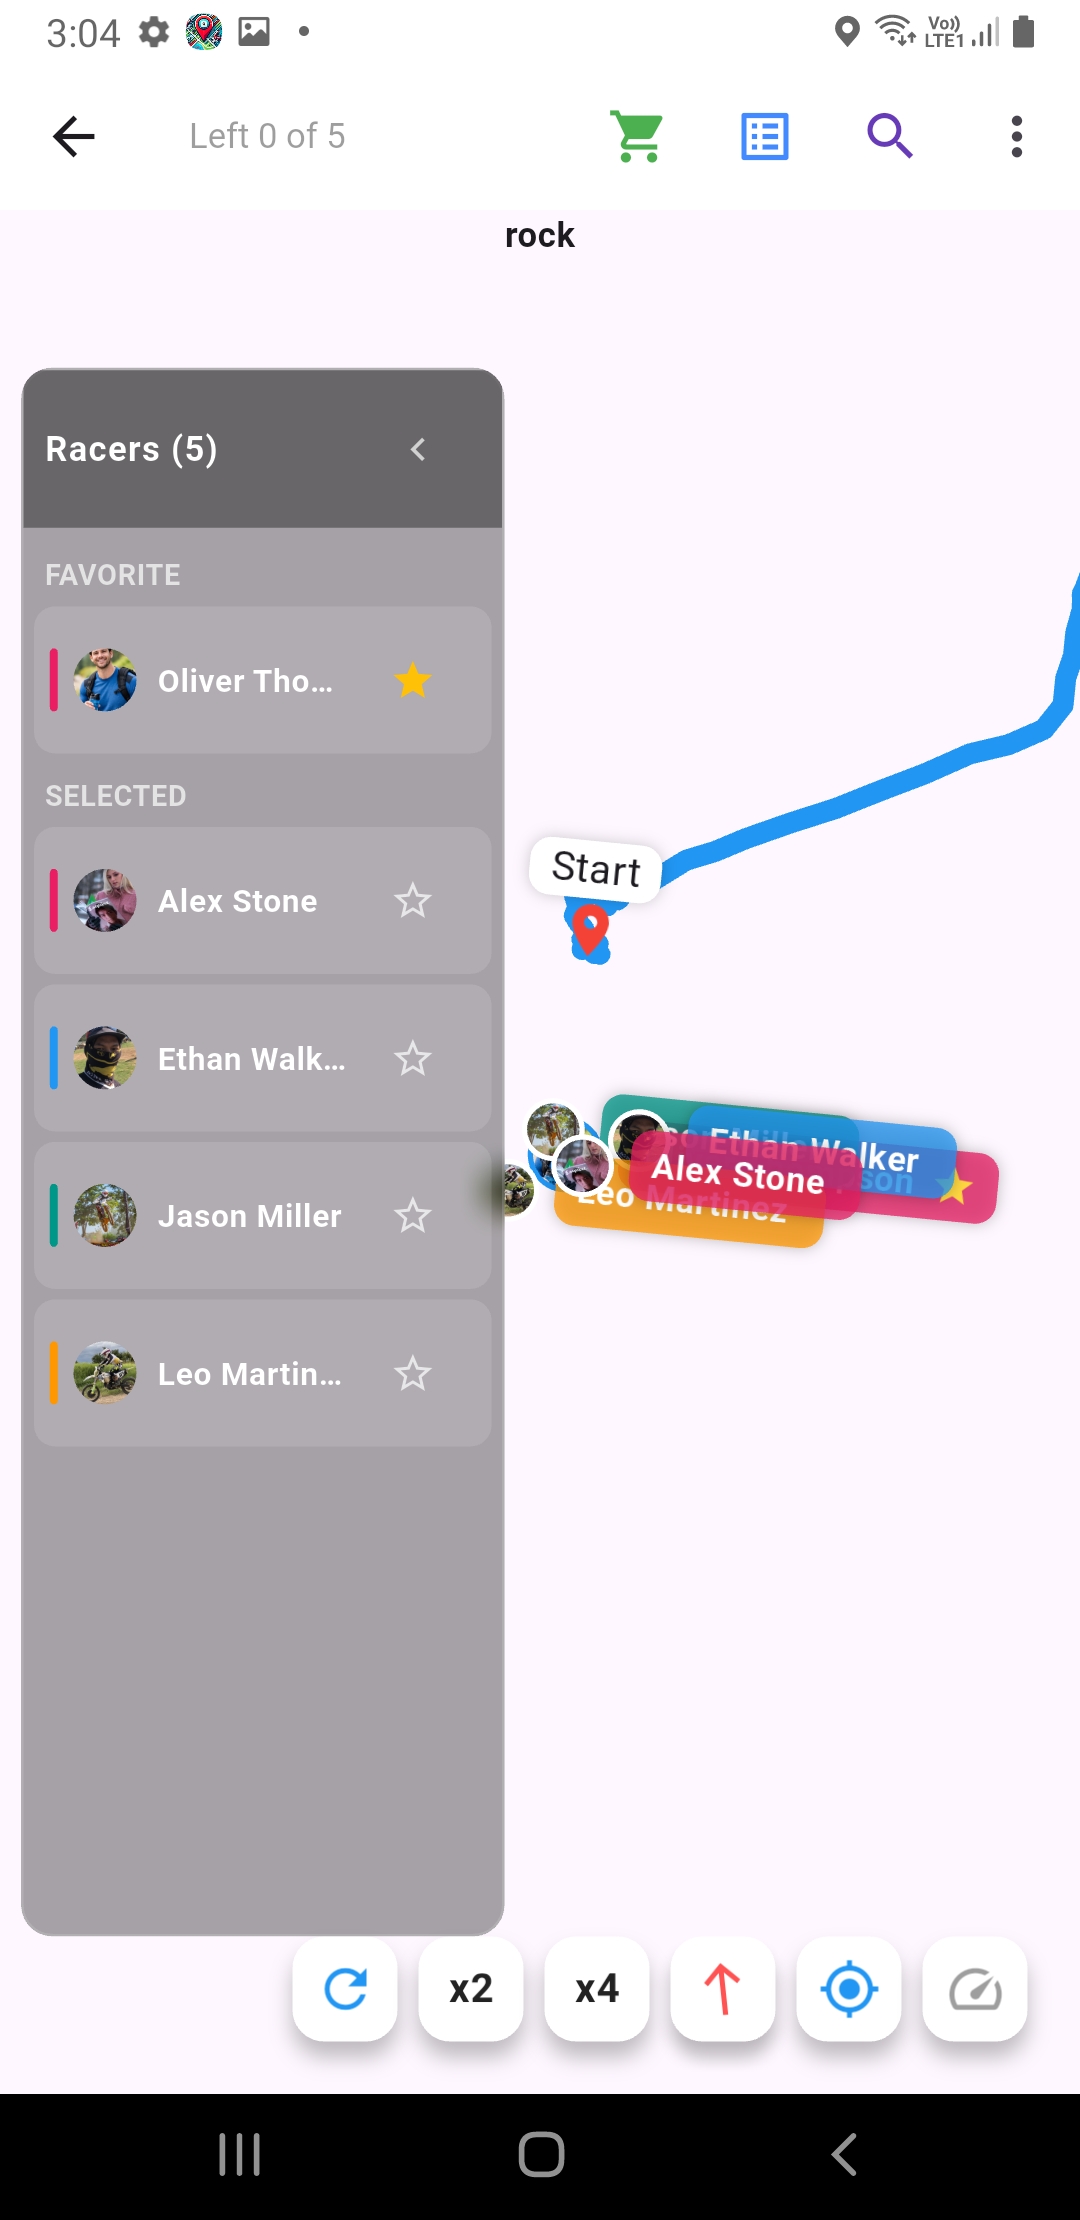
When admin adds a route, the race route appears
When admin adds a route, the race route appears(Screenshot_20260110-150424.jpg)
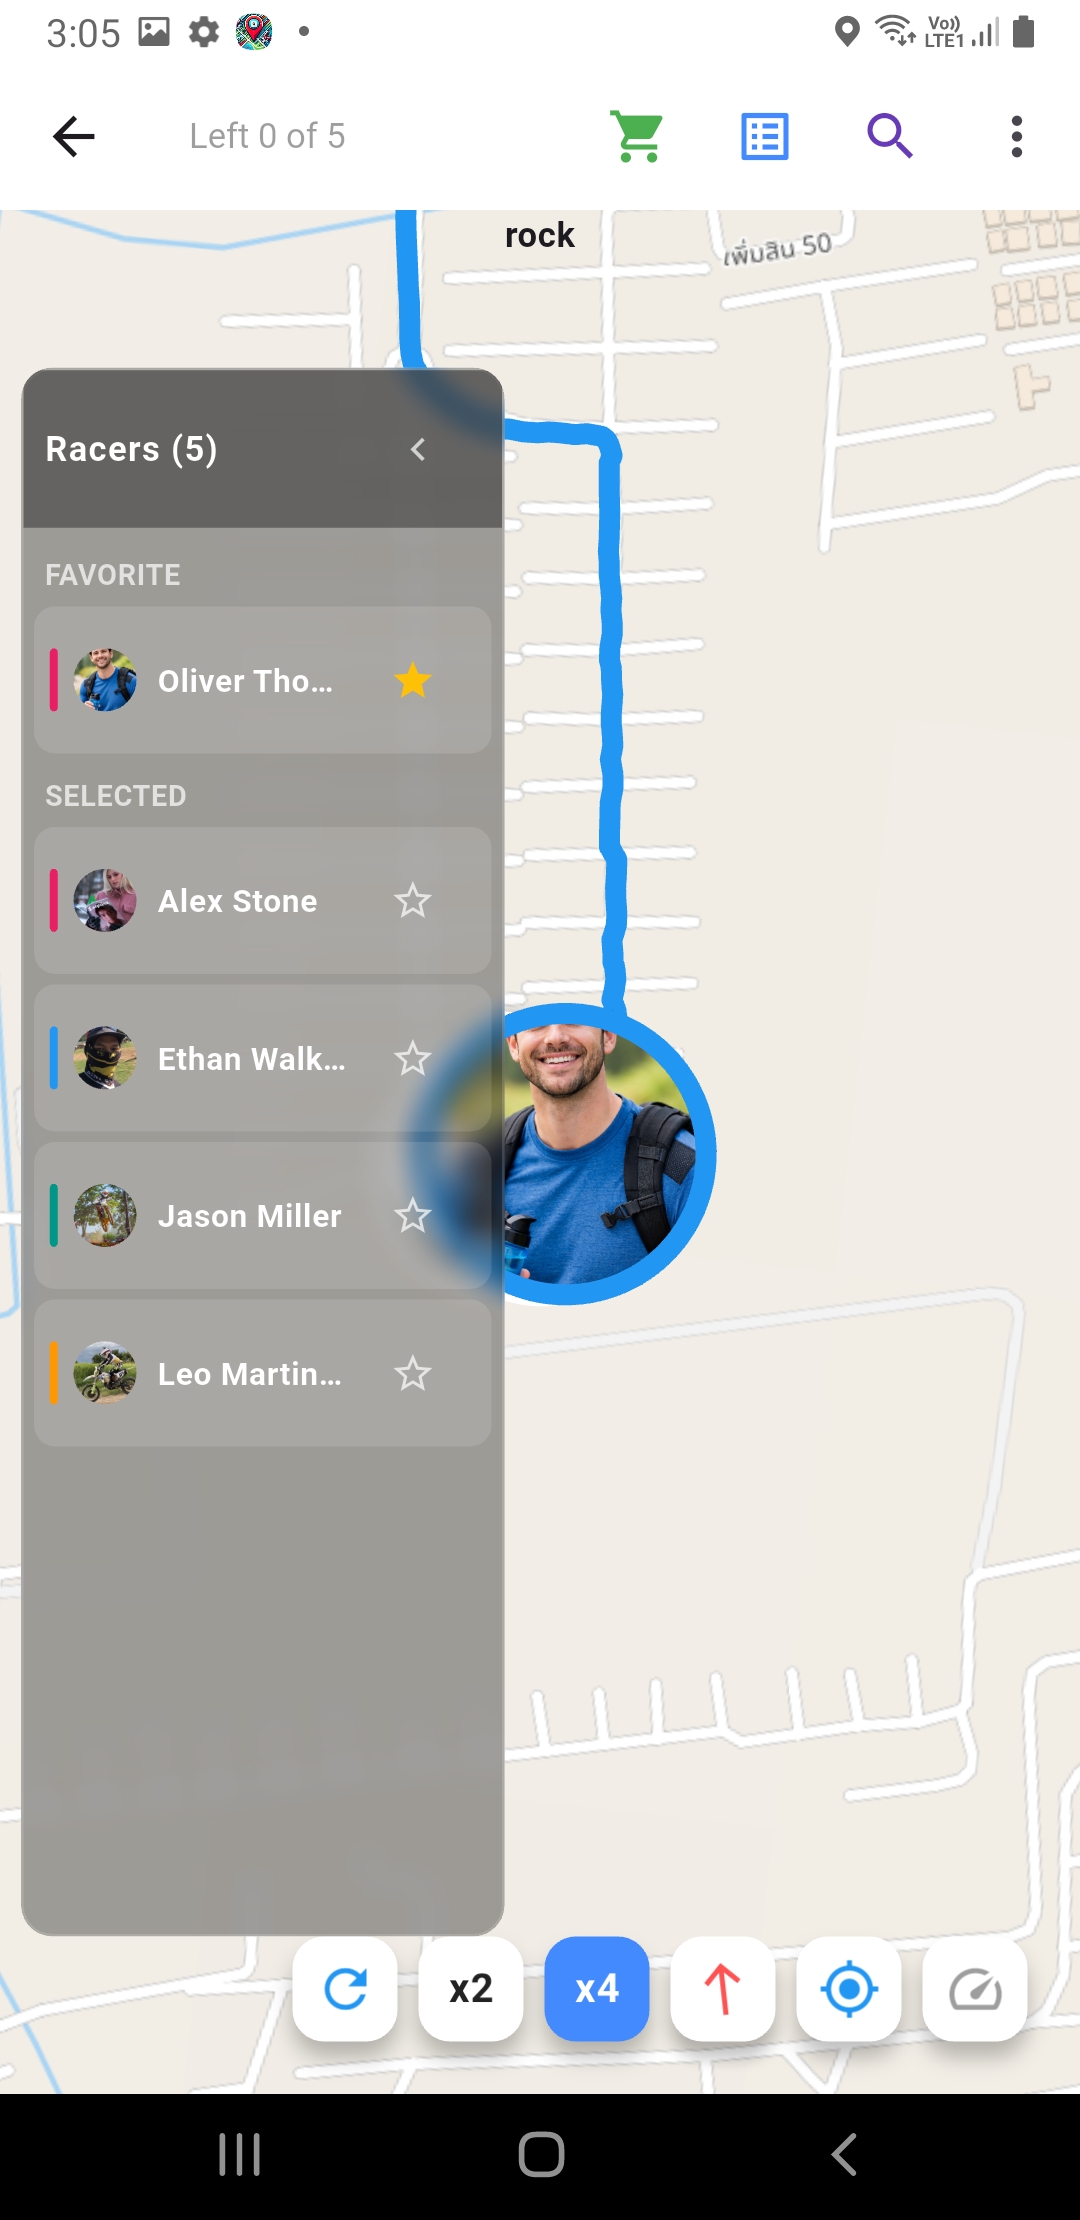
Zoom in on racers x4
Zoom in on racers x4(Screenshot_20260110-150505.jpg)
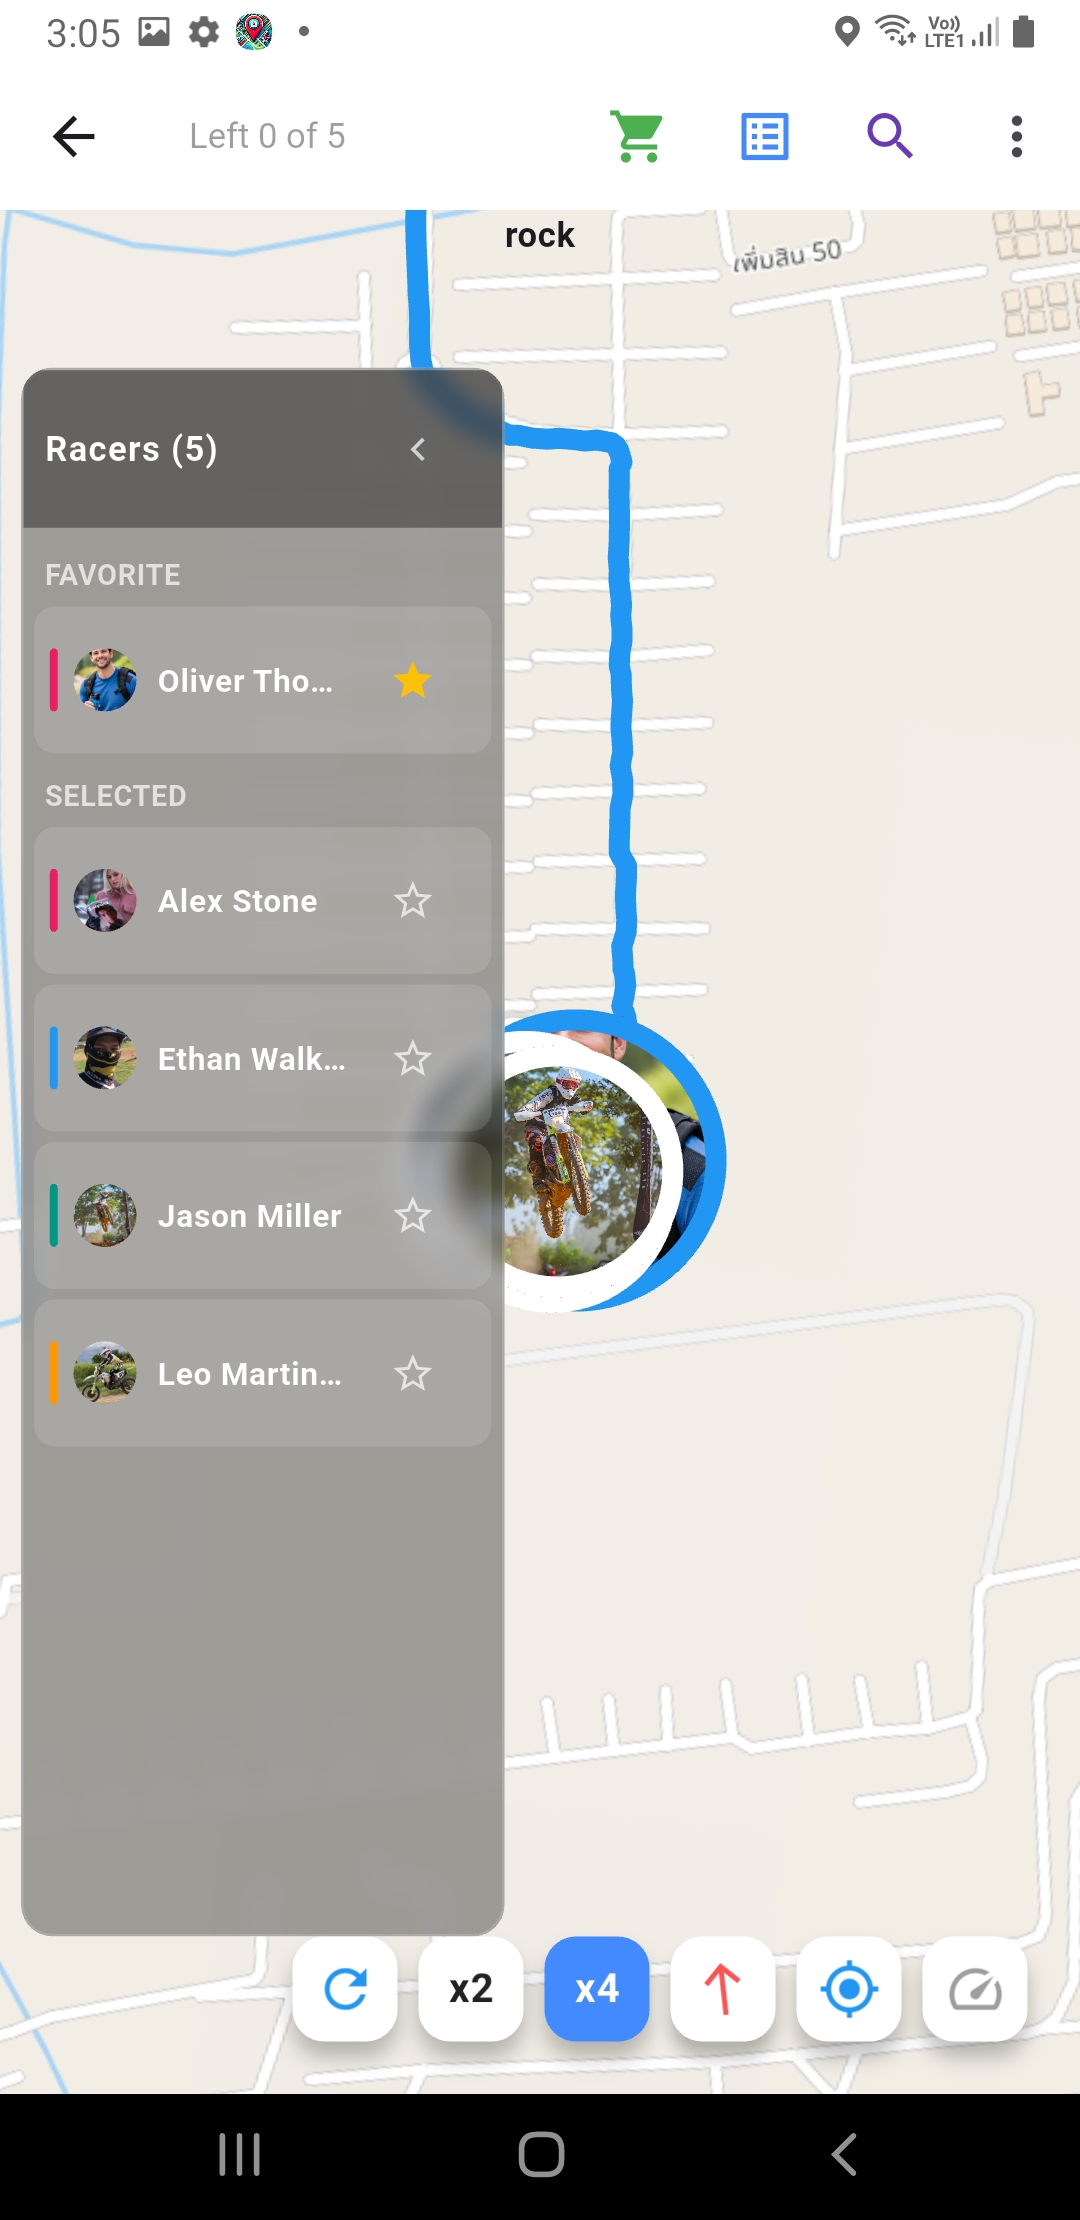
Zoom in on racers x4
Zoom in on racers x4(Screenshot_20260110-150512.jpg)
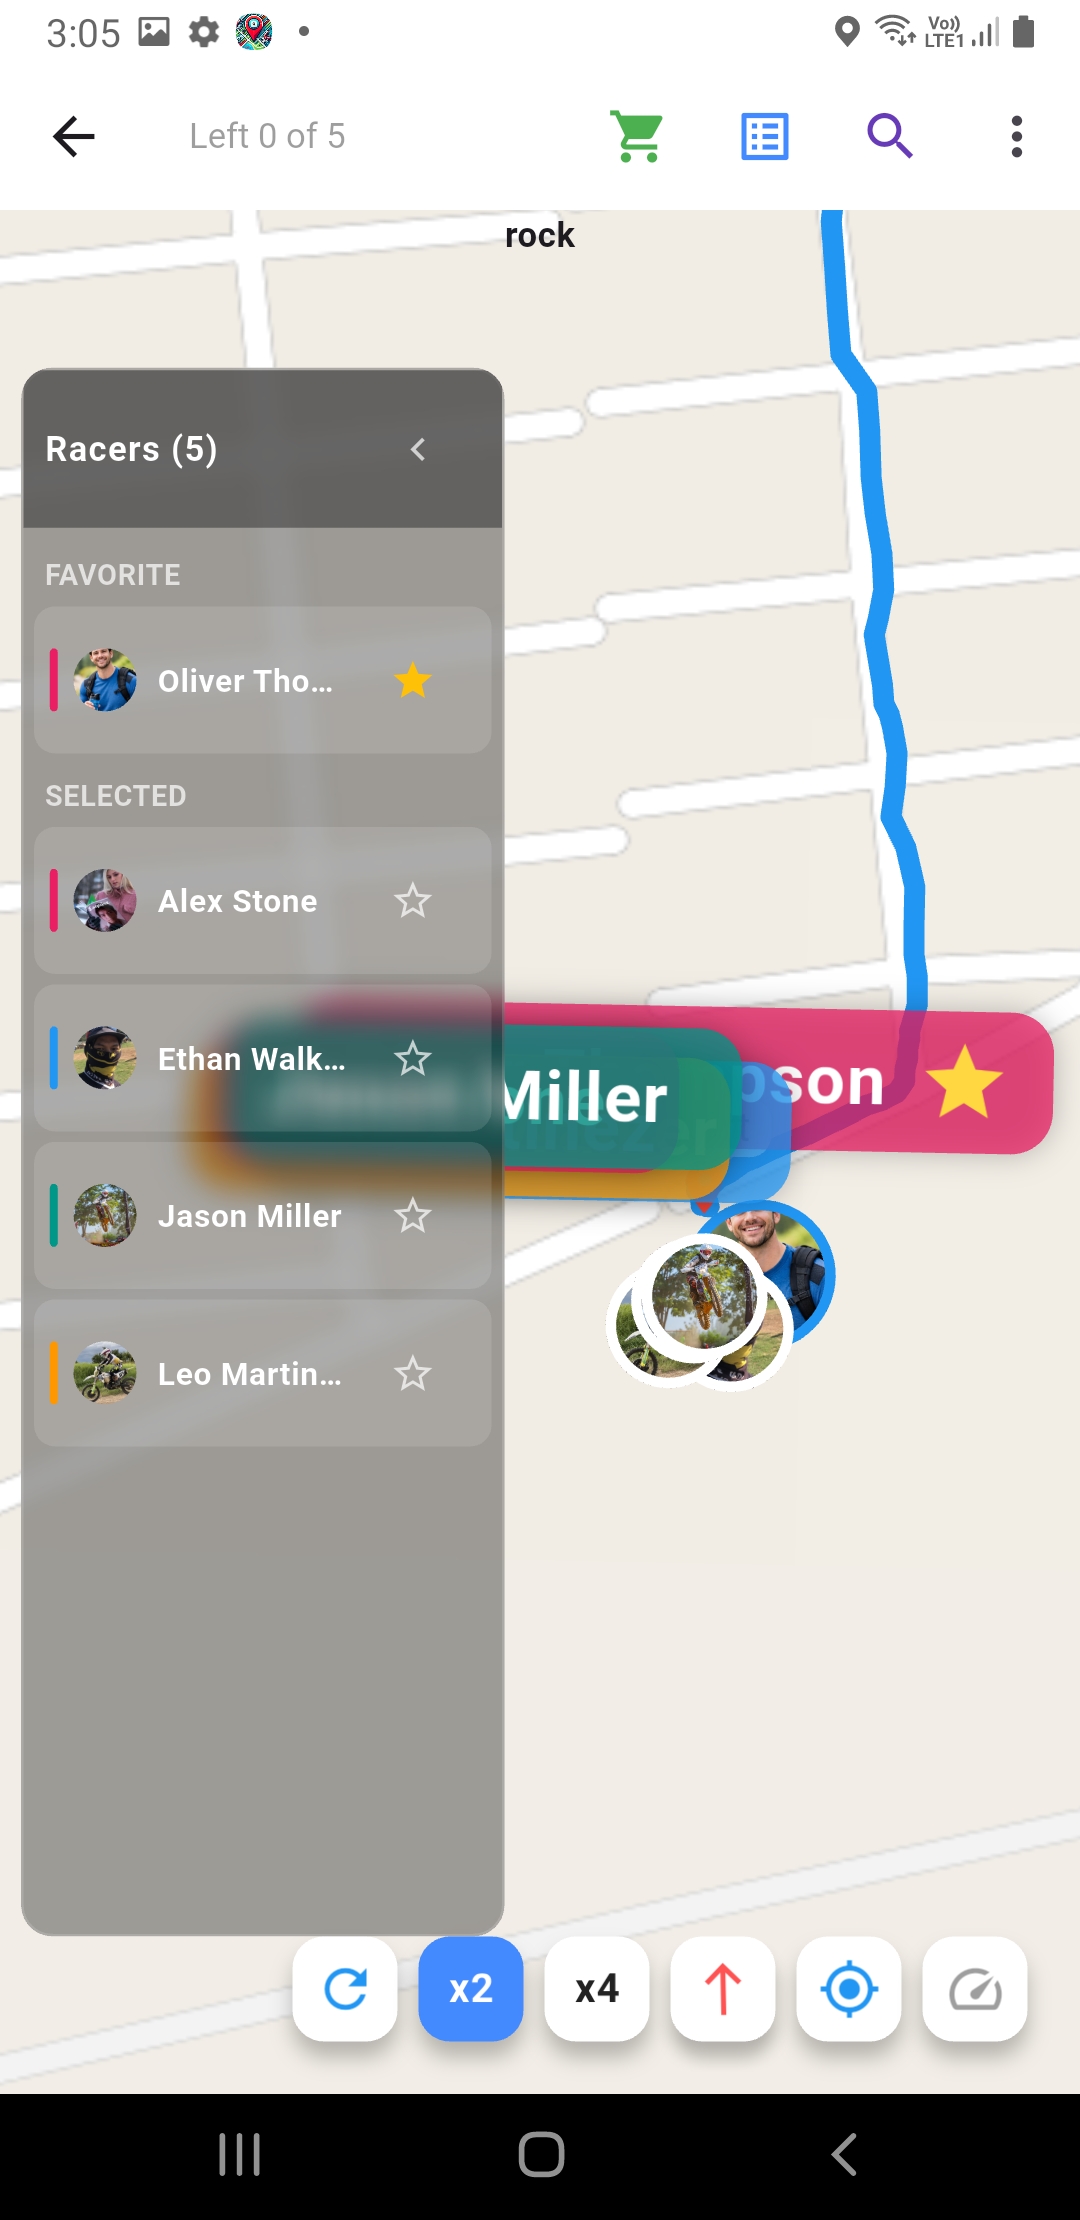
Zoom in on racers x2
Zoom in on racers x2(Screenshot_20260110-150531.jpg)
Hide the left list to view the full map
Hide the left list to view the full map(Screenshot_20260110-150534.jpg)
Note: If positions do not move, the racer may not have tracking on, the network is weak, or the category has not started

5) Location & Privacy

  • Racer: must allow Location to send continuous positions
  • Viewer: generally does not need to share Location to watch racers
  • Access: should be controlled by QR/permissions set in the system
Example Android Location settings

6) Common issues

6.1 Viewer sees the map but not racers

  • Is the correct category selected?
  • Have racers been selected (are there slots left)?
  • Has the category started / has the racer enabled tracking?

6.2 Racer enabled tracking but location jumps/disappears

  • GPS/network unstable -> move location / enable high GPS accuracy
  • Battery saver -> allow the app to run in background

6.3 Route not showing

  • Admin must assign a route to the category first

7) RaceMaps User Guide (Key Conditions)

RaceMaps has three roles (Viewer / Racer / Admin). You can log in on one device at a time—logging in on a new device will log out the previous one.

Viewer

  • View slots: Free 5 racers per event; buy +10 or +50. You can select up to limit = free + purchased.
  • Slot counting: the system tracks the maximum used for that event; reducing your selection later may not restore the slots already used.
  • Selection & Follow: your selected list is stored per event on this device; you can follow 1 racer, and the followed racer does not consume a slot.
  • Ads: viewers can optionally remove ads.

Racer

  • Visibility on the map: must be approved by Admin in that event/category before appearing to viewers.
  • Pre-approval conditions: Admin may require location sharing enabled and/or a recent last known location before approval.
  • Location updates: update interval is set by Admin (default 10 seconds). GPS/background permission is required.
  • Device switch: one device at a time; new login logs out the previous device.
  • Profile: upload a photo from gallery; large images are compressed before upload; a temporary cache may be used.

Admin

  • Racer slots: free 15 racers per event; beyond that uses purchased slots from the shared pool. If insufficient, approvals will fail.
  • Slot packs: 30 / 50 / 100 / 300 / 500 / 800
  • Slot counting: 1 racer counts per event even if they join multiple categories; if purchased slots are not enough, Admin cannot approve more.
  • Unapprove: allowed within 15 minutes after approval; if the over-free count drops, purchased slots are returned.
  • Event settings: set location update interval; category duration up to 5 hours (adjustable in 5-minute steps).
  • Device switch: one device at a time; new login logs out the previous device.
^ Top